post

Festive Bead + Tassel Garlands

I started decking the halls around the house, and the first spot I focused on is the living room and mantel. I bought this whimsical bead and tassel garland for its green hues and plan to swag in a set of three across my mantel.

I swapped the mint green yarn it came with for an earth tone taupe yarn and it’s cute as can be. I’m going with a green and natural palette this year. I have a few different bead and wood garlands I’ve collected, it’s so fun to pull them out and drape them in new places.

The garland seem to get better and better every year. Below are more favorite festive bead and tassel garlands I found online that can be used for seasons to come.

wood bead

boho blush tasselwooden snowflake

bottle brushboho bead

woodland greenery

white felt and bead garland

macramé tassellighted pom pom

mini vintage ornamentbead and jute

red felt & bead garland

stars & orbsfelt & pom

classic christmas colors garland

Before & After Photos: 14 Months In!

Note: This post was born from an updated Before & After page that we heard people were having trouble finding (since it wasn’t at the top of our blog feed). So here it is, forever immortalized as a chronological post. And now, since we’ll continue to update our Before & After page over time, we have this post frozen in time, which is nice to look back on. Wish we had done it around 6 months in and at the year mark too.

We downsized to this 1,400 square foot house in Northwest Florida on May of 2020 after a fast, furious, and long-distance three-month renovation. You can read more about how we found ourselves craving a pared-down lifestyle for our family here and here (that last one is a really good synopsis of what led us to this exact spot).

Continue reading Before & After Photos: 14 Months In! at Young House Love.

Did you miss our previous article…
https://distancebetweenplaces.com/?p=393

Building An Easy Privacy Trellis (With 2 Pieces Of Wood + 1 Planter Box)

BRB, just changing the name of this blog to “Solving Problems With Plants.” And I know we promised a huge pool post, but the pool is still very much in progress. Hopefully it’ll be done next month and we can write one big breakdown with approximately 473 photos. But back to how plants can not only hide ugly stuff, they can also offer some pretty great privacy, as we’re about to demonstrate below.

One of the things that contributes to our house being extra walkable to shops, parks, the beach, and restaurants is that it’s less like a sprawling suburban neighborhood due to the lots being a good deal smaller (you can read more about why a walkable neighborhood and a smaller house/lot really appealed to our family in this post).

It’s a similar feeling to our former beach house in Cape Charles, Virginia, which taught us that we really didn’t mind being that close to other homes.

Continue reading Building An Easy Privacy Trellis (With 2 Pieces Of Wood + 1 Planter Box) at Young House Love.

Did you miss our previous article…
https://distancebetweenplaces.com/?p=392

A Simple DIY Outdoor Plant Shelf To Disguise Ugly Utility Boxes

When we shared pictures of our front porch last fall, we said that our decorating strategy out here was basically “plants and more plants.” It helps visually connect the porch to all of the greenery surrounding our house and – as we’ll show you today – it’s also helping us hide some less-than-pretty parts of this outdoor area. Let’s call them wall warts. Three large rectangular wall warts. But more on that in a second.

white fluted planter | outdoor ceiling fan |wicker storage box | larger white planter | similar egg chair

First let’s travel back in time to what this all looked like last February when we put an offer in on this house (that’s our realtor in the photo below)

As you can see, we’ve already come quite a long way (you can read more about the exterior updates we did in this area herehere).

Continue reading A Simple DIY Outdoor Plant Shelf To Disguise Ugly Utility Boxes at Young House Love.

Did you miss our previous article…
https://distancebetweenplaces.com/?p=390

Our Bedroom Ten Months In (Houston, We Have A Closet!)

Long story short, instead of having 8 doors that lead outside in our bedroom (yes, we really had that many), we now have 6. And spoiler alert: it’s still plenty. We really just use the middle set along this huge wall of doors to go in and out, but the view and the light that the other doors let in is truly a room-making detail. We love the view in here and all of the brightness that shines in, and the addition of the fence for our own little private courtyard out there has been so nice. It not only makes the yard feel more private, it makes the bedroom feel more nestled and private too (more on that fence/courtyard area here).

rug | similar lamps | bed frame | headboard | similar bench | ottoman | curtains | curtain rod | similar tablewood chairs | door knobs

The exciting thing about eliminating that last set of double doors (which used to be where our left nightstand and the left half of our bed are in the photo below), is that we could then move our bed into that cozy nook that was created:

rug | similar lamps | bed frame | headboard | similar bench | ottoman | curtains | curtain rod | similar tablewood chairs | door knobs

As a reminder, this is what the room looked like when we bought our house (and the two-door area that’s half open in the photo below is what we drywalled over and we now have our bed along that wall).

Continue reading Our Bedroom Ten Months In (Houston, We Have A Closet!) at Young House Love.

How We Created A Cozy Fire Pit Area In Our Formerly Boring Side Yard

We’ve been enjoying this fire pit hangout spot for months now, but it hasn’t been on the blog… until today. This is basically a lesson in how a fence can make a HUGE difference in defining an area, which can lead to adding some simple outdoor furnishings (in this case, it was four adirondak chairs and a fire pit – which hit the ground and instantly created an entirely new “outdoor room” for our whole family to enjoy).

We hang out here and make s’mores at least once a week (and sometimes a lot more than that), so it has been a very welcome addition. Especially during a time when everyone is spending A LOT of time at home, so something novel and new like this bonus hangout zone feels extra special We even made s’mores for dessert on Thanksgiving and New Year’s Eve, so it’s quickly becoming quite the family tradition.

Continue reading How We Created A Cozy Fire Pit Area In Our Formerly Boring Side Yard at Young House Love.

Did you miss our previous article…
https://distancebetweenplaces.com/?p=388

Weekend Reading 11.14.21

We’ve had misty mornings with thick fog for over a week and there’s something so wonderful about wearing a winter coat and taking an early morning stroll in those conditions, like something out of a classic novel. 🙂 This week I’m opening up the Christmas closet and pulling out some favorites. I’ll start with the mantel, then decorate the staircase. I like to do it slow, and in sections, it feels better to take time to decorate slowly and I enjoy it much more.

I like carefully digging through my bins and pulling out objects that resonate with me each season, placing them here and there around the house. I have a lot of decor tucked away in giant bins and each year I donate things that I don’t love and add just a few new things that I do. This year I’m in the mood for natural textures with a dash of whimsy. I’ll share holiday images soon!

Favorite links from the week:

Find many beautiful design ideas in this builder home portfolio.

Blue, white, and bright: this home with coastal style in Queensland decorated for Christmas.

What a difference an arch makes: this kitchen transformation.

Impressive: give and old stove a high end look.

A variety of laundry room shelving ideas.

What happens to your body over time when you…. sit for long periods or stop eating sugar.

Reasons why your fears of what other people think are not worth your mental energy.

Fifty quotes on the subject of kindness.

Vacation destination of the week: these stunning villas in Greece.

Ha ha so good: marketing the Icelandverse.

Did you miss our previous article…
https://distancebetweenplaces.com/?p=387

Playing and Pasta Making in Verona

My girlfriends and I found affordable tickets to Italy and traveled there together in October. Our destinations were Venice, Florence, and Verona, we arrived by plane in Venice then did a loop around those cities by train.

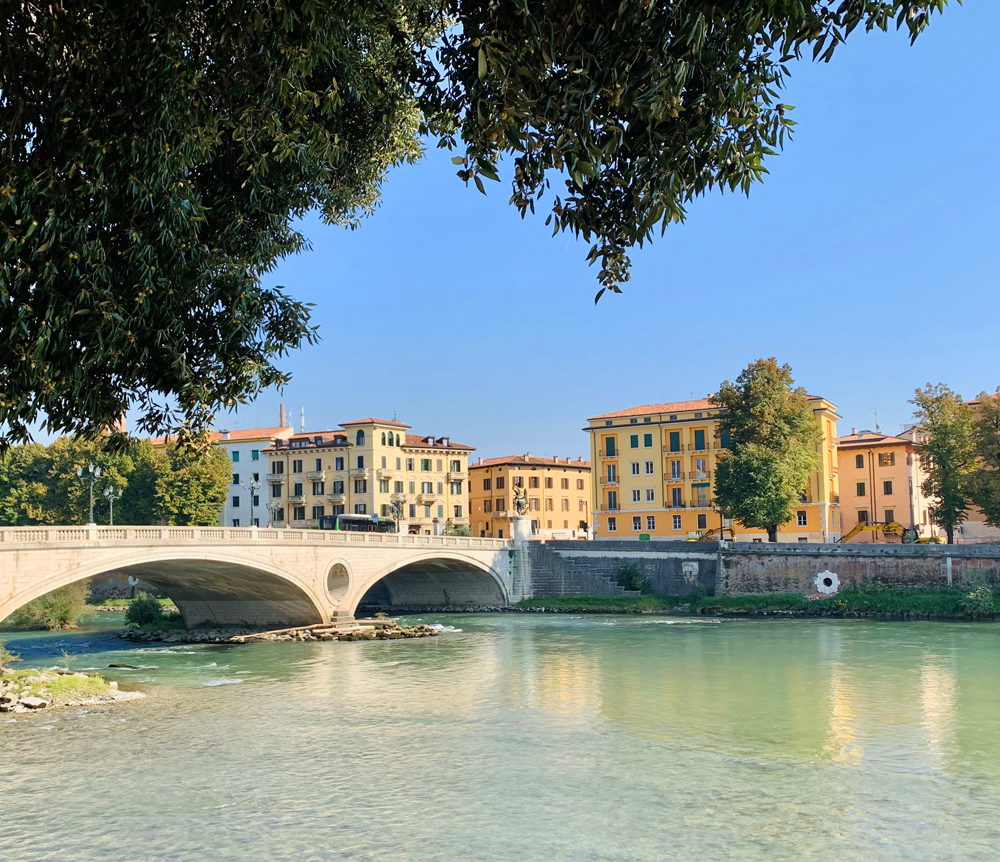
Verona is known for the setting of Shakespeare’s Romeo and Juliet and it sits on the River Adige. It was a colony of the Roman Empire because of its navigable river, and is famous for a few castles including the Castelvecchio fortress. It was an artistic center in the Middle Ages, and today it’s a thriving smaller city in northern Italy just west of Venice.

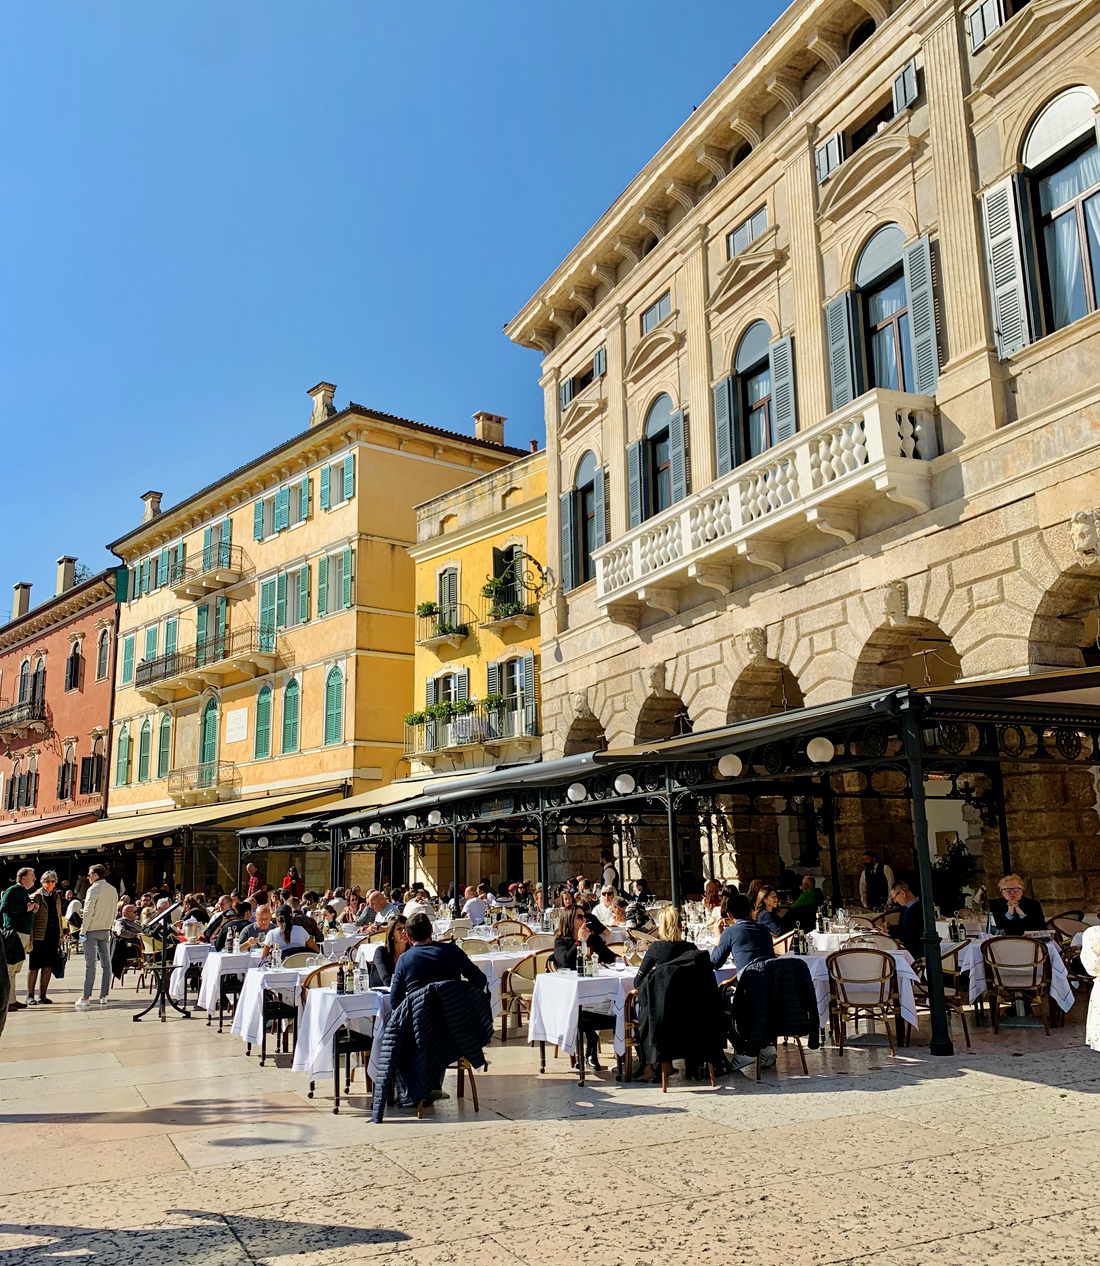
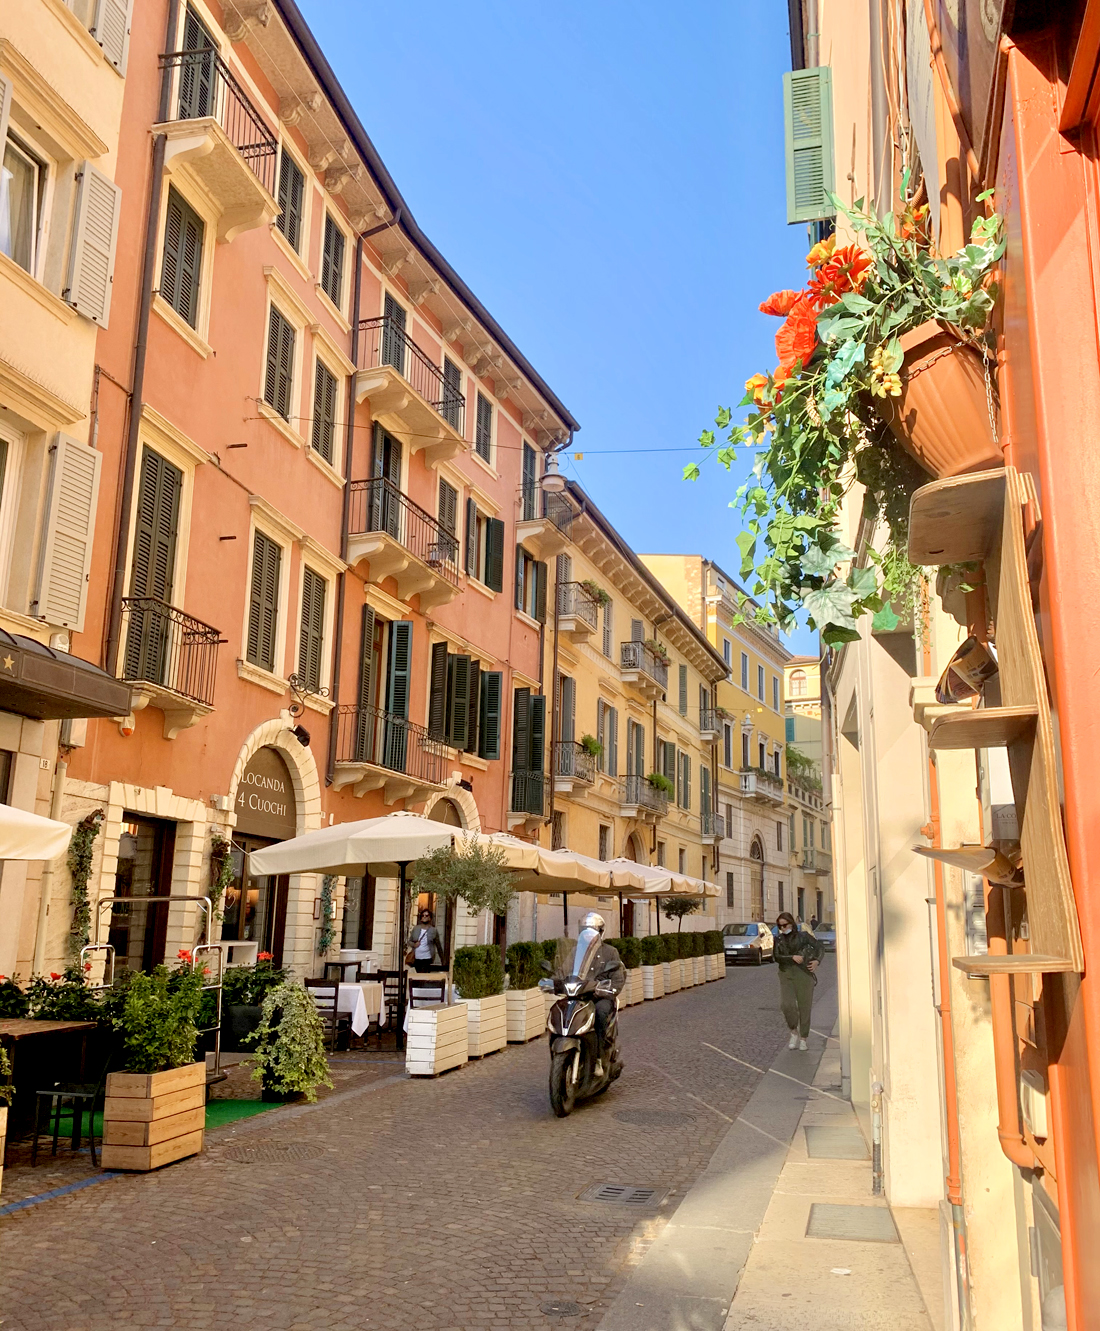
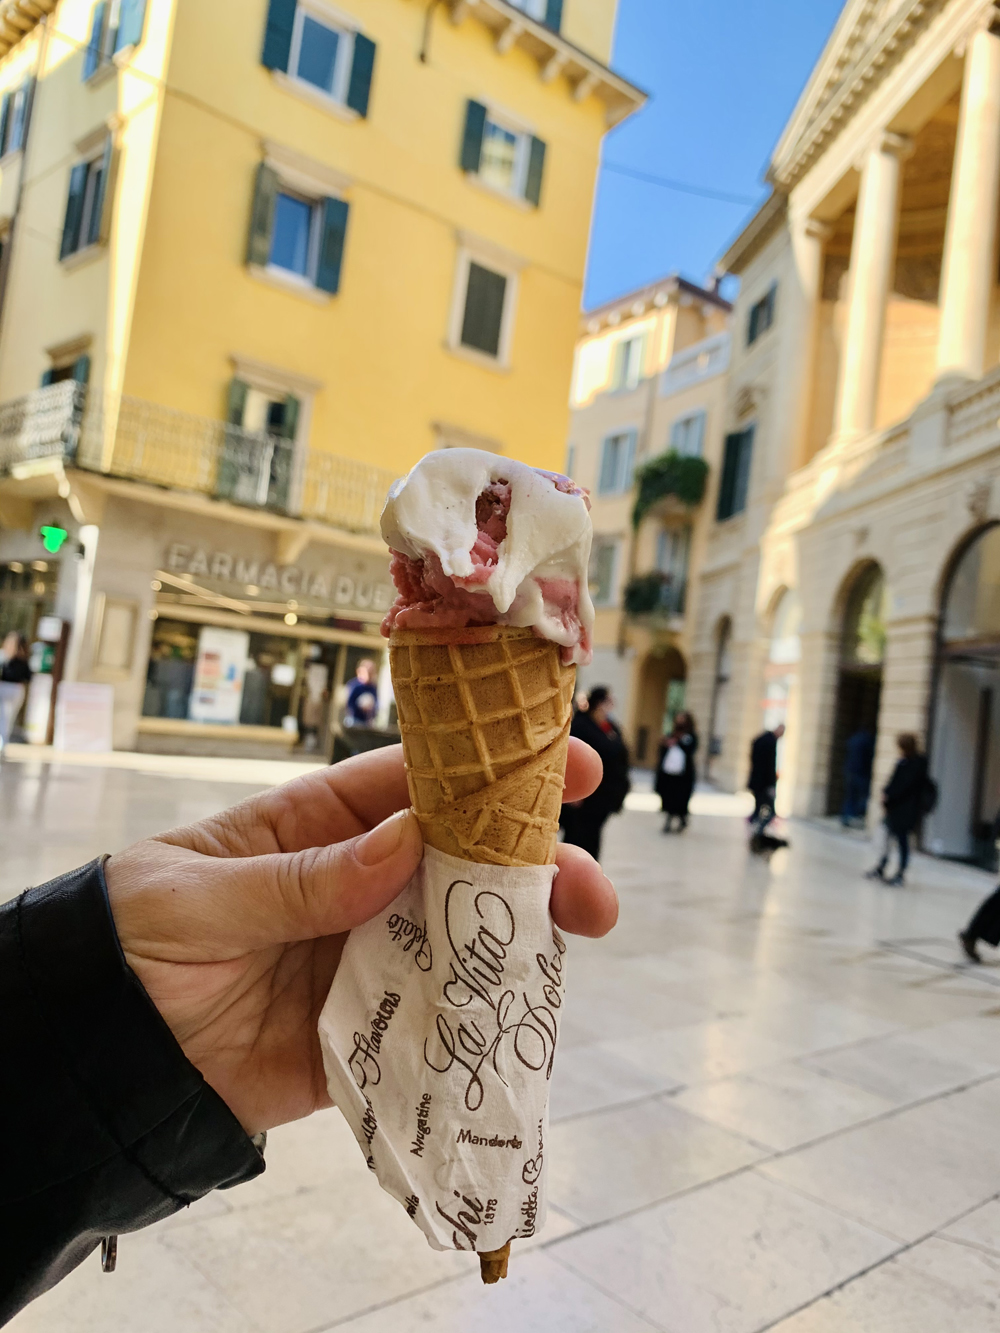
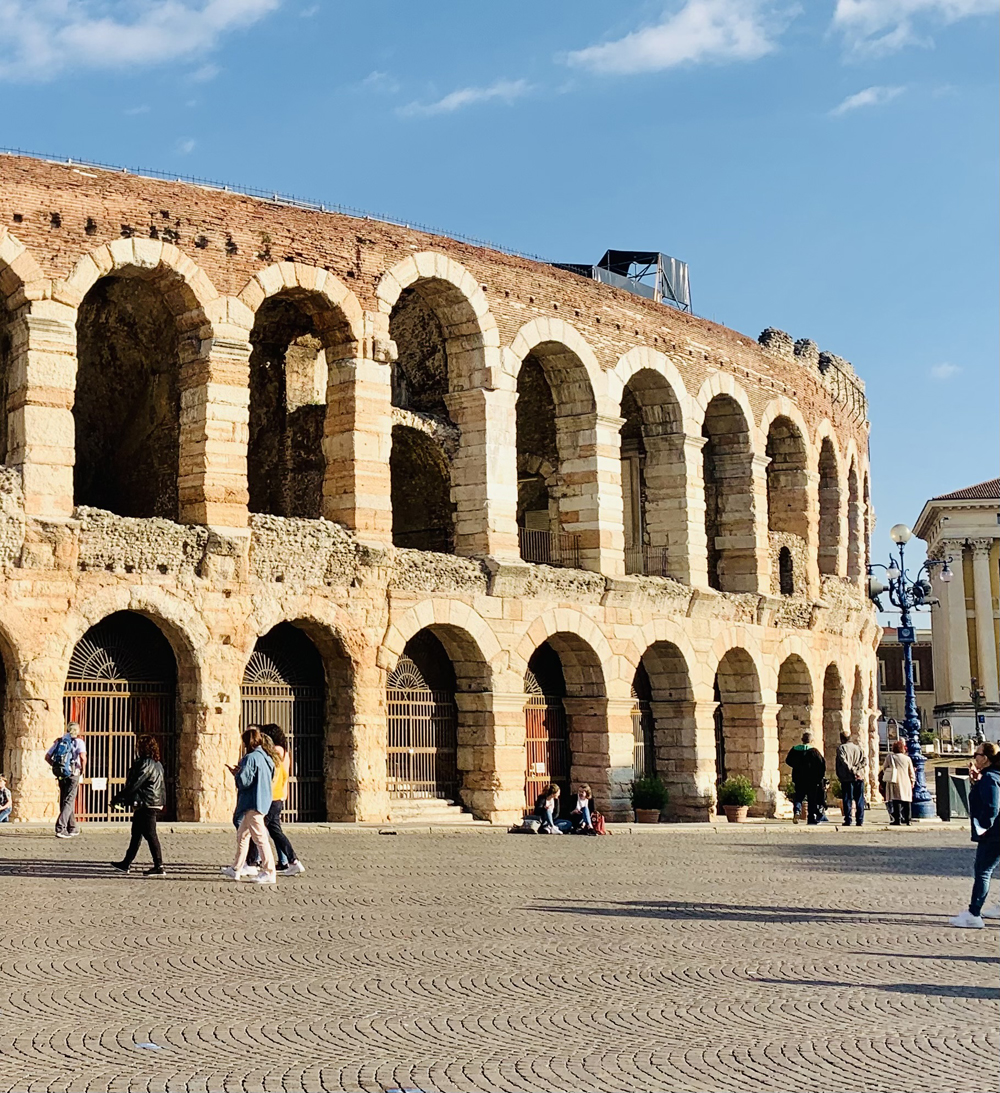
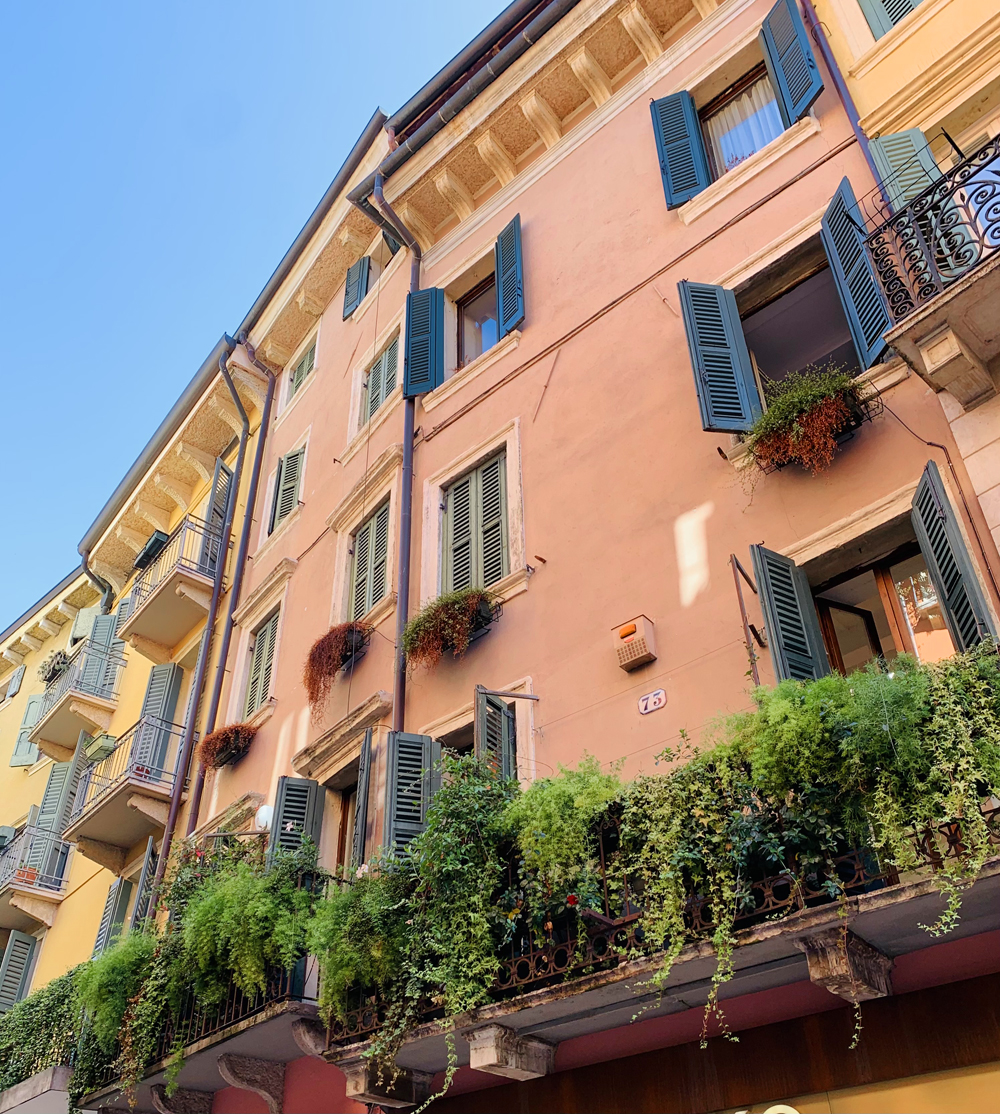
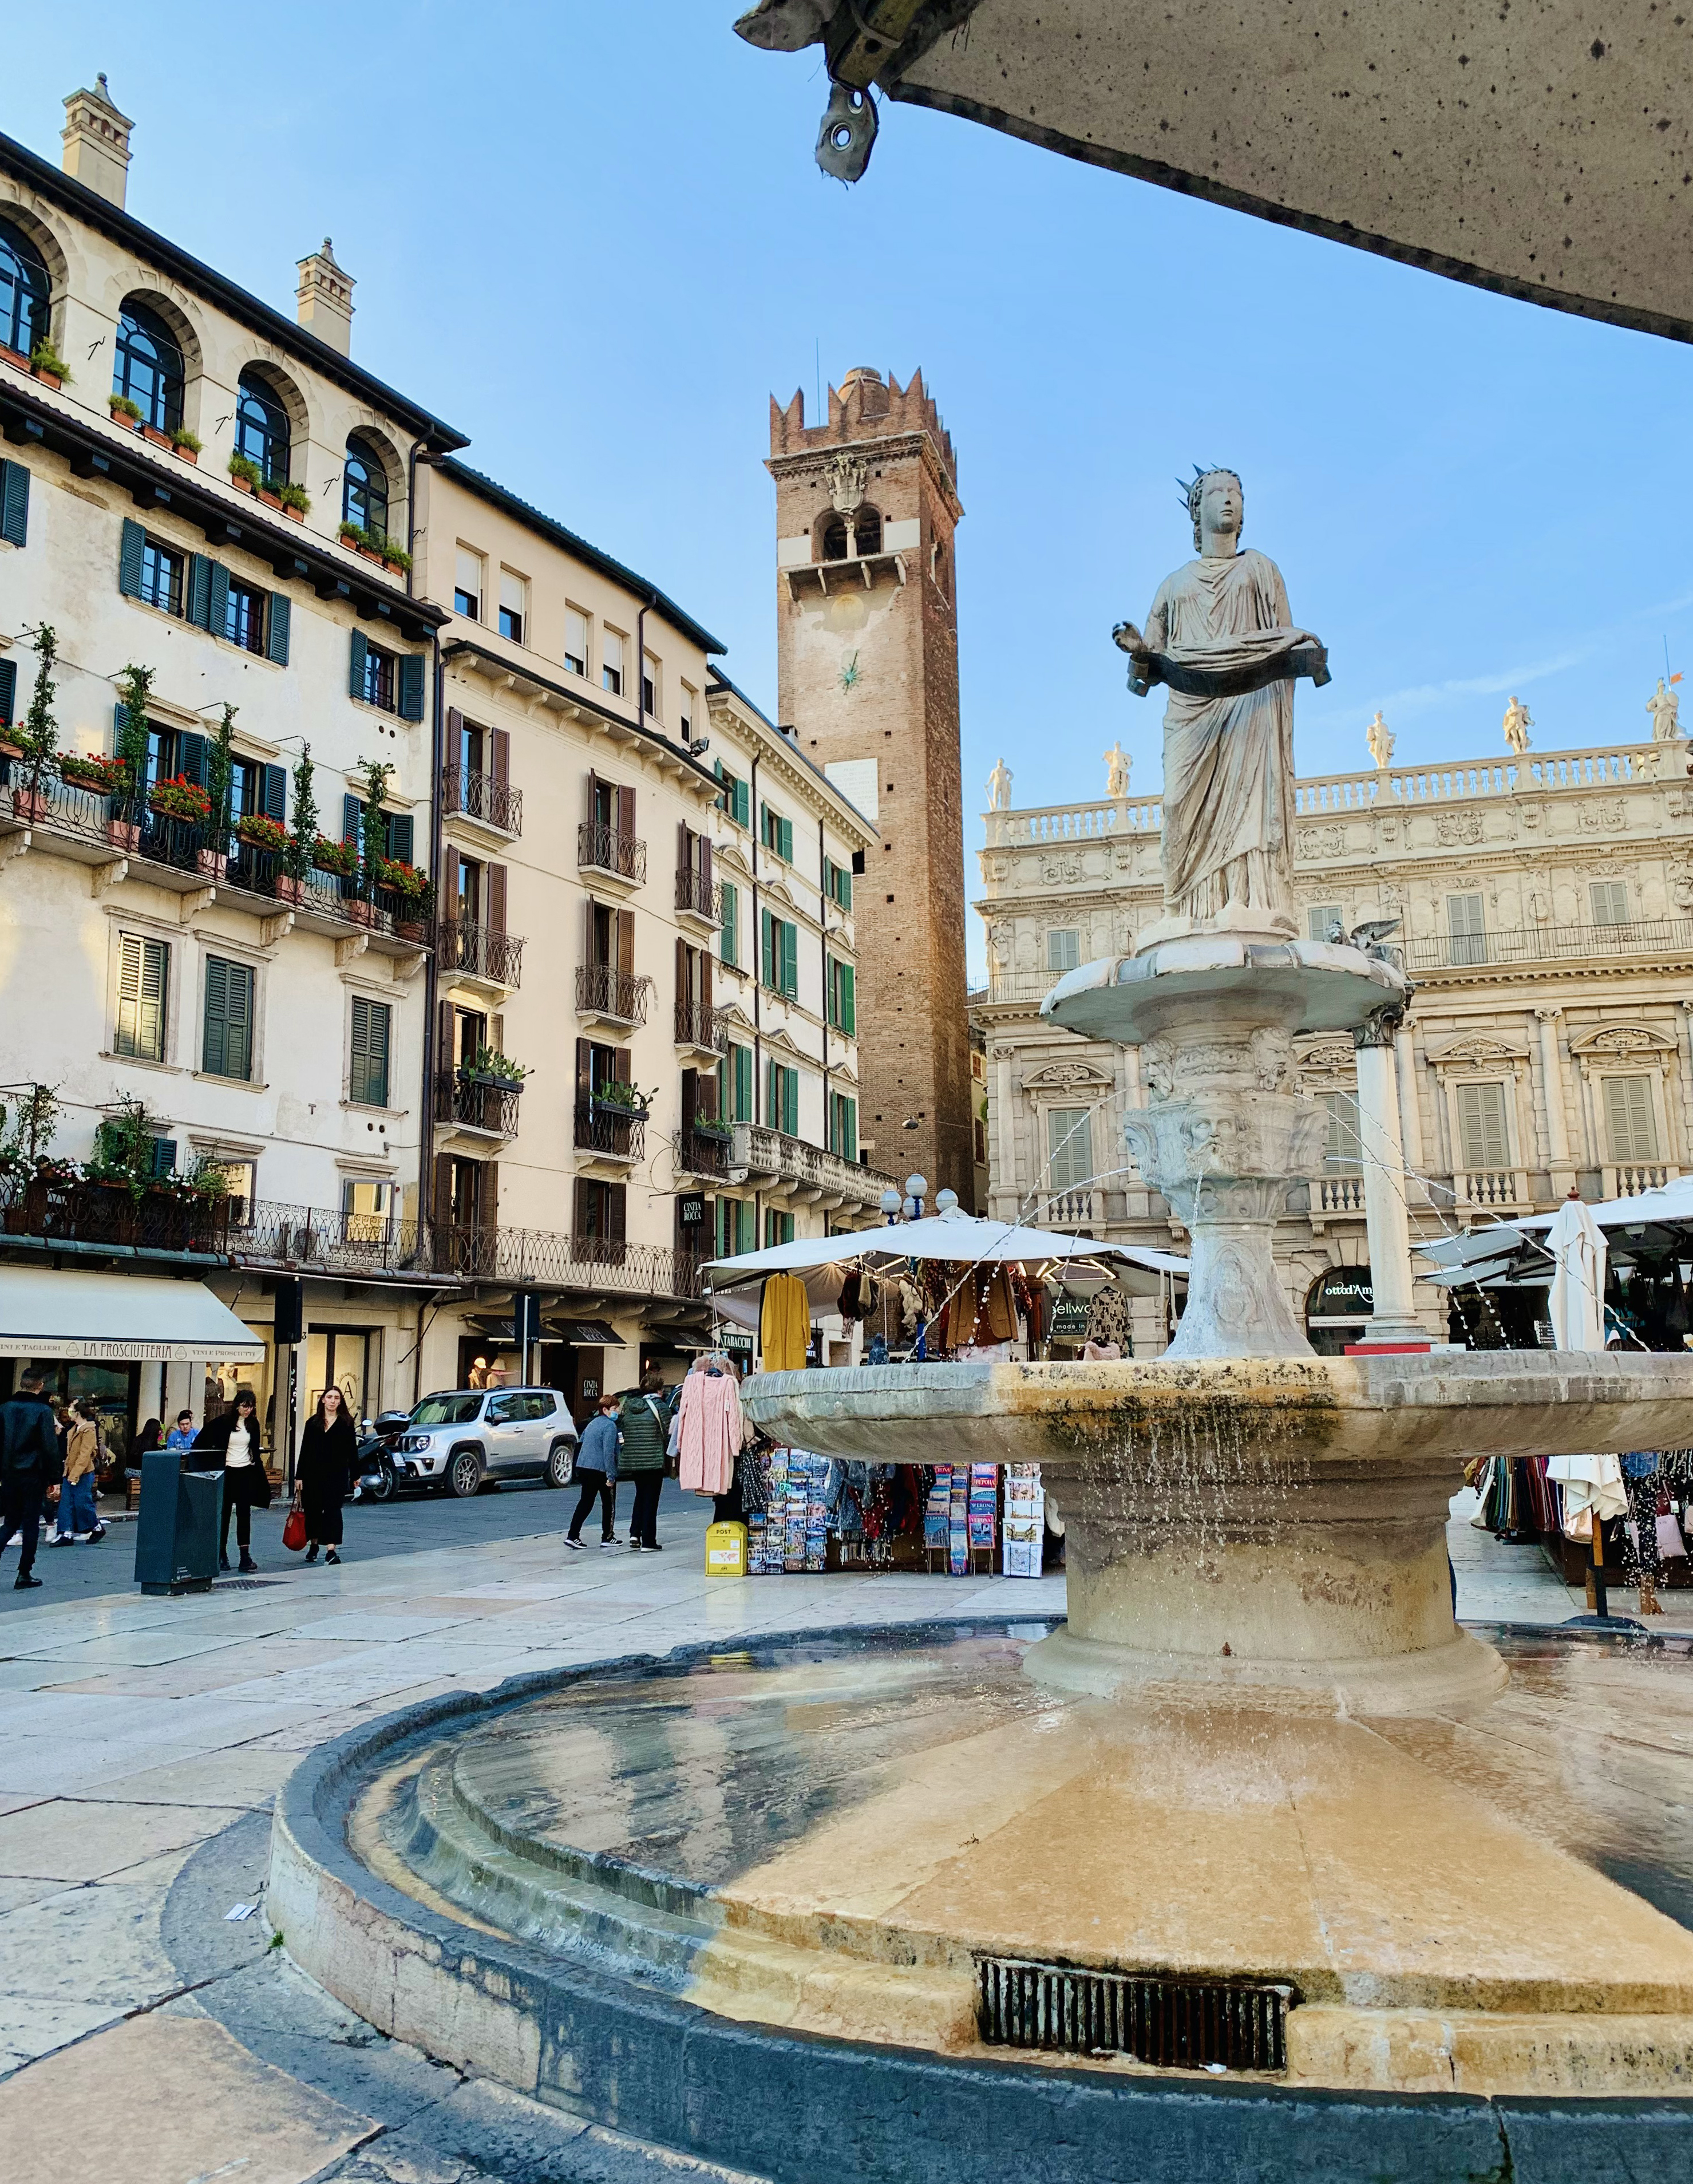
The city of Verona is a smaller town that felt like more of a community and less of a major tourist destination. Although it’s known for the Juliet balcony attraction and first century amphitheater, what we enjoyed most were the river views, the meandering streets, and the piazzas filled with cafes. We got lucky with blue skies which were the perfect backdrop to the pastel hues on the old buildings.

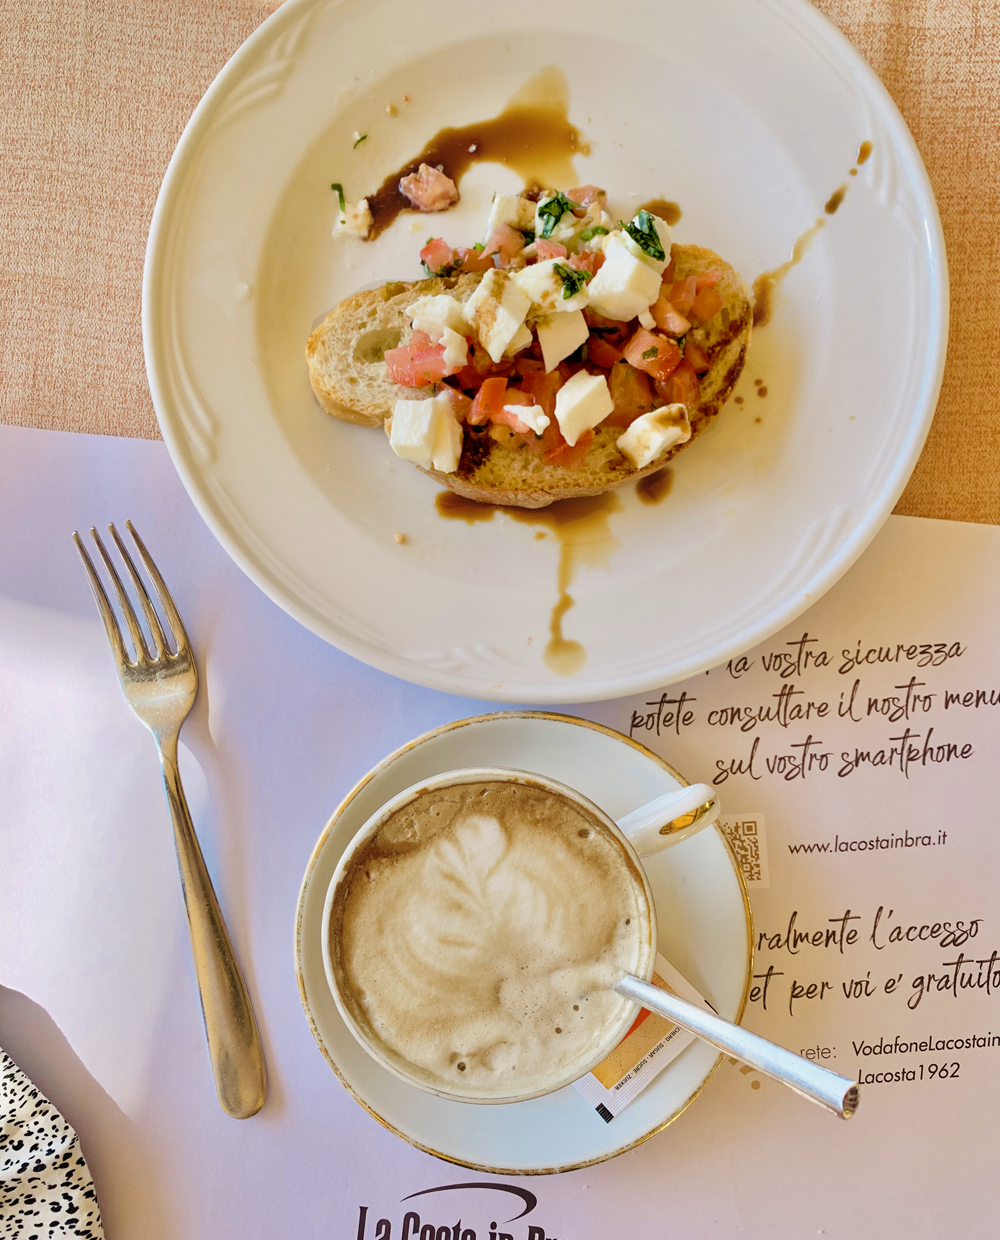
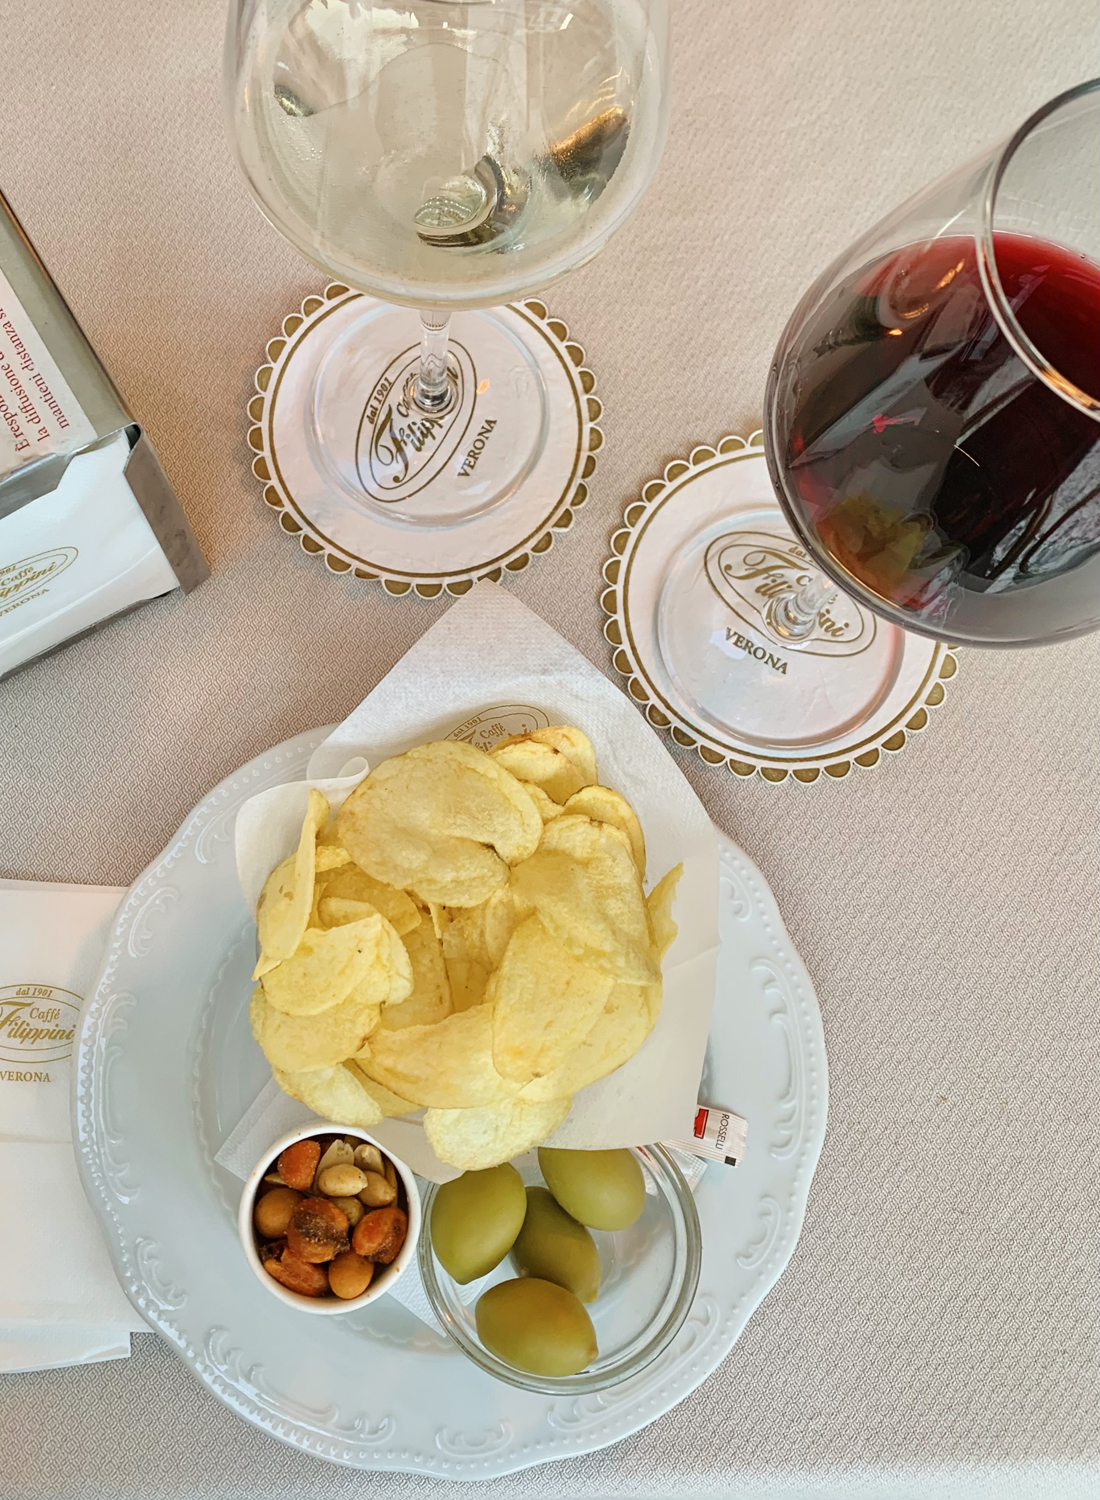
For me there’s nothing better than sitting in a cafe people watching and enjoying local food amid centuries old architecture. It’s my favorite part of visiting anyplace in Europe. Below are a few snapshots from my two day exploration of Verona, plus the experience of learning to make homemade pasta!


One of the things I really wanted to do when in Italy was learn how to make homemade pasta. One of the afternoons we were in Verona we took a three hour pasta making class from a local professional chef.

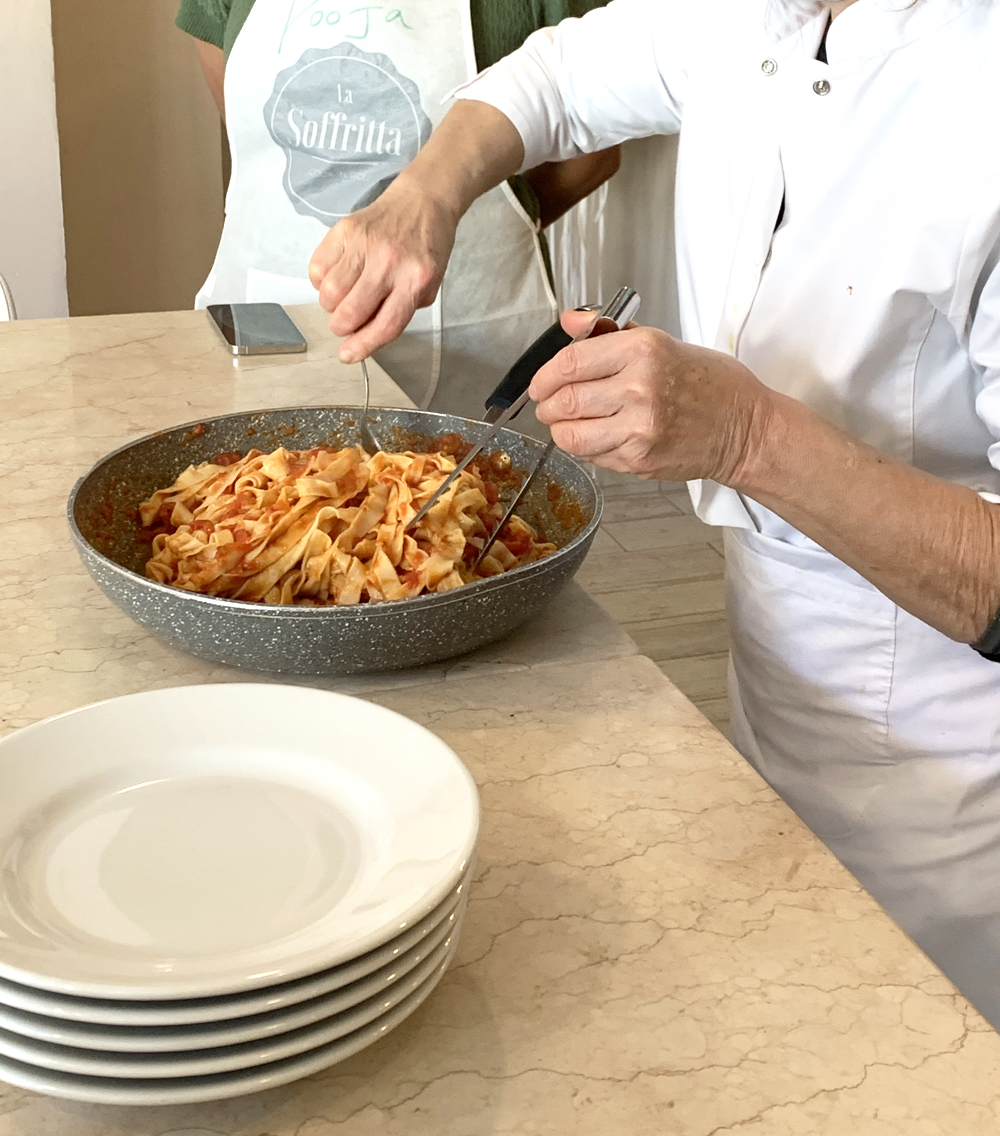
Homemade pasta has a slightly different taste and texture and it’s an amazing experience to make and cook your own. We started from scratch and ended with a meal of tagliatelle in a hearty tomato sauce.

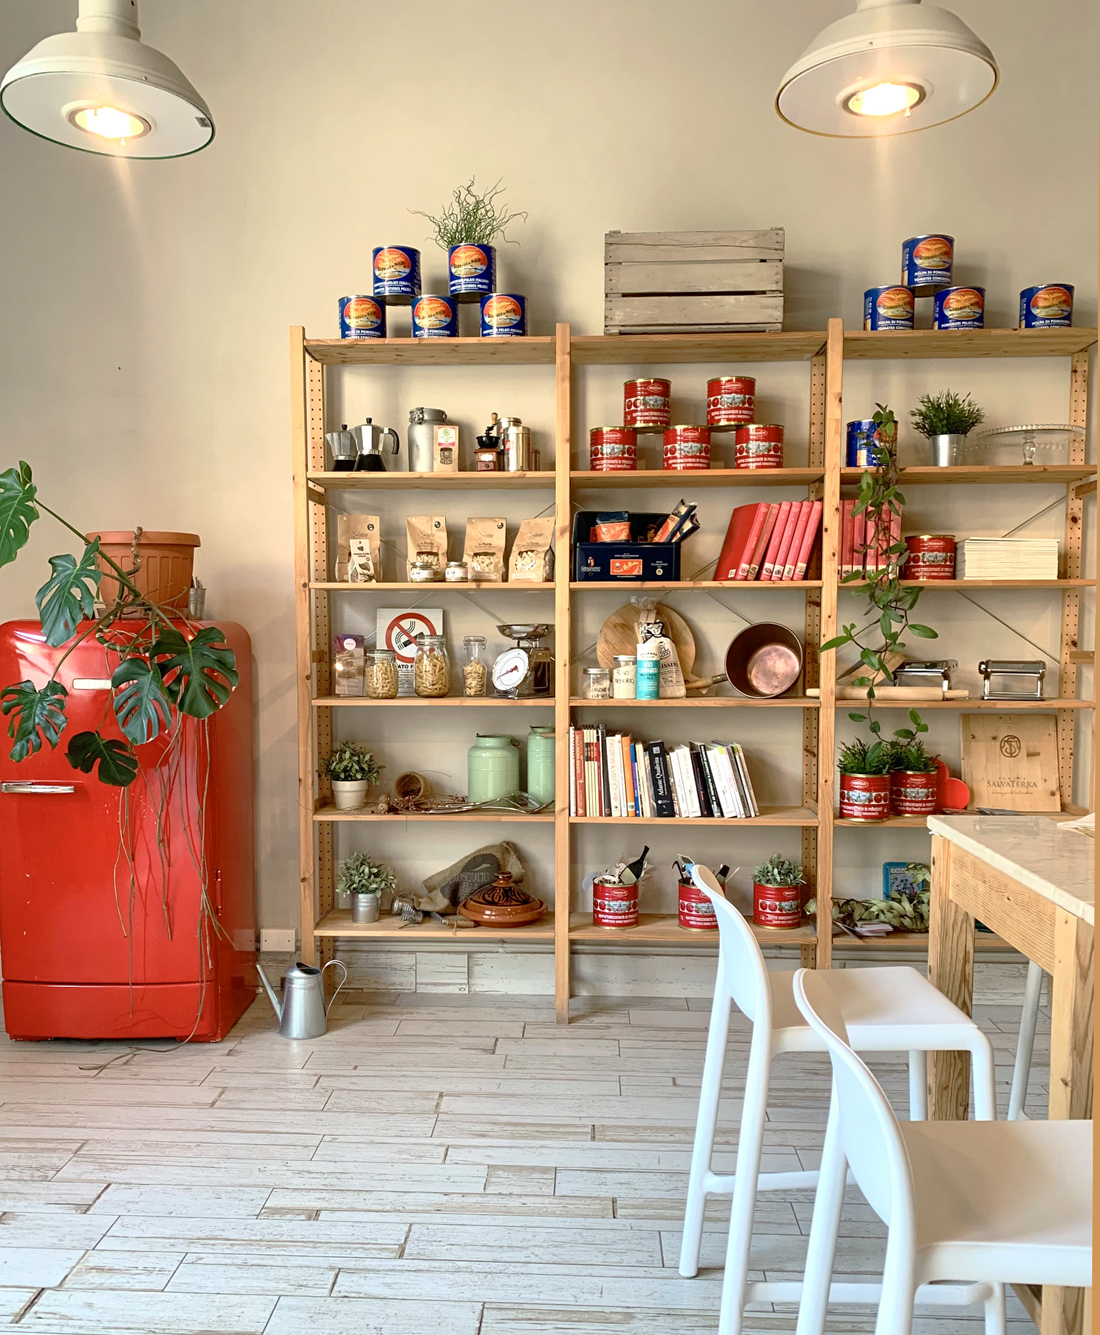
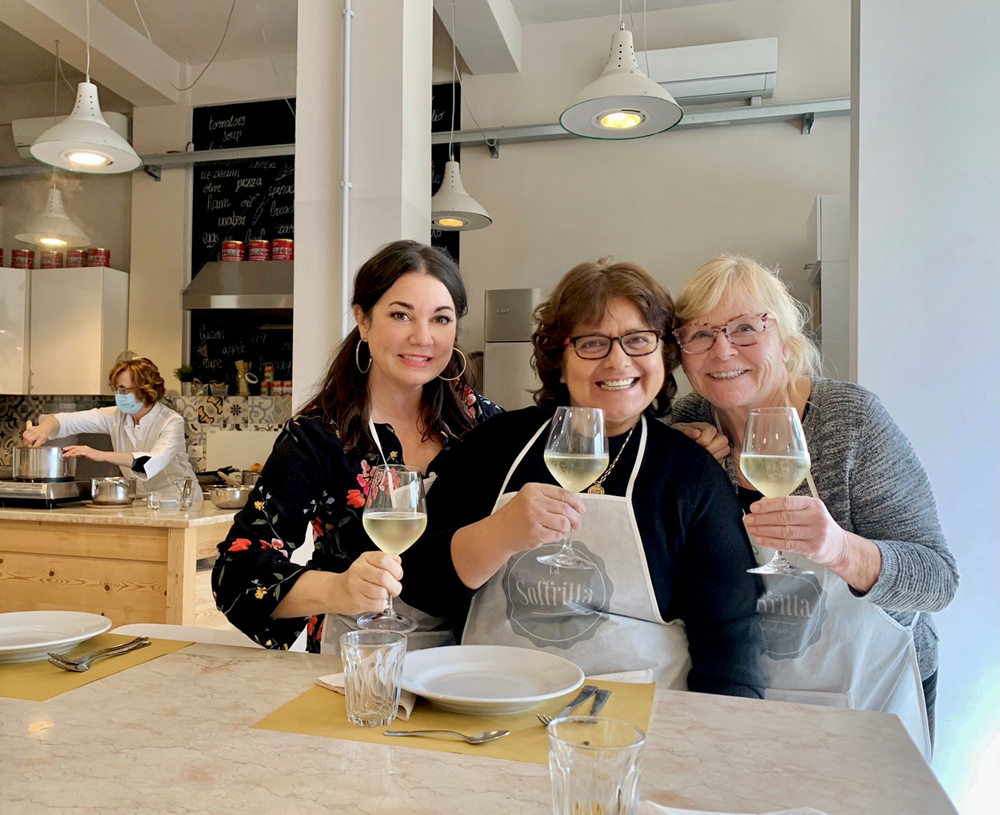
I found this pasta making course on Trip Advisor and booked it for the experience. It started in this charming small professional kitchen where we gathered in a small group to learn from Chef Cristina.


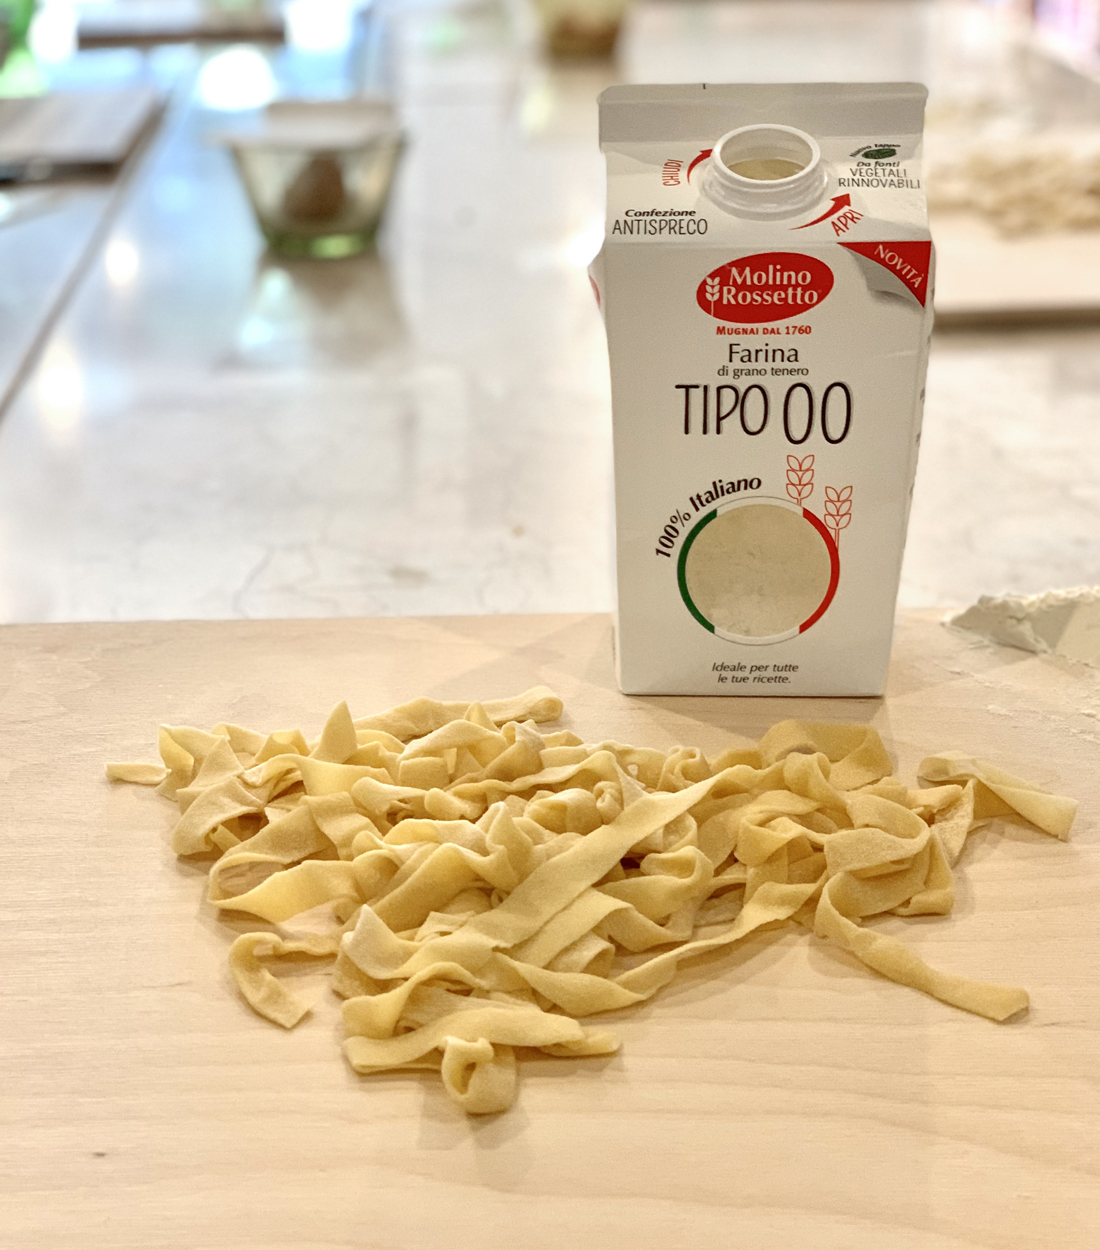
We started with flour, an egg, and a pinch of salt, then turned that into a dough. Cristina taught us how to knead the dough to activate the gluten and then her technique for rolling and cutting. (I’m sharing all the tips in a video tomorrow on Instagram stories if you’re interested!)

The proportions were this: one egg to every 90g of flour (which is between 2/3 and 3/4 cup) and a tiny pinch of salt.


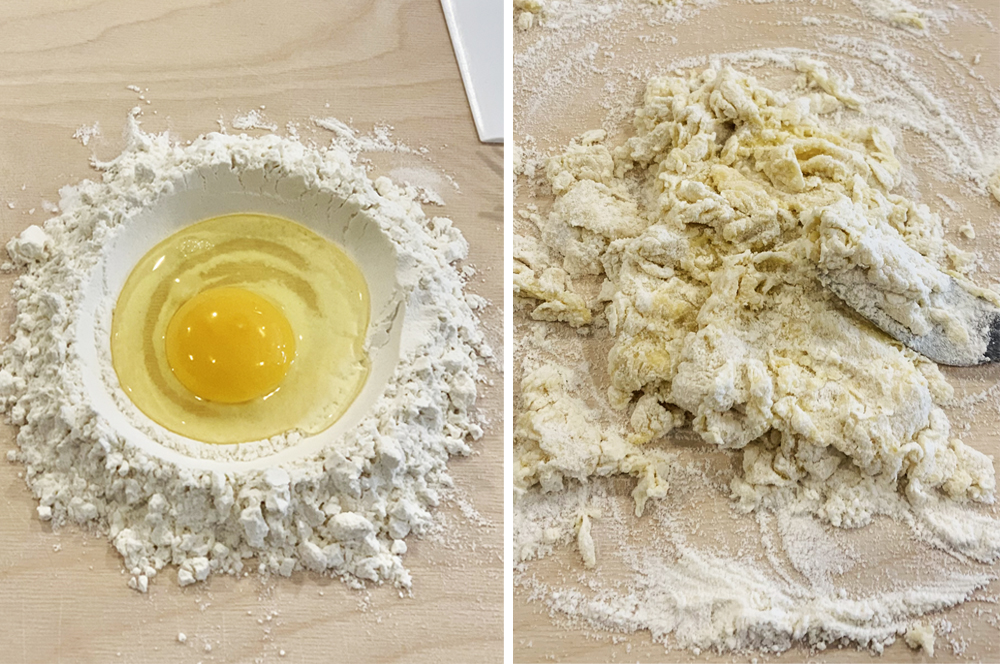
Once we combined the egg and flour and salt we formed a ball of dough. Then we kneaded it for about five minutes, pulling the dough out and then forming a ball again and again. The pulling activates the gluten. We were told you know when the dough is ready when it feels as soft as a “baby’s butt” and comes back into shape when you try to indent it with your finger.

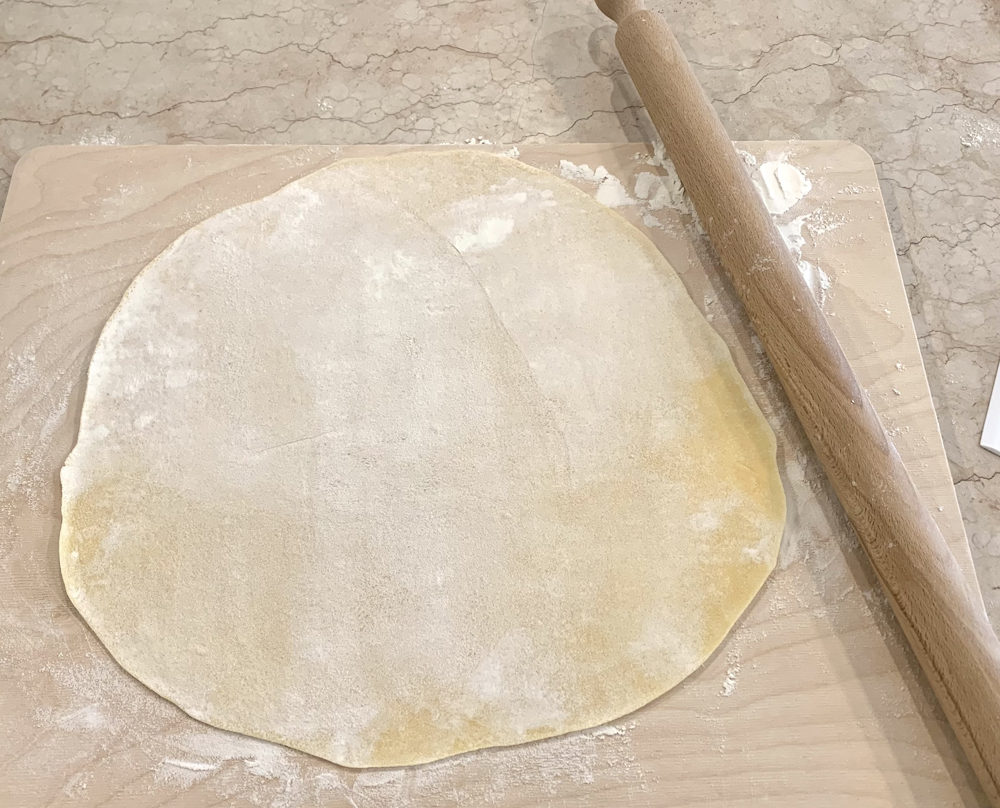
We wrapped our dough in cellophane and let it sit for 30 minutes before rolling, then unwrapped it and rolled it super thin, then folded it over like a crepe. We learned to cut the different widths for pasta (spaghetti, linguine, tagliatelle) and the technique for forming tortellini and how to layer and cut ravioli.


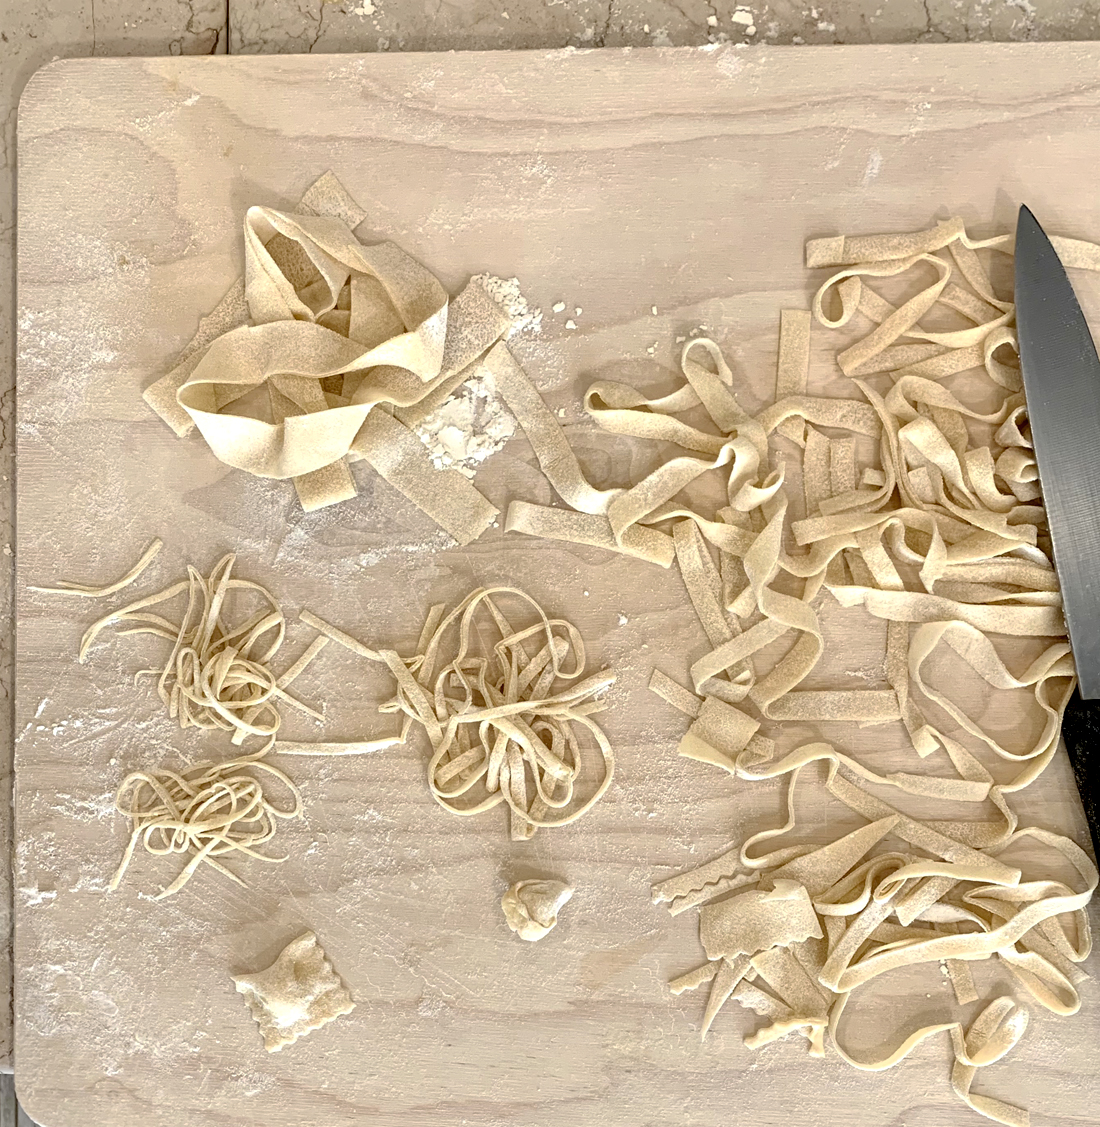
With a hearty homemade tomato sauce on the menu, our chef instructed us to cut the width of tagliatelle which we did. She served it to us with a sparkling wine and it was delicious!


What an amazing afternoon with friends! I’ve traveled with these two ladies on multiple international trips and we always have so much fun and make great memories. I wrote an article about what makes a great travel mate last year, if you’re curious about why we travel so well together. I adore these two and we’re already planning trips for next year!


So the real question I asked myself when I got home was could I recreate it? Could I use my new skill and make my own homemade pasta?

I ordered the same Italian wheat flour on Amazon that our instructor used to make my own pasta and gave it a try.

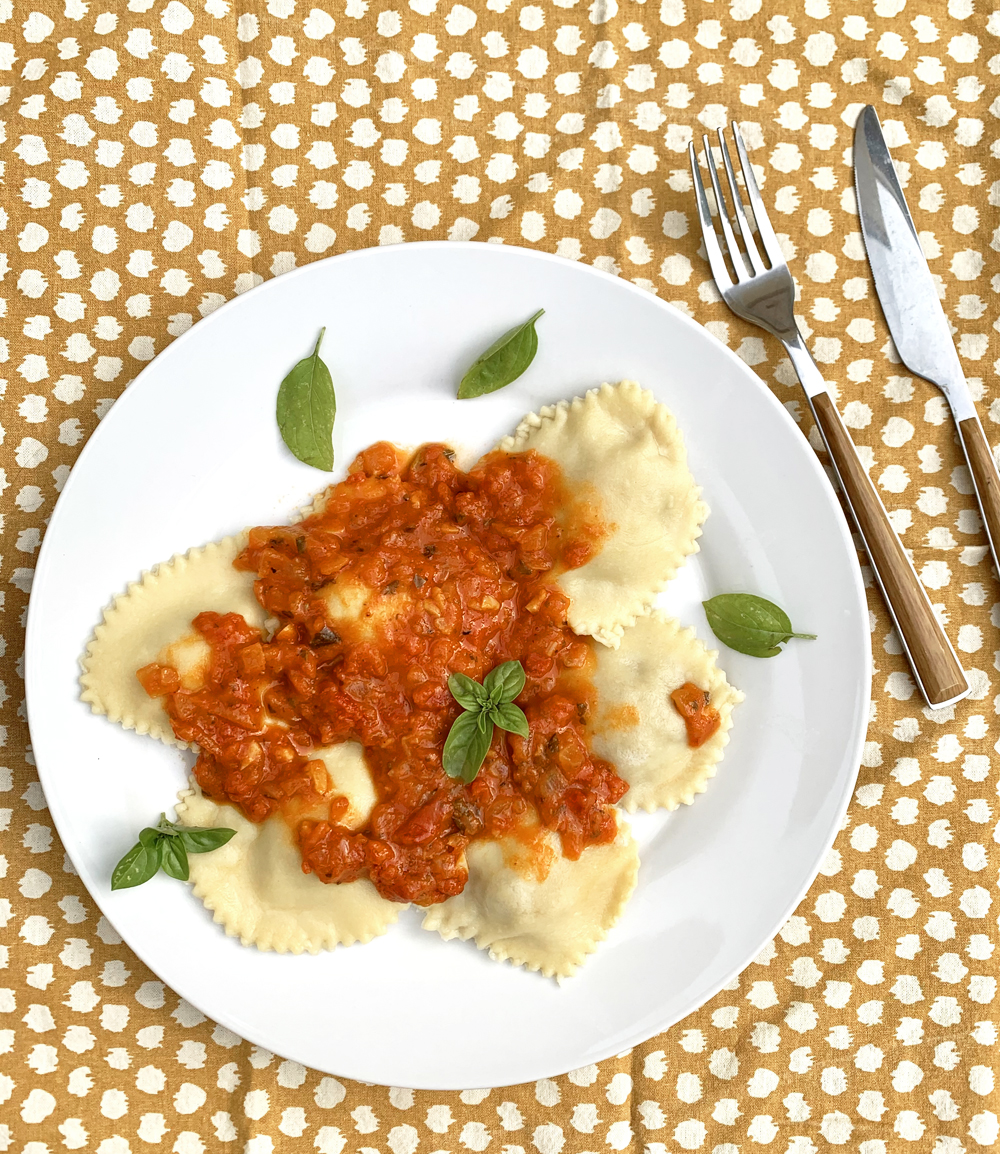
I did it! I made homemade beef ravioli and served it to my teenage son. He loved it!

Making homemade pasta was so much simpler than I thought and there’s no need for a pasta maker. It can be done by hand! I’ve read other recipes that use semolina flour which is a very common flour used for making pasta, it comes from durum wheat and it’s coarser and darker than all purpose flour. The flour I used was a whole wheat flour imported from Italy that I linked to above.

I’ll share my experience and photos from Venice on a later date. Check tomorrow’s Instagram stories for tips and techniques on how to make homemade pasta in your own kitchen too!

________

Since I’m sure many are curious, there were a few extra documents that were required for us to travel to Italy. To fly, the airline required a negative covid test within 72 hours of arrival and a completed EU passenger locator form. On arrival, they check your vaccination status at border patrol. If vaccinated you’re free to enter, if not, you need to quarantine for five days. However to travel on any train or eat indoors or visit any museums, the Italian government required a green pass or proof of vaccination. To return to the US we needed a rapid covid test with a negative result to board the plane back home which we got at the Venice airport for $35.

People wore masks on planes and trains and indoors in shops and restaurants, but many chose not to wear masks outdoors when walking around or when they were seated while dining. The extra paperwork wasn’t a big deal and we didn’t feel the trip was diminished in any way by the extra requirements or masks. We were so happy to be exploring the world again after being grounded for almost two years. 🙂

Did you miss our previous article…
https://distancebetweenplaces.com/?p=365