3 Tips for Decluttering Your Home

There are many reasons a person might decide to declutter their belongings. Perhaps they have an upcoming move approaching, they’re downsizing to a space with less storage, or they might simply be dreaming of a living space with a lot less stuff. In any case, they need to cut down on the items around them, getting rid of things they don’t need and taking advantage of more effective storage options for those items they intend to keep.

As you embark on your decluttering journey, you may run into a wide range of obstacles and even more questions. For example, how should you handle the sheer number of items you have to sort through? Where can you find storage units near you? What should you do with the things you’re purging? Fortunately, a few particular tips can guide you through the decluttering process at home and beyond.

1. Find the right type of decluttering for you.

From Marie Kondo to The Home Edit, there’s no shortage of decluttering and organizing methods you can choose from, and each one has its legions of devoted followers who swear by their strategy of choice. However, your question shouldn’t be which method of organizing or decluttering is the most effective for most people. Instead, you should consider which option is the right fit for you.

Hot Mess House host Cas Aarssen utilizes this concept in her Clutterbug ideology, a set of four different organizing styles she’s seen in her clients. The same principle can be applied to decluttering. For example, should you sort through your items in large groupings, like the KonMari categories of clothes, books, papers, and so on, or will you have better results by categorizing your belongings further, such as decluttering tops, bottoms, dresses, and other subcategories within the larger umbrella of clothing? Once you’ve determined the most effective strategy for your unique needs and personality, the decluttering process will become much less overwhelming.

2. Figure out what to do with your existing belongings.

The belongings you keep and those you decide to discard will need to be dealt with beyond this initial declutter. For those things you plan to keep, what will you be doing with them? Ideally, you’d have delegated spaces within your home for everything you keep. However, your space doesn’t always work with your lifestyle. For instance, what if you’re embarking on RV life and are decluttering your belongings to fit in that small space, but you don’t want to lose their cherished heirlooms or other non-urgent items just because they’re not in the RV with you? In these cases, a storage facility may very well be your best bet. Just be sure to organize your storage unit to make sure your items are indeed organized and decluttered.

3. Find ways to dispose of the excess.

img

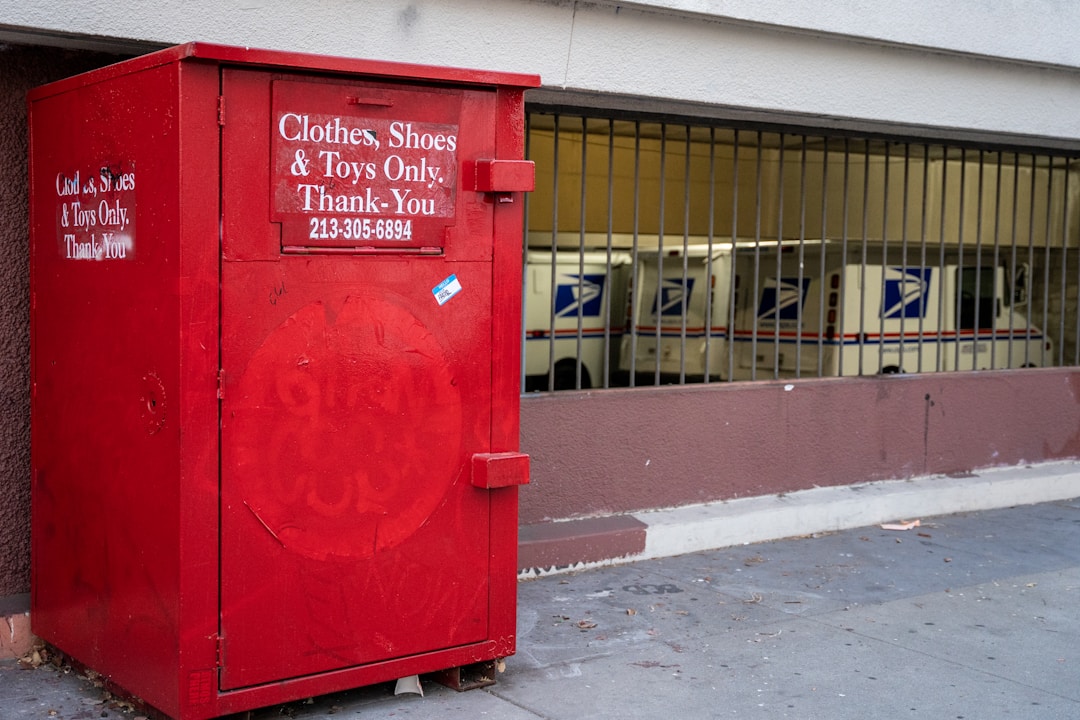
There are other items that you won’t want to keep. It’s easy to toss out blatant trash, but other types of belongings might prove more difficult. Can that box be recycled? Where might you donate those old clothes? What should you do with that entire extra pile? Take some time to research how you should dispose of those items you’ve decluttered to ensure you’re doing so responsibly. Donations, trash, and even gifts can get unnecessary items out of your home or storage space and to a more appropriate destination.

When you stare at a pile of clutter, the sheer thought of purging and organizing can become intimidating. However, you can and will get through these items successfully. Simply spend some time considering the methods and minds that will work best for you, store your “keep” pile in an organized manner, and dispose of the decluttered excess responsibly. Then, enjoy your newfound extra space!

4 Mistakes to Avoid When Moving to A New House

Moving into a new home can be overwhelming, especially because you already have other significant responsibilities. It is common to make mistakes, but the fewer errors you make, the more pleasant and easy your move will be. It also helps in keeping the costs low during the entire process. When you are aware of the mistakes you need to avoid the next time you make your move, you will have a better experience. The following is a list of common mistakes to avoid when you are moving.

Last-minute packing

If you want to have all your things packed for the move, last-minute packing is not the way to go about it. To be adequately prepared, you will need to start arranging and organizing your belongings about a month in advance. Otherwise, you will get frustrated and overwhelmed. The last days should only be for putting in the final touches. 

If you want to have an easier transition, you should consider hiring a professional moving company Holland Movers. They will offer you expert packaging materials and services, which will also give you peace of mind.

Failing to set the correct budget

Developing a budget estimate is essential even though it is impossible to anticipate precisely how much it will cost for the entire moving process. Avoid the mistake most people make of abandoning your budget altogether. Having it will help you plan and know how much you’ll need. It will also mitigate the shock and unpleasantries that come with unexpected financial burdens.

Inadequate research 

There are a lot of moving companies available in the market. However, they don’t offer the same quality of services. So, to settle on the right company, you will need to do adequate research, and thankfully, there are many online resources at your disposal. Look up different companies, and don’t forget to read reviews and referrals from customers. Additionally, you could also ask for the estimates and forward any queries to the Moving Company Amsterdam

If you fail to do the due diligence and settle on the first company that comes up, you will be taking a significant risk. Such a mistake might cost you extra money and loss or damage to your belongings. Doing adequate research will also give you the chance to compare rates from different companies. 

Allocating too much time

 Don’t make the mistake of starting to pack too early. Apart from unnecessarily prolonging the process, you will also likely pack up things you need to use before moving. Having to unpack already packaged boxes will also result in disorganization and misplacing items.

Your move does not have to be challenging, nor should it become a hectic, burdensome task. Preparing adequately by taking the proper steps will come in handy. Always remember that unexpected things might come up regardless of the task at hand. It means that although it will help to have a budget and a plan for the entire process, some things will be out of your control. It will be helpful to take everything in good stride.

Did you miss our previous article…
https://distancebetweenplaces.com/?p=218

How Much Does Exterior House Painting Cost?

When your house needs a new coat or two of paint, it can be a big project. Homeowners can head over to Angi, formerly Angie’s List, to find out more about the price it will cost. However, there is no one set price for this type of job. A lot depends on your house itself as well as the region that you live in. Urban areas virtually always cost more, and rural areas may have an extra charge because they are far away. 

Exterior House Painting Prep

A big part of the cost to paint the exterior of a house depends on the prep work required before the house is actually painted. That prep work often includes getting rid of the paint that was there before if it’s chipping and to fill in any holes and dents. If the house needs a lot of prep work, this alone can be more than half of the labor cost of the entire project. If there is little prep work that needs to be done, this part may only cost a couple to a few hundred dollars. However, on a house that is 2,100 square feet that needs a lot of prep work, the cost can be $1,000 or more.

If your home needs window glazing or caulking, this will add even more to the price. You can expect an average-sized house to cost anywhere from $2,000 to $4,000 depending on the prep work needed, the size of the house, and the kind of exterior house paint you want to use. 

The Square Footage

The square footage of your house is one of the major determiners of how much the paint job will cost. If your home needs to have window caulking and pressure washing, and paint that is in average condition, you may pay about $0.50 per square foot for the prep work. If you need a little scraping and/or power brushing to get rid of paint in bad condition, you may pay anywhere from $0.50 to $1 for each square foot for the prep work. If the paint is in very bad condition, you may pay as much as $2 per square foot for the prep work.

Then when you get two coats of paint on your house, you can expect to pay about $1 to $2 per square foot. All total, $3,000 is a good average amount for exterior house painting. The price can be up to $10,000 if your house is larger than average and you have paint in poor condition. 

Want to know how much your exterior painting project will cost? Angi makes it easy for you to find local exterior paint professionals and get multiple competitive quotes. Estimates are generally free, and you are under no obligation to use their services. 

Did you miss our previous article…
https://distancebetweenplaces.com/?p=217

Process of pool installation, Step wise

The following is a step-by-step guide on installing your swimming pool, from start to finish. When you meet with one of our designers for a free consultation and estimate, they may go through each stage in further detail.

Design

The pool designer will then take the information you provided and create a drawing of the pool in the area you specified on your property.

Layout & Excavation

This is the first step in the construction of your salt water pool The layout as well as the excavation are completed on the same day. The  construction manager and excavation crew will meet with you to plan the pool’s layout. They will begin excavating the pool after you have approved the location and elevation of the pool. This day will be used to remove any surplus soil that cannot be graded into the yard.

They will simply remove soil from the yard at this time. The location of your filter equipment and light junction boxes will also be confirmed by the construction superintendent. If you haven’t finalised your coping and tile choices yet, you’ll need to do so now to avoid any delays in  construction process. This is the day that your excavation instalment is due.

Steel Reinforcing

This is where your pool’s support structure is built. Our gunite shell gains structural strength from the steel setting. Once the steel is installed, the township will be contacted for a building inspection and a partial bonding inspection.

Gunite

It is at this point that the pool’s shell is constructed. For this part of the project, we’ll need to use your outdoor water supply. You may be required to stay for a few moments to approve the placement of any benches and your steps. This is also when the gunite instalment is due.

Plumbing

The pool plumbing and filter equipment will be installed and pressure tested on this day. This step does not require your presence because the equipment and light junction boxes were installed during the layout and excavation. If an electrician and a gas plumber are required, you are now ready.

Coping and Tile

It is now that you will see that your saltwater pool is getting finished. Your raised wall’s coping and tiling, as well as, if necessary, the facestone, will be installed. You do not require to be present for this stage once again.

Electric and Gas

The electric and gas lines must be connected after the pool filter equipment has been installed.

Decking

The decking installation can be planned after the electric and gas connections have been examined.

If you hire your own decking contractor, it is your decking contractor’s job to ensure that the decking is not completed until all necessary inspections have been conducted, such as gas and electric trenches, and bonding. It is also your concern that the installed decking does not surpass or impact on any township setbacks or limits and that the amount of decking does not exceed any lot covering totals. Backfilling any ditches that may be in the way of installing the deck is the responsibility of whoever is performing the decking.

It’s also crucial that the decking system, concrete, or pavers have adequate expansion, with at least a 12″ x 4″ ethafoam expansion connection between the deck and the pool coping and shell. If you don’t get this installed, you risk damaging your pool’s coping, tile, and gunite shell, which won’t be covered under warranty.

Fencing

After the decking is finished, the fencing around your saltwater pool should be built. They can’t start filling your pool until the permanent fence is in place due to local building laws. They request that one portion of the fence be removed so that They can access the saltwater pool to plaster it.

Plastering

This is the right time to start planning your pool party. This is the last step in the saltwater pool construction process. We leave the pool to fill with your water supply after the plaster is done. DO NOT end the water from filling the pool during the filling phase. Where the water was turned off, a stain or ring may appear on the pool plaster surface. Stop filling the pool after the water reaches the centre of the tile and call the office to schedule the start-up. This is the moment to pay for the plaster.

Did you miss our previous article…
https://distancebetweenplaces.com/?p=216