DIY Upholstery Tips for Beginners

Have you got some beloved furniture that you just can’t bring yourself to throw away? Whether it’s an old chair that needs a new seat, or you’d like to give a piece of furniture a bit of a revamp, having a go at DIY upholstery could be your best bet.

However, if you’re new to the upholstery world you might not know where to begin. This article will go over some of the top tips for DIY upholstery to help you make a start on your new project. From which upholstery nails to choose from to checking the inside of your furniture, here’s everything you need to know about upholstery before you start.

Get your tools right:

The first tip may be one of the most important, as without the right tools, there’s no way you could do a decent job! Having the correct tools will not only make your life easier, but the finished product will also thank you for it. Your final results will go from amateur-looking to professional level! Here are the most important tools to get right:

Upholstery gun: There are three different types of upholstery guns, the most popular being the pneumatic staple gun. This type will make the job much easier and quicker, so don’t just go for the cheapest option, as you might regret it!Upholstery nails: You can choose from a range of upholstery nails to add a final touch to your product. Not only can these disguise any staples on show, but they can be used as decoration to give the furniture a certain look or style. You’ll need a hammer for this!Fabric scissors: Good quality fabric scissors are essential for getting straight lines and avoiding tearing to the fabric.Marker: You can use anything from chalk to a pencil to mark where you want to cut the fabric, this will help you make more accurate measurements.Staple remover: For all beginners, you’re bound to make a couple of mistakes. Having a staple remover on hand will allow you to fix those errors swiftly.

Don’t forget the inside

When you first start upholstering, you only want to focus on updating the outside. With this in mind, you need to check to make sure the insides are in good condition. If not, this will be a job for a professional. 

You can check the insides are working correctly by testing how sturdy and solid it feels when you sit on the furniture piece. If it feels rock hard or you sink deep into the seat, these are signs that there are a few problems that need fixing and you should leave that piece to someone who knows what they’re doing!

Be picky with fabrics

You don’t want to put loads of effort into upholstering a piece of furniture for the fabric to only last a couple of months (or to rip whilst you’re working on it!). If you choose a fabric that won’t tear easily and is heavy-duty to withstand years of rubbing, you could give the chair or sofa a new lease of life for years to come.

Thin fabrics might be cheap, but you’ll just have to re-do the covering not long after! Heavy hemp fabrics and cotton twill or denim are all good choices for long-lasting upholstery.

Start small

It’s great to be optimistic, but if it’s your first time trying to reupholster a piece of furniture, it’s probably not the best idea to start with something expensive, large, or pieces that are important to you. It’s best to get your practice in first until you feel confident enough to tackle larger projects.

You don’t want to start with a large piece of furniture as this might be so difficult that it puts you off upholstering for a long time. Have a go with something small like a footstool as your first attempt to get yourself comfortable with the process. Buying something cheap will also put the pressure off getting it right first time, that way you can have more fun with it and any mistakes won’t be a big deal.

Practice makes perfect!

As with anything, skills take time to develop and the more time you give to it, the better you will get. Follow these top tips when tackling your first upholstery project and you should feel confident enough to make a start.

Did you miss our previous article…
https://distancebetweenplaces.com/?p=181

8 Days in Italy: What I Packed

It’s been a few days I’ve been in Italy, visiting Venice, Florence, and Verona. In the past ten years I’ve visited a lot of European countries but I haven’t been back to Italy in almost two decades so I’m thrilled to return! If you follow my stories on Instagram, I’ve shared some images of what this week has been like so far.

I’m not a fashion blogger, I travel for the experience and to take a lot of pictures of the landscapes and scenery. I value comfort but I don’t want to look sloppy either so I will bring clothing that make me feel good while I walk around town. I travel light, wear layers, rewash and rotate my outfits. I stick with classic styles but I prefer to mix feminine and edgy.

Today take a peek at some of the separates I brought with me on my trip to Italy and the travel gear I bring with me too!


long sleeve swing dressfaux leather jacket

black camo leggingsred lace camiblack combat boots

mustard crewneck sweaterlace trim topstretch ripped jegging

satin leopard print skirt (similar heregold sneakers

marble leggingsblack v neck sweaterblack sneakers

tie dye sweatshirt  / red midi skirt (similar

packable puffer jacketlightweight moto jacket

black floral blouse (similar) / black jeggings/  black stretch rayon dress

I brought clothing that can be mixed and reworn in different combinations. Comfy leggings or jeggings, a few dresses and skirts, patterned or colorful tops and super comfortable shoes!


samsonite spinner / this lightweight duffle (sale price here

jewelry bagblack crossbody (night)

marble cosmetic bagssmall backpack (day)


A few tips that I follow that help me pack super light:

1. Roll instead of fold your clothing, it’s amazing how much this saves space!

2. Stay in a vacation rental with a washing machine mid way through your trip so you can wash and rewear clothing. Keep in mind some places only have a washer not a dryer so budget 24 hours of time for clothes to dry.

3. Try every outfit on! I’ve skipped this step before and realized I’d gained or lost a little weight or I brought the wrong version of something and smacked my forehead not doing this. Especially since comfort is so key!

4. Stick to a basic color palette, mix in one or two patterned dresses and a few colorful tops/sweaters/skirts.

5. Shoes: comfortable is essential but cute is important too! I like leather sneakers plus a pair of boots in colder weather or sandals in warm weather. The one thing you don’t want is blisters so break in any shoes before you leave, but bring blistercare gel bandages just in case.

________

I’ll be in Italy a few more days! I’ll share the regular weekend post on Sunday and back to blogging when I get back to the States next week.

Ask any questions you have and I’ll get back to you in the comments. Ciao!

Did you miss our previous article…
https://distancebetweenplaces.com/?p=174

3 Historic Buildings You Should Visit for Design Inspiration

A lot of buildings that have beautiful interiors and exteriors are older houses that have withstood the test of time. There is a huge variety ranging from Tudor dwellings to modernist masterpieces, all of which could be very helpful when it comes to giving you inspiration for your own home. This list will discuss these buildings in more detail so you can go visit and start getting inspired. 

Adlington Hall 

There is a long history that surrounds Adlington Hall, which is why people from all over the country head there to visit on group tours. It started its life as a simple Saxon Hunting Lodge, which acted as a base for Earl Edwin and his men. During the Norman conquest, William the Conqueror threw Earl Edwin off the land and took it for the Normans, who held it for years until it was eventually passed onto the crown in 1221. 

As well as it’s interesting history, another reason why they go to visit is because of its sheer beauty and magnitude. Thanks to its enormous gardens, gorgeous exterior and moving interior, Adlington Hall truly is breath-taking, which has, and will continue to inspire decorators for years to come. 

2 Willow Road 

If you are looking for something that is a little more modern then you will absolutely love this gem of a row of houses which is located in Hampstead. It was originally designed in 1939 by Erno Goldfinger, who upon completion decided that he wanted to make No.2 his place of residence. This home has been furnished by Goldfinger and still contains a lot of his original possessions, such as his furniture and artwork. 

The home is now owned by the National Trust and so can be visited by everybody. It’s really surprising that a home that was decorated so long ago can still look as modern as it does. There really is nowhere else that you could get some inspiration for your own interior design. 

Eltham Palace 

Two styles that you will be surprised go well together are art-deco and medieval splendour, but Eltham Palace proves they were always meant to be. This palace is somewhere that will appeal to history buffs as they will be able to dive into the back story of the fantastic history that surrounds this area. The interior design of this palace truly is something to be marvelled at as there is a series of different art-deco pieces that were built by both Stephen and Virginia Courtald in the 1930s. Not only this but the palace is surrounded by beautiful gardens and has a nice tea shop. As such, this makes for a great day trip and great inspiration for your own home. 

Conclusion

There is such a huge array of trends that come and go in the realm of decorating your property and as such it can be difficult knowing exactly what you should be doing. If you are looking for some inspiration, visiting historical houses can be a great way that you can work out what you want to do moving forward. 

Did you miss our previous article…
https://distancebetweenplaces.com/?p=173

10 Tips for Moving to a New State

Moving out of state is exciting, but it can also be hard. When you buy a home out of state, you can expect to pay more to move and jump through extra hoops. If you’re moving to a new state, here are 10 tips to help you out.

Sell Your Current Home

You know you want to get out of your current state, which means if you own a home, you’ll need to sell it before moving (unless you plan on being a snowbird) – because we’re assuming you’re moving to a warmer state. Although traditionally selling your home can be a long drawn out process, there are new home buying companies that will provide you with an offer on your home, generally within less than one day. 

Make a plan

First and foremost, you need to have a plan before you move out of state. Plan out specific dates, including the date you plan on starting your move and the date you need to start your new job when you get settled. Another big part of this is planning the drive to your new home, know the route you want to go so you don’t get lost, have the GPS setup and many of those also inform you of any construction sites along the route. 

Downsize (Get rid of Stuff!)

Throwing things away is hard, but it’s a great way to simplify your out-of-state move. Put anything that may not fit in the moving truck up on OfferUp or Facebook Marketplace to offload old furniture, large tables, bed frames, and other items you might not need or want to move to save time on your move – and also make a quick buck to help with moving expenses in the process. Once you get to your new house, you’ll know what items you will need to purchase that didn’t make the cut.

Finding a house and a job

Before you move to another state, make sure you’ve got a house and employment secured. The last thing you want is to be stranded in a new state with no job or no place to live, so get that figured out before moving. If you’re stressing about finding a job, head over to a job site like Career Monster or Indeed – you can upload your resume and blast it out to a large number of companies that are hiring in your new state.

Moving Truck Rental or DIY

You can rent a truck and move on your own, or you can use one of the several out-of-state moving services. While you’ll typically save money by moving everything on your own, you can save precious time by hiring movers or using a moving storage container. Companies like Penske and U-Haul rent moving trucks for one-way moves, which will allow you to make the move and not have to return the truck back to the original rental facility. 

Make a budget

Moving can get expensive fast, so make sure you have a budget you can stick to. A budget keeps you from spending too much money during the move, which means you’ve got enough for bills and other moving expenses.

Pack an emergency bag

You never know when you’re going to need a first aid kit, hygiene items or food and drink when you’re on the road. Pack an emergency bag with all the essentials, that way you’ve got what you need even if you have to spend a night in your car.

Getting a new license

When you move to a new state, you have to get a new driver’s license. Take care of this as soon as possible to avoid tickets and ensure you have an ID with a current address. 

Update addresses & accounts

Speaking of addresses, you’ll need to do a change of address on any accounts that have your old one. It may be easier to make a list of all the accounts you need to update, that way you can simply check them off your list.

Keep your receipts

Moving expenses can be written off on your tax return, so keep all your receipts so you can write them off at the end of the year. If you’re not interested in tax write-offs, keeping your receipts isn’t a priority.

If you need help finding your dream home or moving out of state, there are lots of resources that can help. Make sure you take advantage of all the available resources to make your next move as simple as possible.

Did you miss our previous article…
https://distancebetweenplaces.com/?p=172

How Much Do Custom Cabinets Cost?

Cabinets are home assets. They hold and keep the most important things for you, such as clothes, tools, utensils, display frames and figures, and even your important documents. Almost everything that you need to keep and care for is put in the cabinet. It is essential to invest in cabinets with multiple shelves to help you organize your essentials and household stuff together.

There are various types and sizes of cabinets. There are small ones for documents, and there are big ones that can hold appliances and equipment. There are standing cabinets and hanging cabinets. There are also portable ones as well as those that are mounted on the wall. Each kind of cabinet serves a specific purpose and fits in particular places. For instance, if you want to save space, you can have hanging cabinets. If you have enough household space, you can have standing cabinets. And if you wish to change the placement of your cabinet inside your household now and then, you can have portable cabinets.

A carpenter has the expertise, skills, and experience that can help you achieve a cost-efficient, durable, and highly functional custom cabinet. You can get carpenter quotes to know the best carpenters who offer professional skills and highly satisfactory service near your area. How much does a carpenter cost? It depends on the duration of service and the weight of the workload. You can pay a carpenter by hourly rate or by the project. It is wise to compare quotes to give yourself choices and ensure that you get the best professional work right on your budget.

Advantage Of Custom Cabinets

Custom cabinets are your best choice when it comes to choosing storage for your household. Custom cabinets can fit according to your needs and preferences. The specifications of a custom cabinet are highly dependent on your demand. You can express your style and creativity in your cabinet without sacrificing its quality and durability. Indeed, no penny goes to waste when you are able to get a cost-efficient and very satisfactory cabinet to add value to your household and keep your essentials safe and organized.

More flexible

Custom cabinets can fit any available space in your house. There are unlimited size variations, and it can fit precisely anywhere you wish to put it. They are made to fit your lifestyle, and it is up to you to choose the dimensions, style, and final furnish of your cabinet. But if you have no idea where to begin, a carpenter can help you plan your cabinet, including costing, dimensions, design, and materials that will be used. You do not need to worry about carpentry service deals because you ask for carpenter quotes to hire the best and nearest carpenter in your area.

With the help of a carpenter, you can have highly functional cabinets in the important areas of your household. You can have a well-polished and smoothly furnished cabinet made with excellent woodwork skills.

More durable

The durability and functionality of your custom cabinet are the priority; that is why skilled carpenters use excellent construction methods to make sure that the measurements are accurate and the dimensions are correct. You do not want to have expensive maintenance service along the road, and an essential aspect of ensuring durability is having a thick and sturdy custom cabinet.

The cabinet boxes should be ½ inch on the sides and ¼ inch on the back. But if you can have it at  ¾ inch and ½ inch, that is better. The drawer boxes should be sliding smoothly and neatly with a cracking sound. Of course, you can go beyond these dimensions as long as it fits the space where you will put your cabinet. Lastly, the shelves should be ¾ inches thick. These standard measurements are not new to a carpenter, and their skills and expertise can create a cabinet with accurate dimensions that suit your needs.

Custom Accessories And Details

The best things about a custom cabinet, aside from specified dimensions, are specified accessories and details. There are designated standards of measurement which you can go beyond and add intricate details that suit your preference. Custom accessories and details include cabinet handles, the style of the door opening, and the functions of the shelves. You can have shelves without covering, with a sliding cover, dorr-type cover, or with panels.

A carpenter can help you choose the correct details and accessories for the style of cabinet that you will choose. You can also rely on him when it comes to visualizing the cabinet that embodies your preferences. All of these cabinet accessories and details will be specified during the planning and costing. Make sure to communicate your preferences but make sure that it is reasonable. After all, a carpenter will bring out the best in the custom cabinet that you envision.

Invest In Professional Work

Whether for your new house or a part of a renovation plan, your custom cabinets are one of your most significant home investments. Of course, you want nothing but the best when it comes to adding value to your home and improving your quality of living. It is best if you invest in professional work, and the best woodwork skills you can rely on are a carpenter’s skills. 

Did you miss our previous article…
https://distancebetweenplaces.com/?p=171

4 Renovations That Will Transform Your Swimming Pool

As you upgrade your home, one of the areas that is likely to be left out is the pool area. Just like other areas of your home, the pool gets worn out too. Why does your pool need attention too? This is the place you get rejuvenation after long tiresome days, it might also be where you host guests and it also contributes to the overall appeal of your home. 

If your pool exhibits dry ambience, has leaks and old systems and it is no longer trendy, this is a call for an upgrade. With the help of pool remodeling Tucson experts, here are some upgrades that will transform your pool area.

Installing LED lights

Is the poor lighting in your pool blocking you from enjoying your evenings and nights in the pool area? Well, installing LED lights will give it an impressive transformation. Not only will these lights save your energy by about 75%, but they will also add to the ambience while ensuring lighting is adequate.

To make the view even better, you can install LED lights that change colors to create a light show in your pool. This is a  good way to revamp a swimming pool that is out of trend, while at the same time enhancing safety.

Add some stone coping around the pool

Stone coping around the swimming pool will give it a great face lift. Stone coping has greater ambience compared to concrete. More so, it is safer that other materials like tiles which are slippery to walk on. Stone coping comes in a wide range of options and designs allowing you to achieve your preferred aesthetics. 

Compared to other materials this gives a distinct charm that also makes your pool look expensive and elegant.

Automatic leveler

An automatic leveler will detect when the water levels in the pool are too low and trigger a refill up to the optimum level. Whey do you need an automatic leveler? For one, it will give you peace of mind as it will eliminate the constant worry of whether the water levels are okay. Note that too low levels can cause damage to the pool equipment which can be expensive to replace. 

It will also go a long way in protecting your yard from flooding caused by overfilling. It also has an aesthetic benefit as it eliminates the need to have hoses floating on your pool (hoses can be a hazard too).

Tile replacement 

Broken and old tiles are not only unsightly, but they can cause injury or damage to the pool. This is one of the priority areas of remodeling that will instantly change the appearance of your pool. Retiling with updated and attractive tiles will enhance the overall appearance of your pool area.

Conclusion

As you remodel your home, do not leave your pool out. It gets worn out too, something that will not only cause inefficiency in energy use but can also be a hazard. Do a remodel to eliminate these worries and also enhance the ambience of your outdoor space.

Did you miss our previous article…
https://distancebetweenplaces.com/?p=170

5 Creative Ideas for Renovating a Nursery Room

The first room that a child experiences is the nursery. It prepares them for their future as they learn how to sleep, play and even walk in this new space. The nursery should be filled with items that will encourage a child’s curiosity and imagination.

Nurseries are also a place where many parents choose to decorate for baby showers, so it is important to keep in mind how this room could transform over time. It’s also helpful to consider the different types of nursery beds, storage and lighting.

We’ve rounded up five design ideas that can help you get inspired for creating your perfect nursery room.

light source that matches the style of your child’s bed

If you are planning to use a convertible crib, go ahead and purchase one with a canopy. Place an overhead light fixture that matches the bed’s style, then switch it on each evening before your little one falls asleep.

If you plan to use this room as an adult guest space in the future, think about investing in lighting styles that will complement your décor and fit in with other items in your home.

n area for rocking and comforting

If you plan to use a crib until your baby is ready for a toddler bed, it’s helpful to create a separate space that is solely dedicated to comfort. This may be as simple as adding an armchair next to the crib or creating a special reading corner in the nursery.

Peel and stick Wallpapers

Use Custom wallpaper that is peel and stick wallpapers to add color and texture to the walls, then carefully paint over them with a low-odor paint. Peelable wallpapers can be great  for nurseries as they can be repainted and redecorated over time.

Decor that expands their horizons

Children’s rooms should be decorated with items that broaden their horizons, like a mobile that includes images of the moon and stars or an area rug with an interesting pattern. These are only two examples of how to transform this space into something special. Use your imagination and decorate this room with items that will encourage your child to explore while they are still very young.

Lighting and storage containers that parents can use in other rooms

It’s a great idea to add lighting and storage units that can be used in different parts of the house when you are finished using them in the nursery. If you have the budget, you may also want to look into changing tables with storage space.

style that reflects your personal taste and is easy to update

It’s important to decorate a nursery room in a style that showcases your personal tastes, but is also functional. You can do this using wallpapers for nursery. It’s helpful to go with basic colors and designs for this room as you will most likely be updating the space every few years.

Did you miss our previous article…
https://distancebetweenplaces.com/?p=166

October Mood: Dark Walls

What is it about October that makes us all want to hang out in dark cozy spaces. I believe it’s the combination of Halloween and candlelight flickering against the walls that casts alluring shadows plus the cooler weather and daylight savings time that brings the night faster.

What I notice with dark painted walls is that gold or brass glisten beautifully, wood textures come alive, and shadows are more dramatic. These examples will tempt you to paint your walls  a shade of deep green, blue, charcoal, or black.

villa betula 

the future kept

arazi levine design 

source unknown

colette wallpaper – the pattern collective 

shop mohd 

ideal home uk 

studio mcgee 

eche martinez 

hotel st vincent 

deuce city henhouse

vernich interiors

horchow 

apple and oak

Did you miss our previous article…
https://distancebetweenplaces.com/?p=152

Oregon Road Trip Highlights

I spent the first week of August exploring the state of Oregon, a place I had never been to before even though it’s my neighbor to the north. On my road trip, I stopped in Ashland, Portland, Hood River, and then drove the entire Oregon coast home all the way back to California.  It was a lot of driving but I wanted to visit my northern neighbor by car to see the mountains, rivers, and explore the towns.

I had to make my way through several northern counties in California before crossing the border. The golden plains turned to hills and then mountains covered in forests as I made my way toward the Pacific Northwest. It was almost dusk as I crossed the border into Oregon where I stopped on the side of the highway to photograph the “Welcome to Oregon” sign as semis whizzed past me at high speeds almost blowing me over.

At sunset I arrived in Ashland, Oregon and I had just enough time to make a last seating for dinner downtown. I dined under globe lights in an outdoor cafe and while I ate I struck up a conversation with a local theater manager. She offered me a quick walking tour of the town after dinner, pointing out various sights I should see during daylight. Friendly locals always have the best tips and remind me of the kindness of strangers.

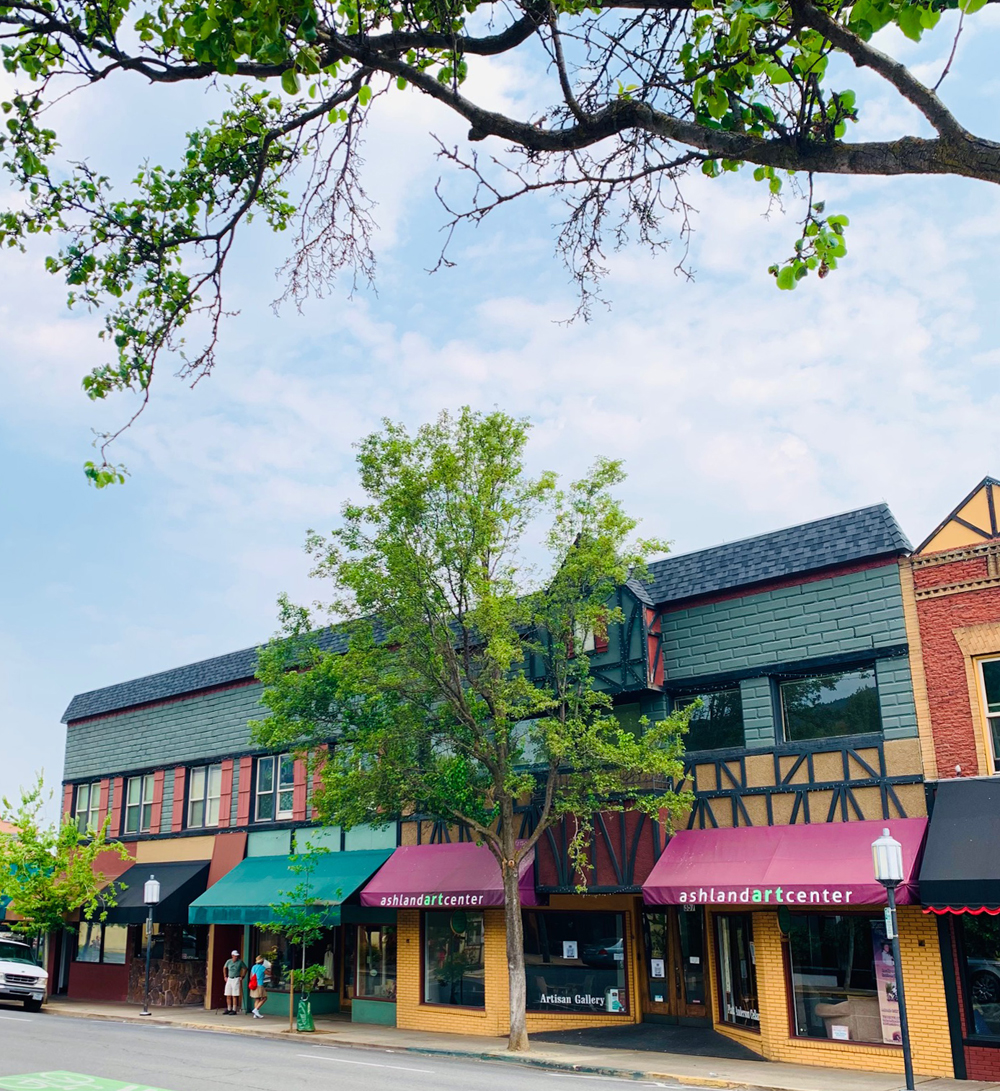
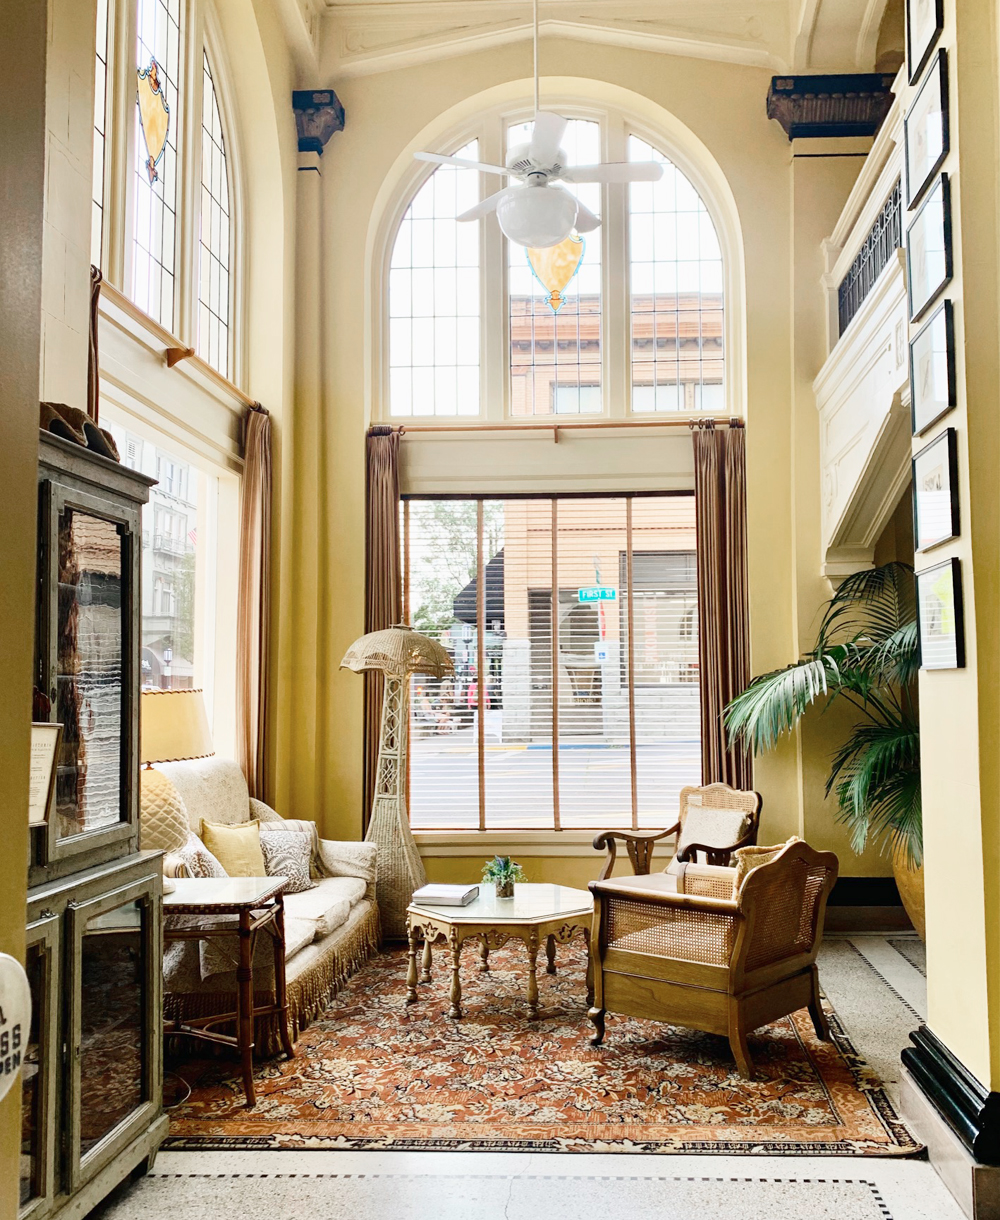
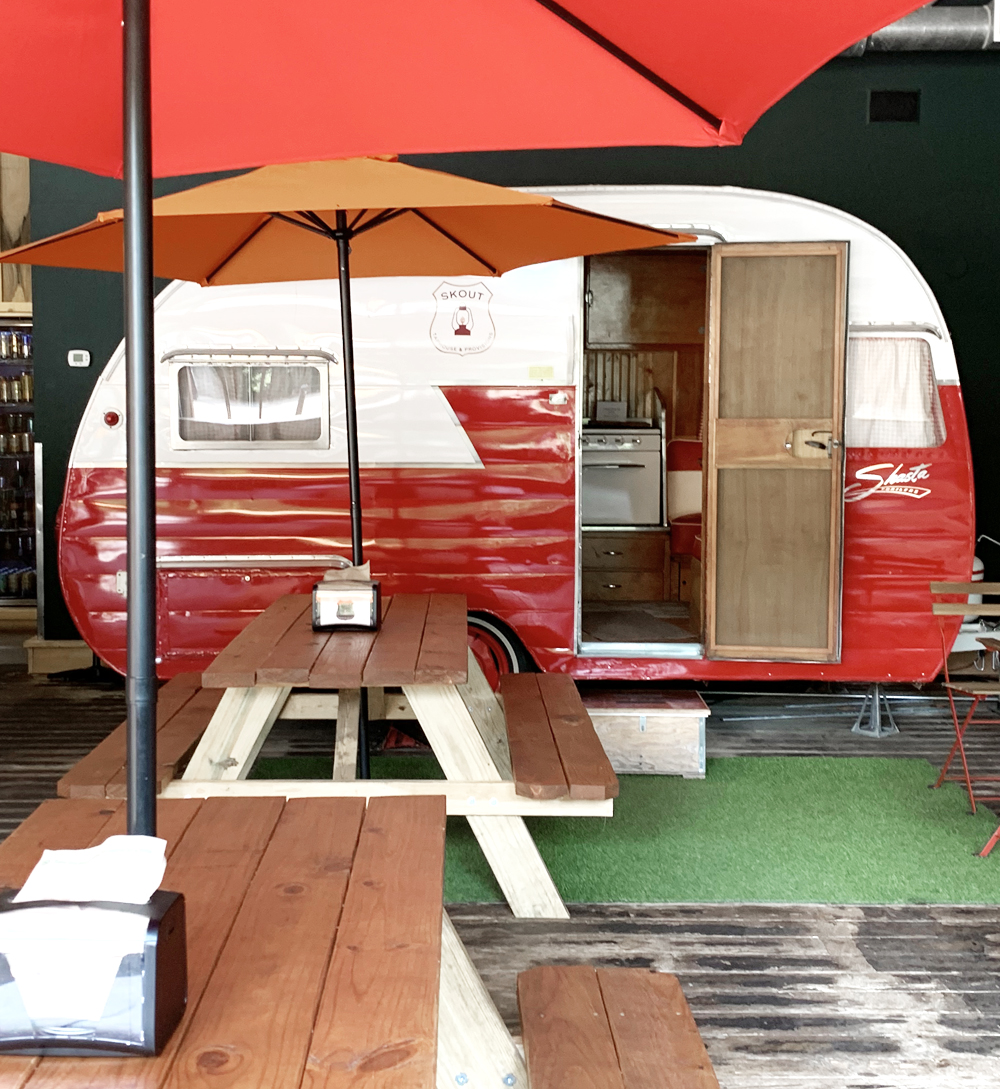
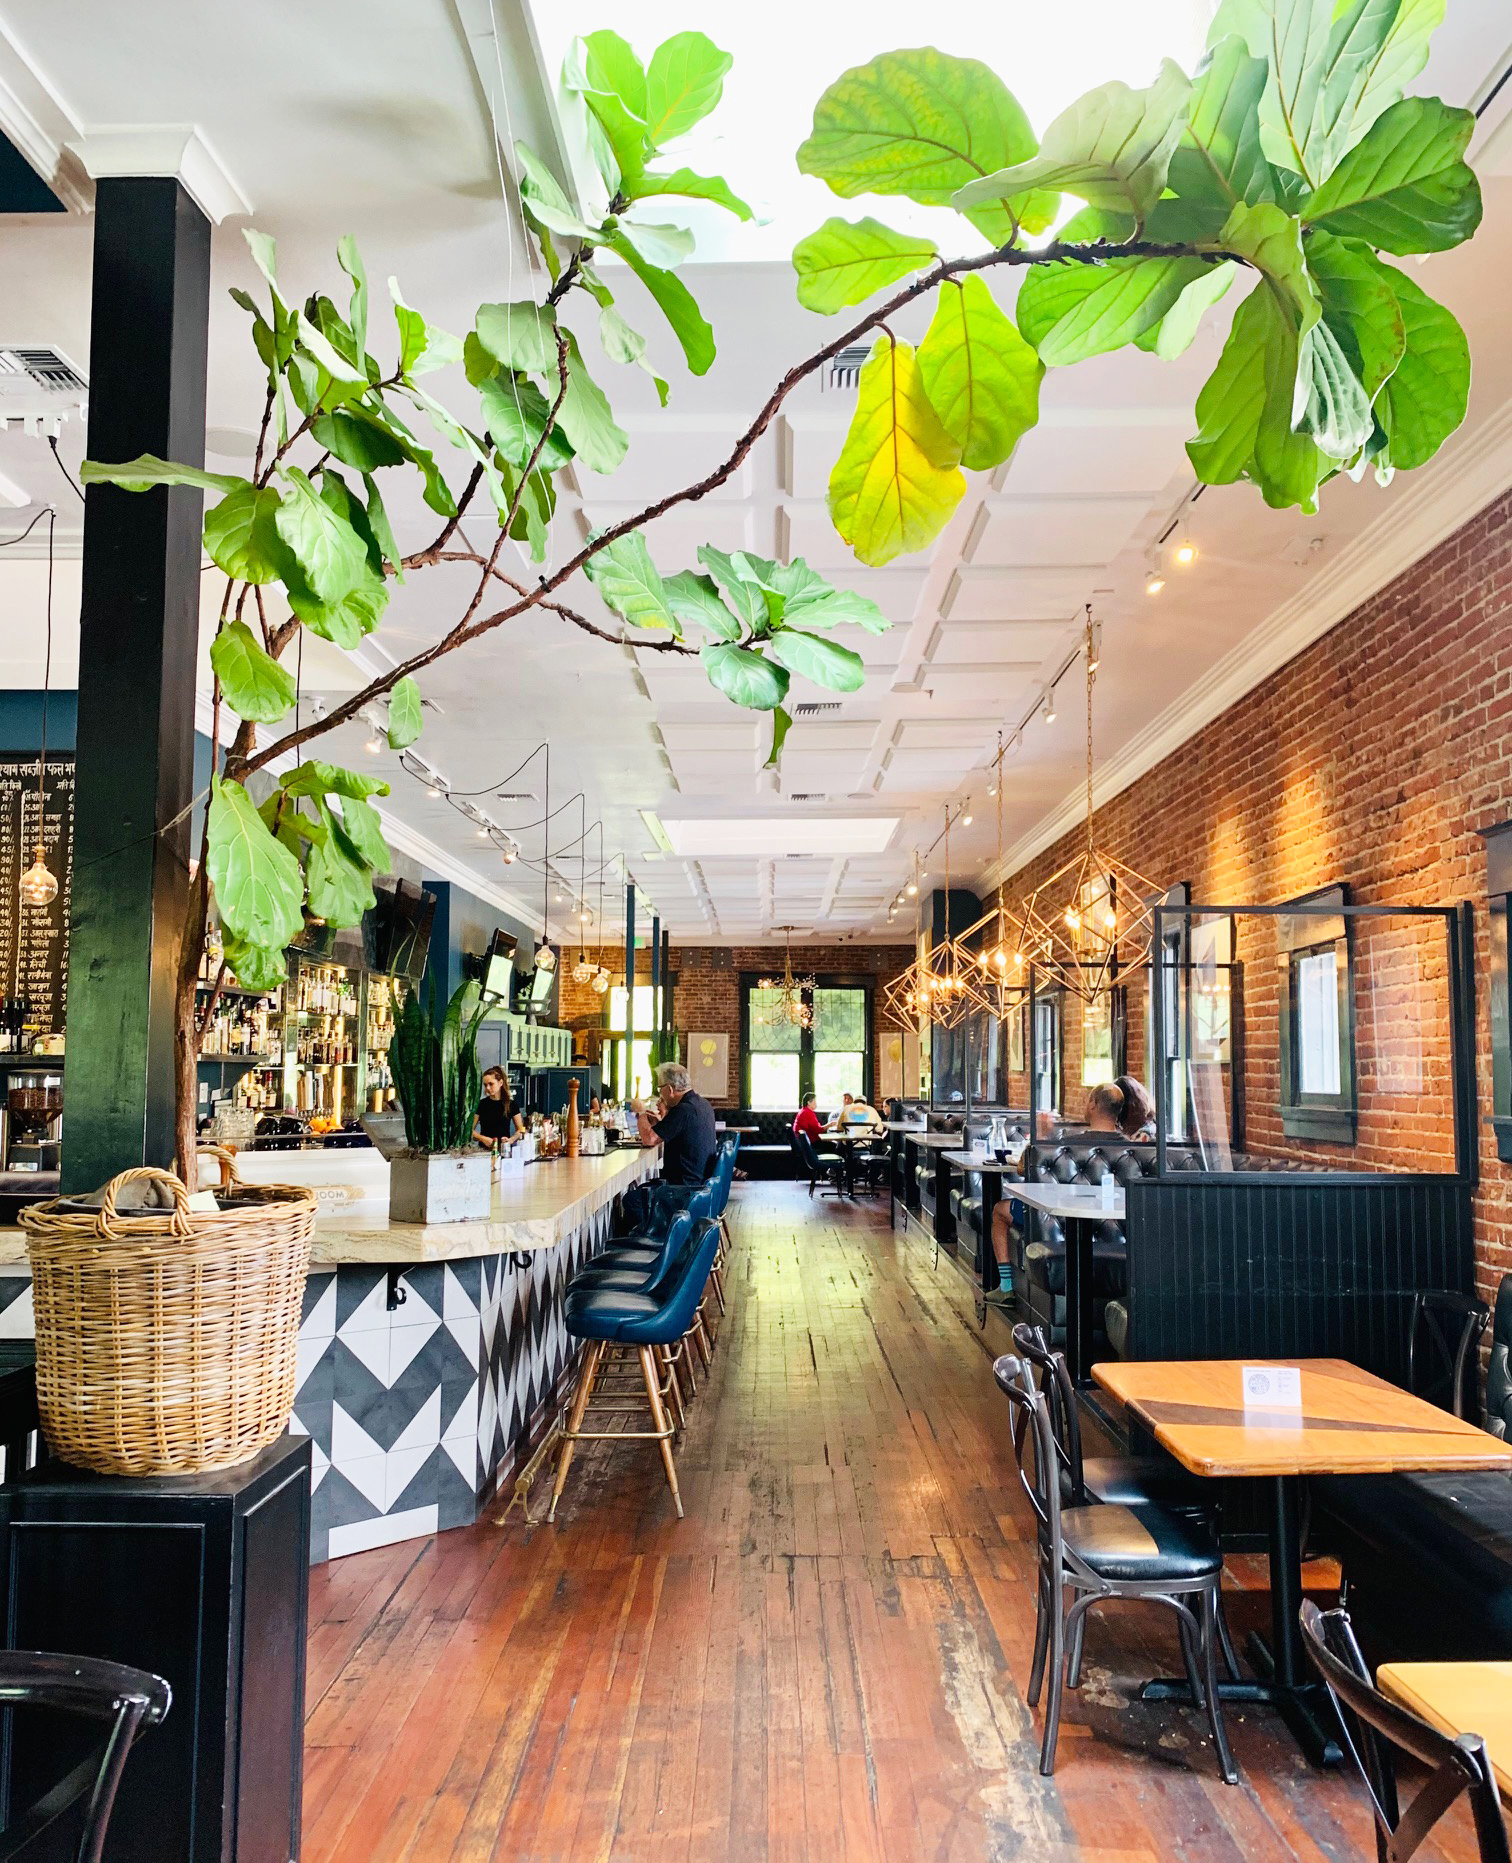
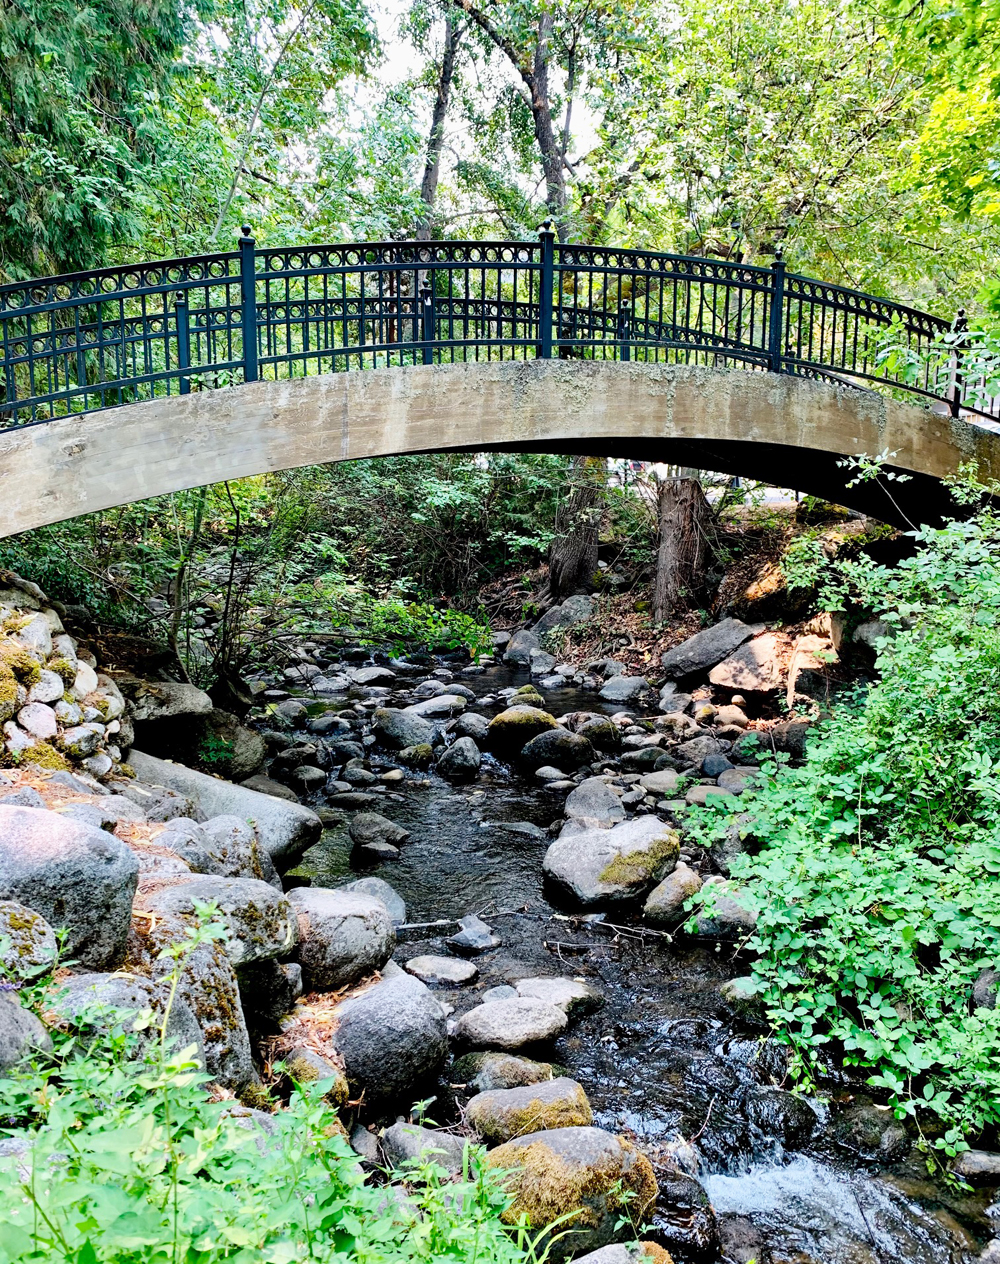
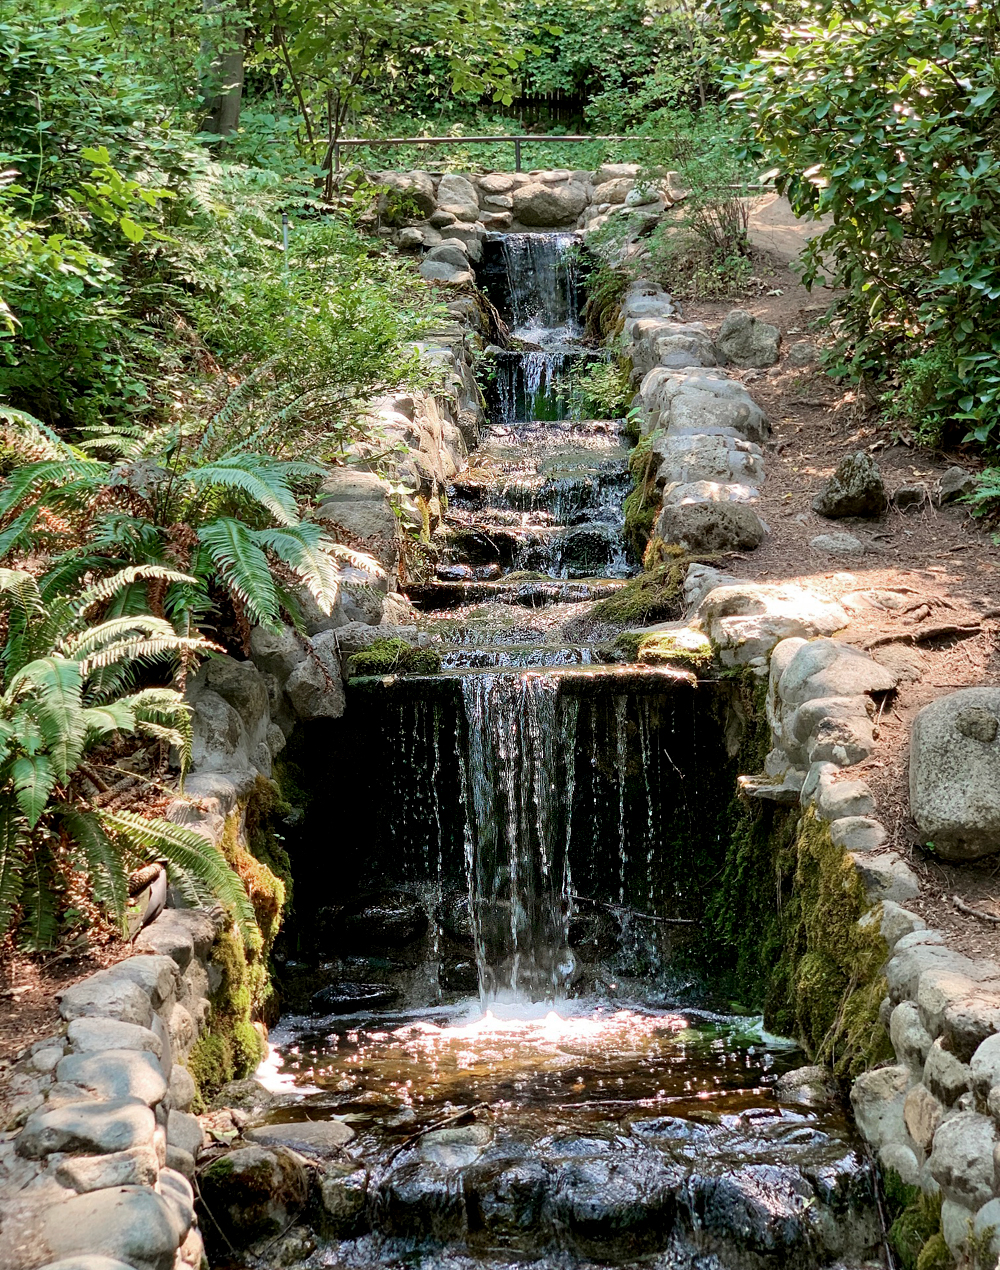
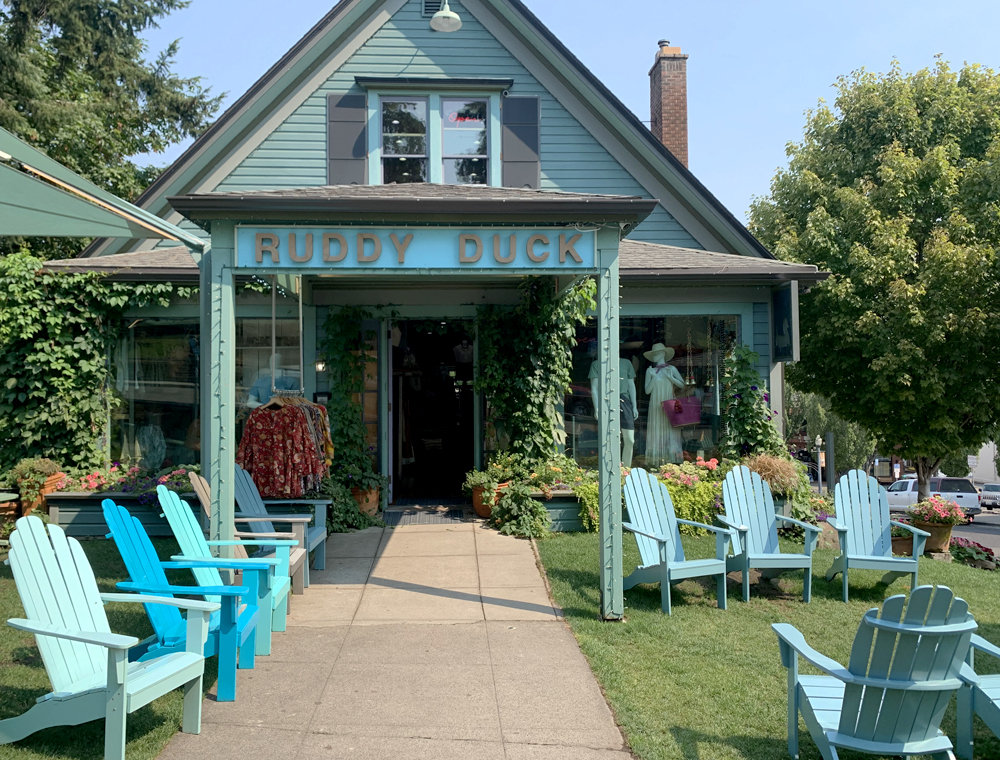
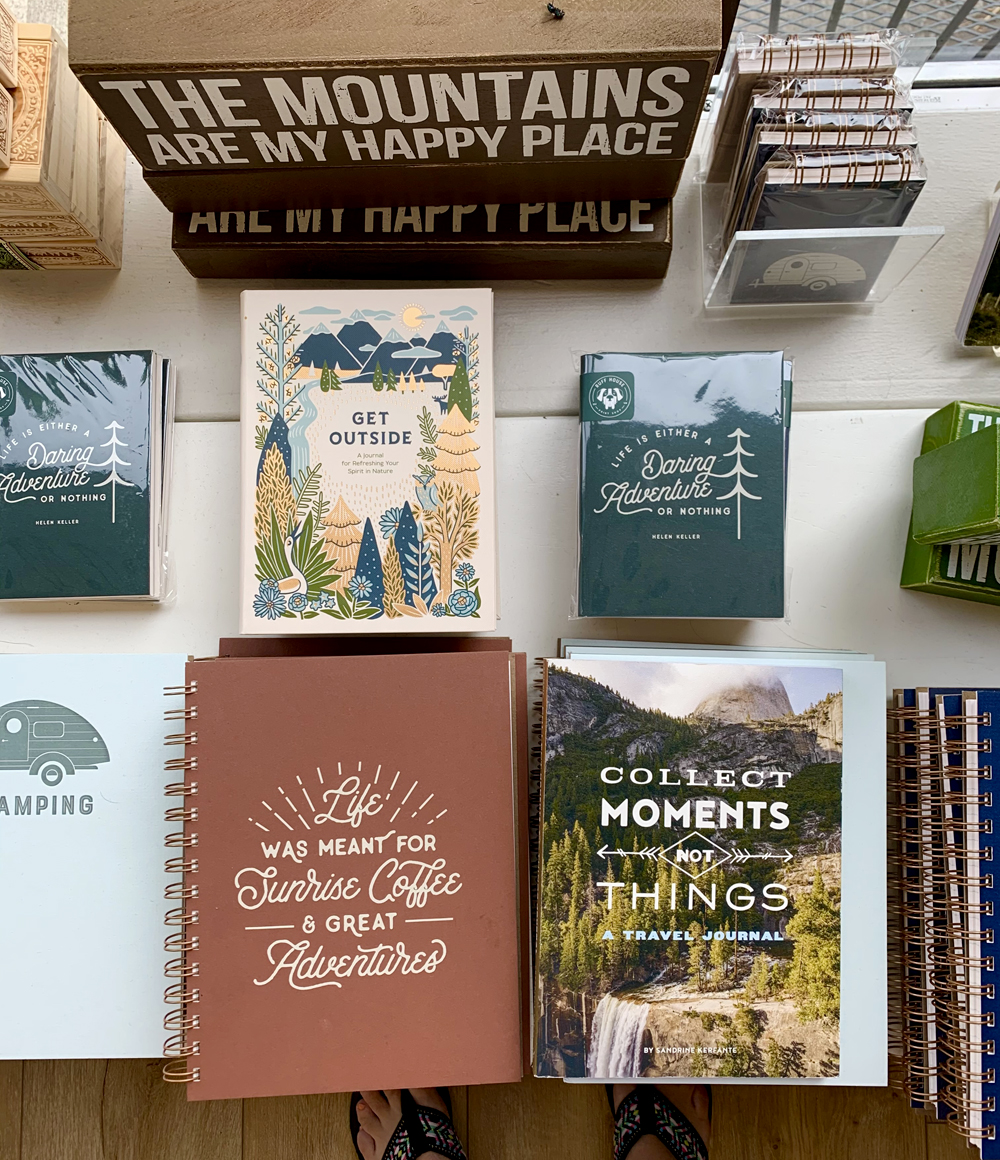
The next morning I set out on foot to explore the town in daylight and snapped a few photos with my phone. Ashland is known for its theater productions but I will remember it for its small town charm. Highlights: the interior of the historical Ashland Springs Hotel which will transport you to another time, and the very cute shops and restaurants next to Lithia Park.

After soaking up the parks, cafes, and shops I headed north to Portland. I didn’t get to spend anytime in Bend, which I’ve heard is really wonderful and in hindsight I wished I’d budgeted an extra day to see it.

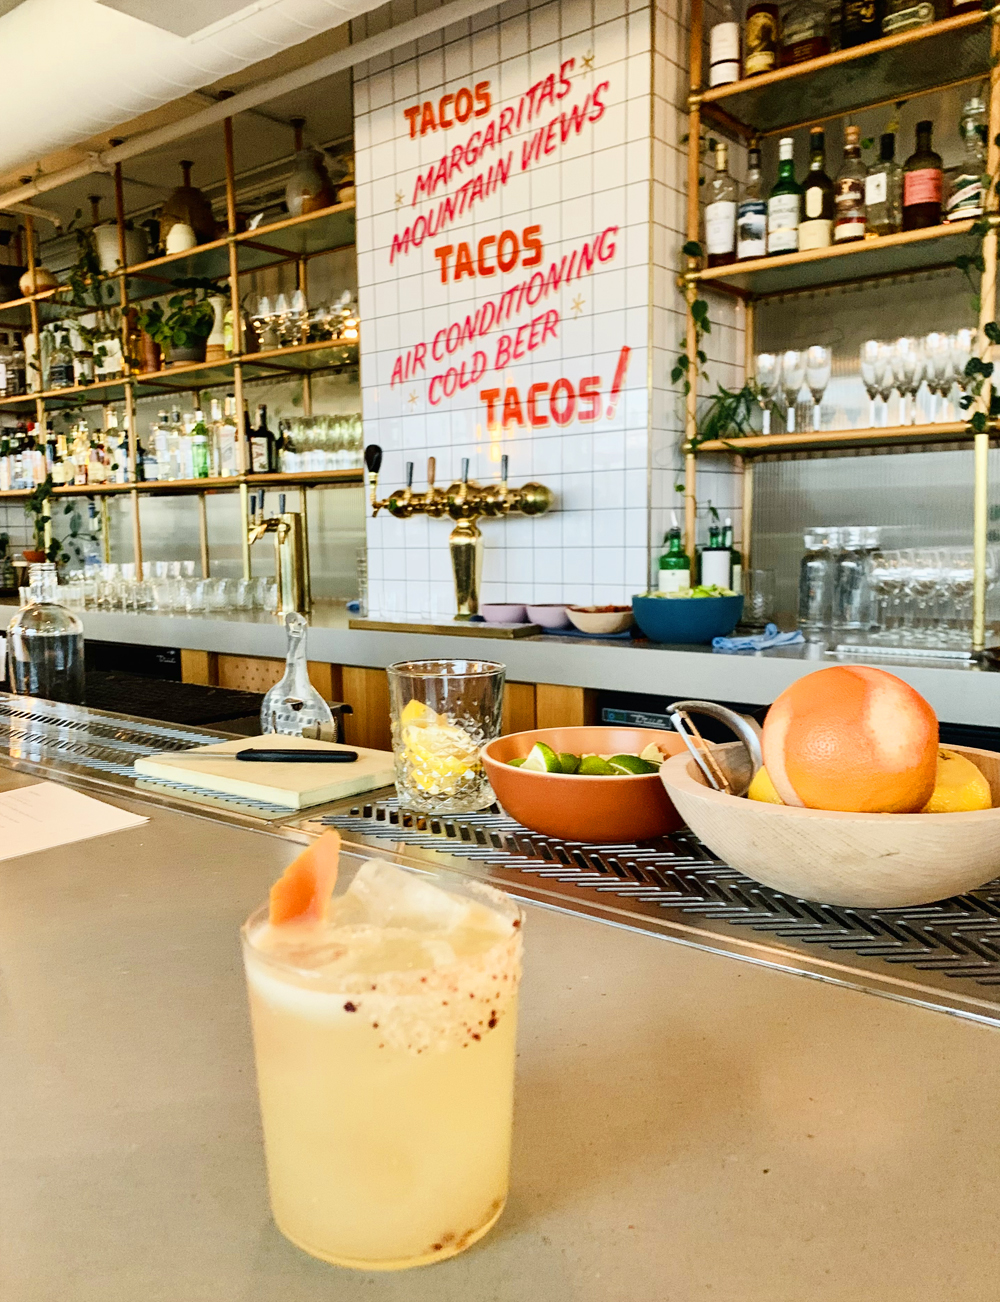
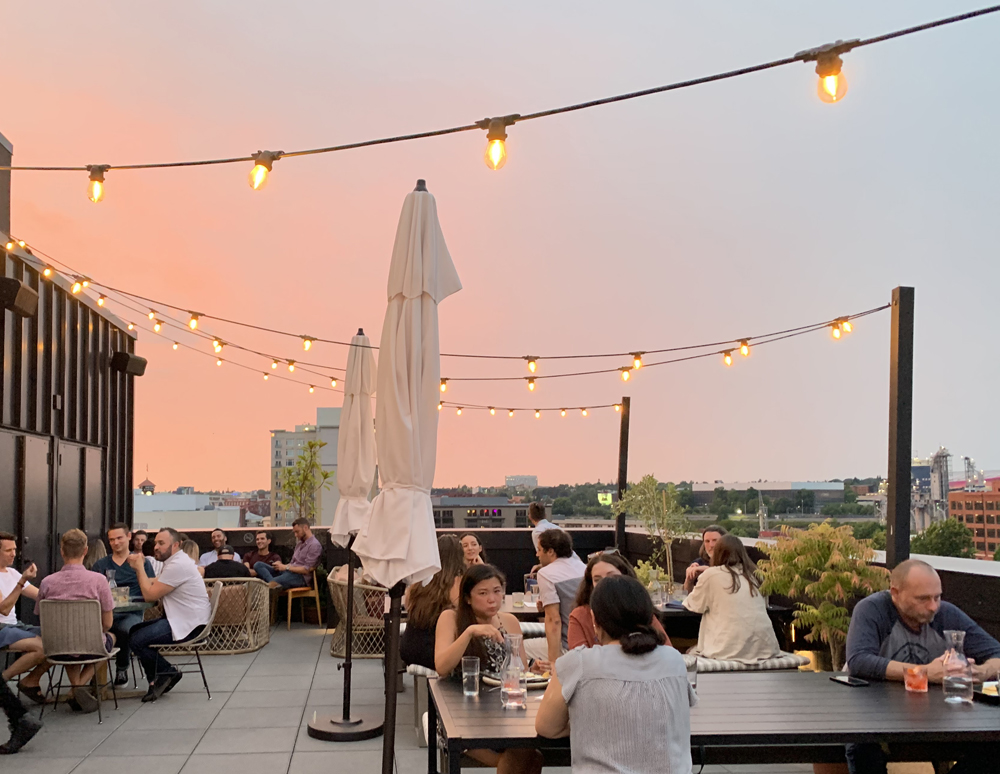
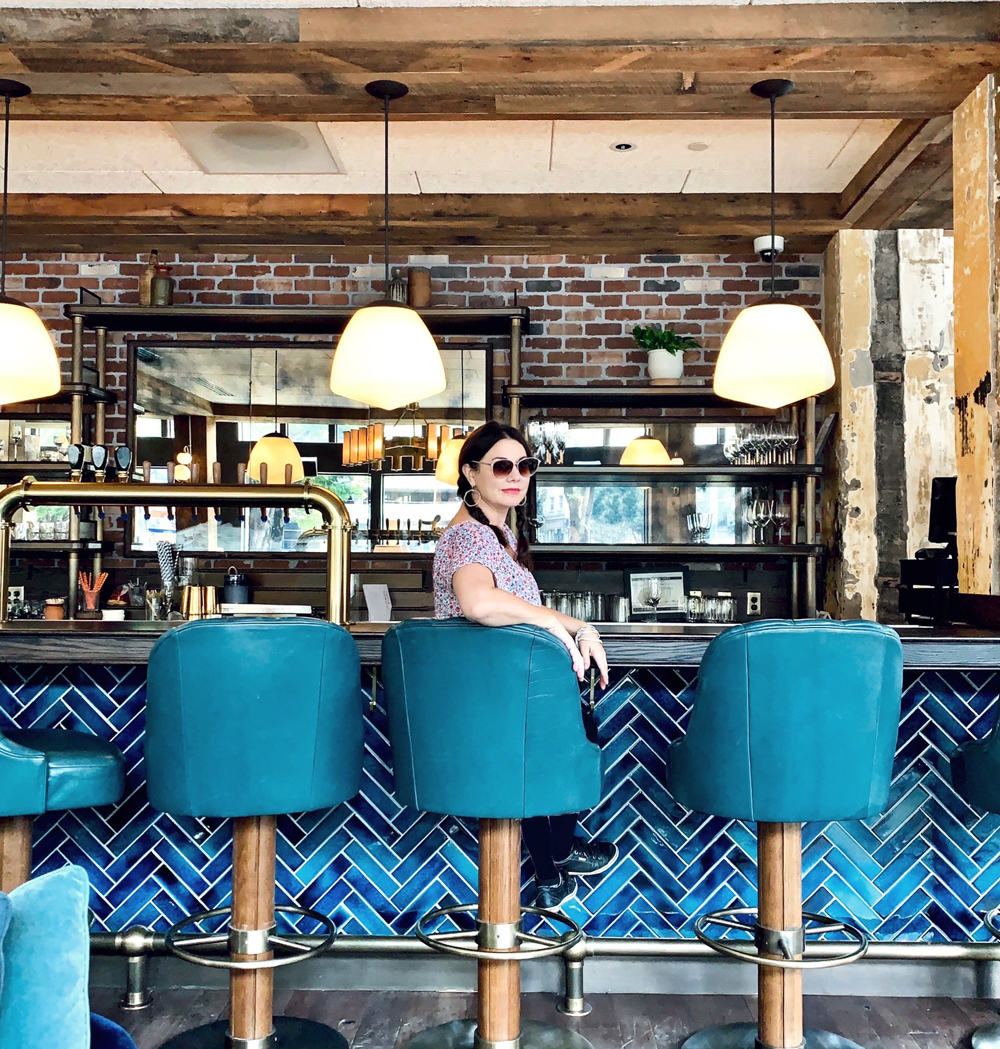
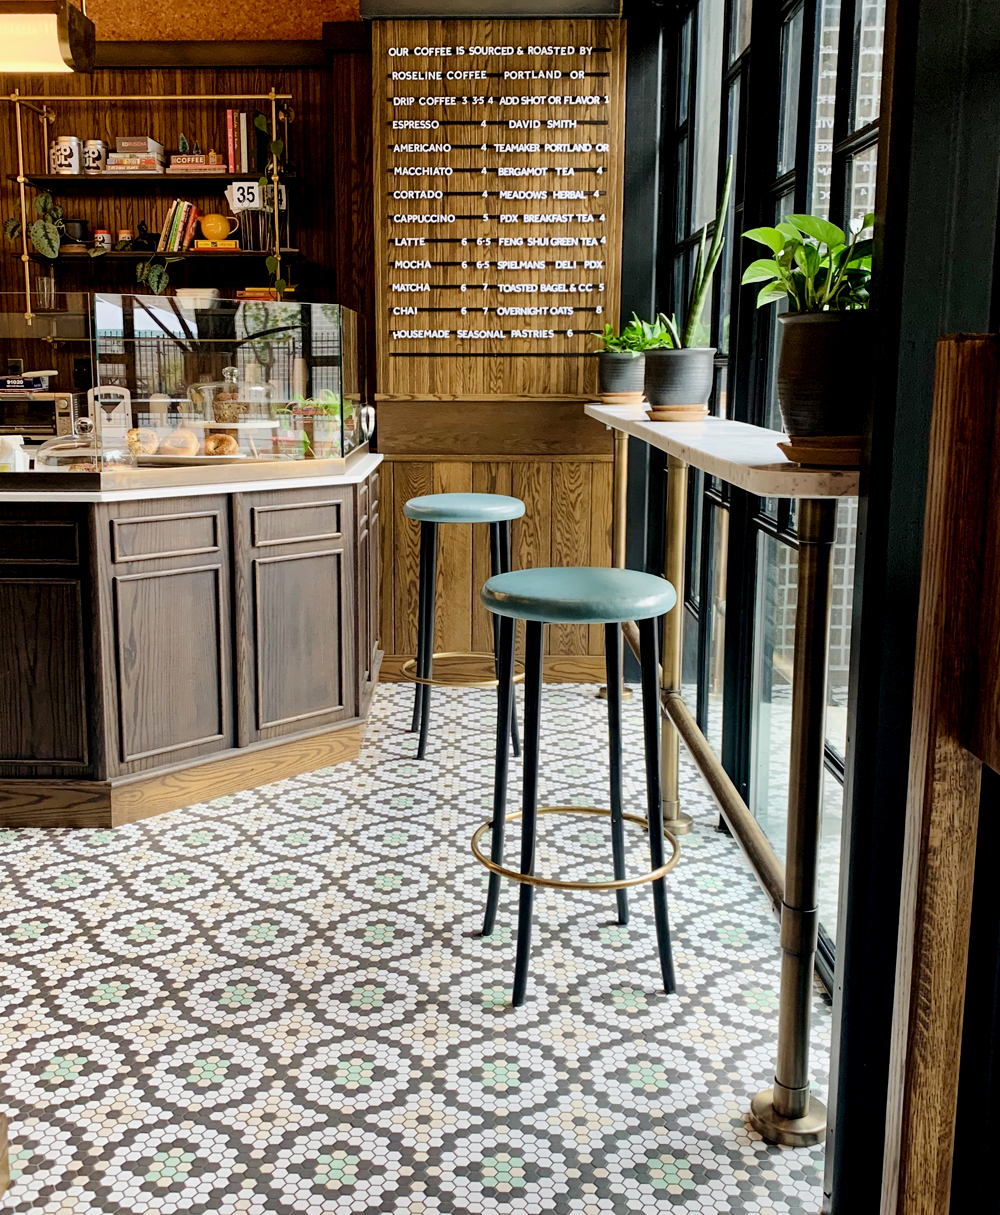
Arriving in Portland my immediate impression was the opposite of Ashland. It was big, crowded, and confusing to navigate. I checked into the Hoxton hotel and headed to the rooftop bar to relax with tacos and sunset views.


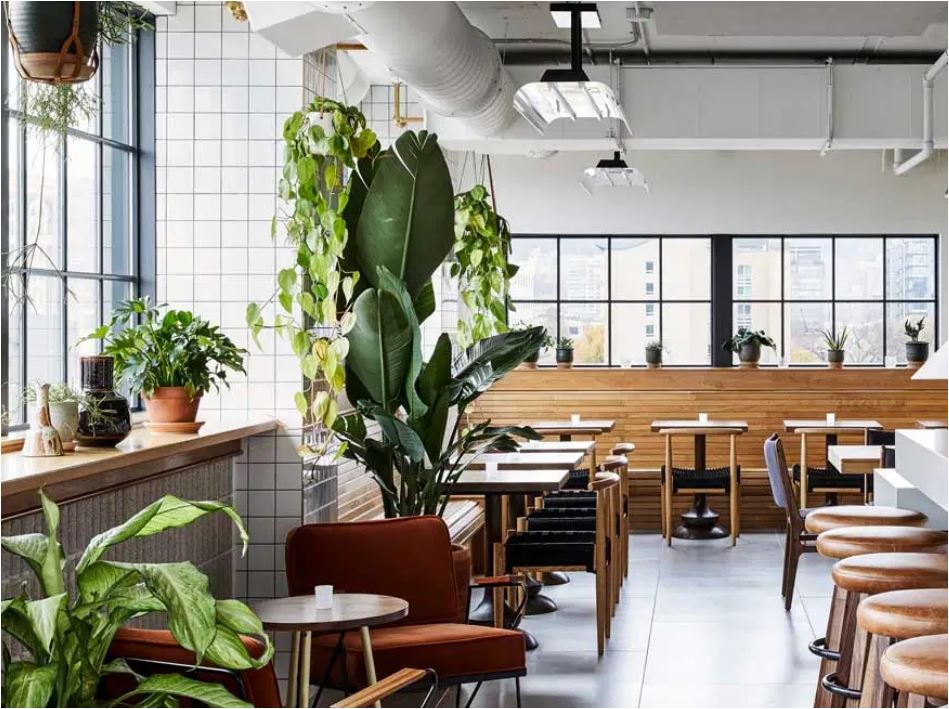
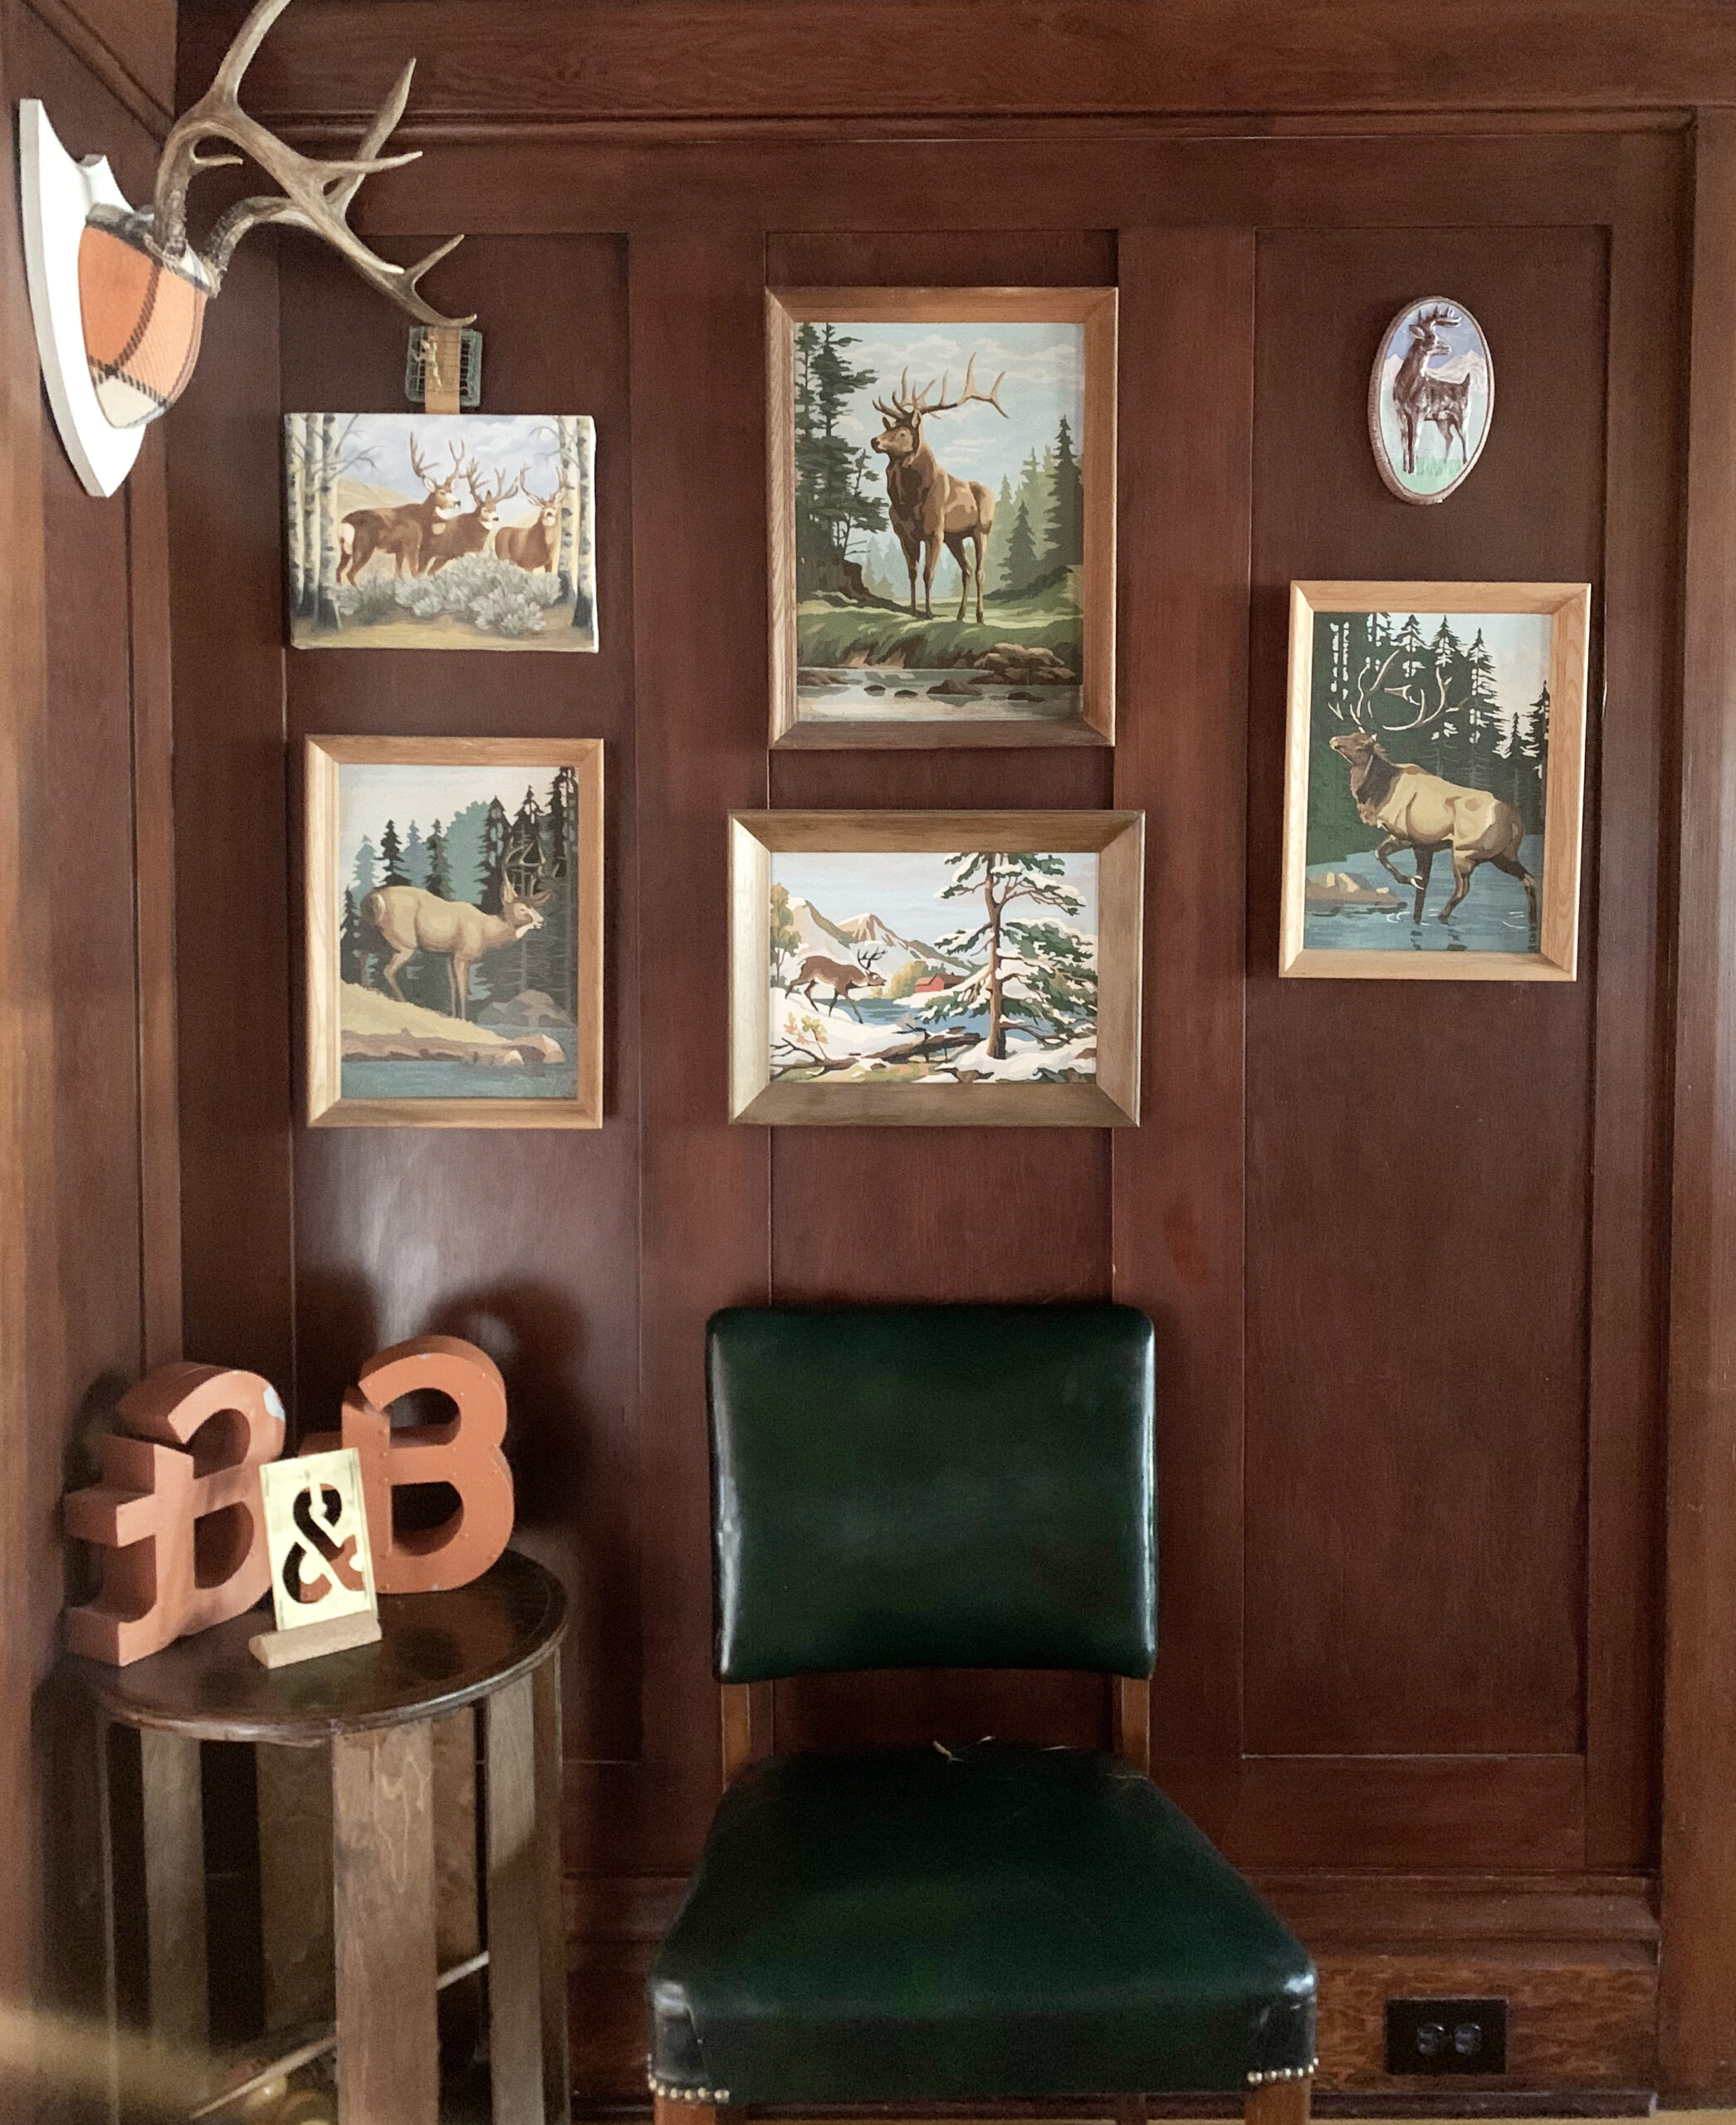
I loved the interior of this hotel, its decorated with a cozy mid century vibe (see more pictures here) and it was a cozy place to relax and have morning coffee.


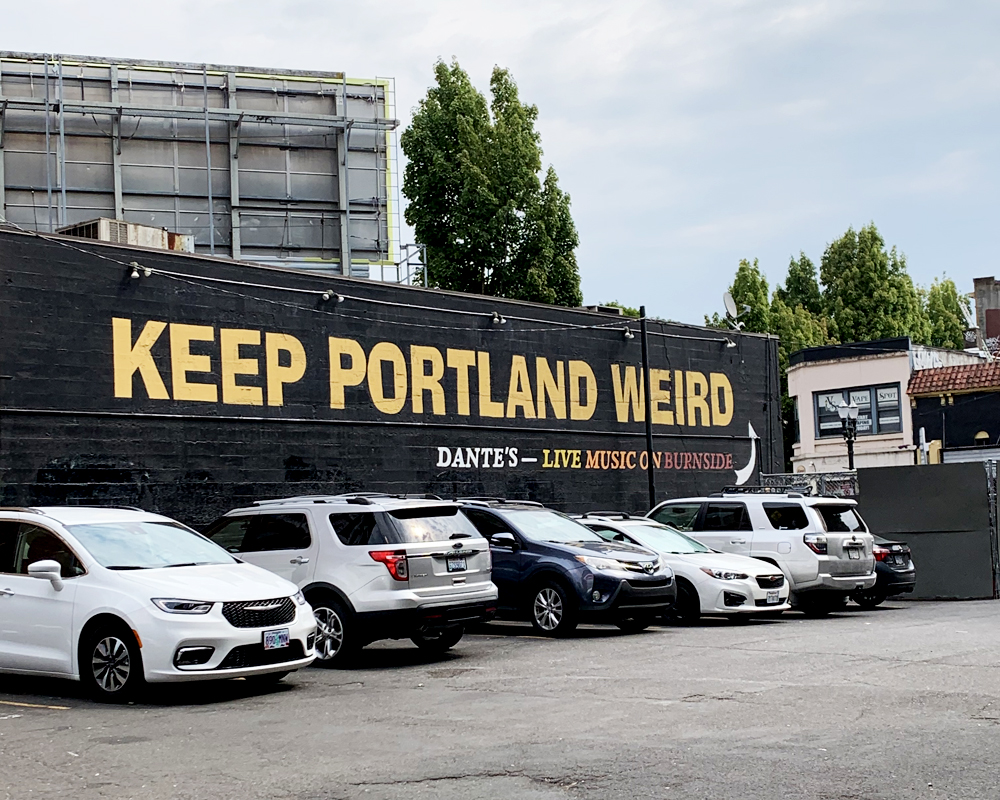
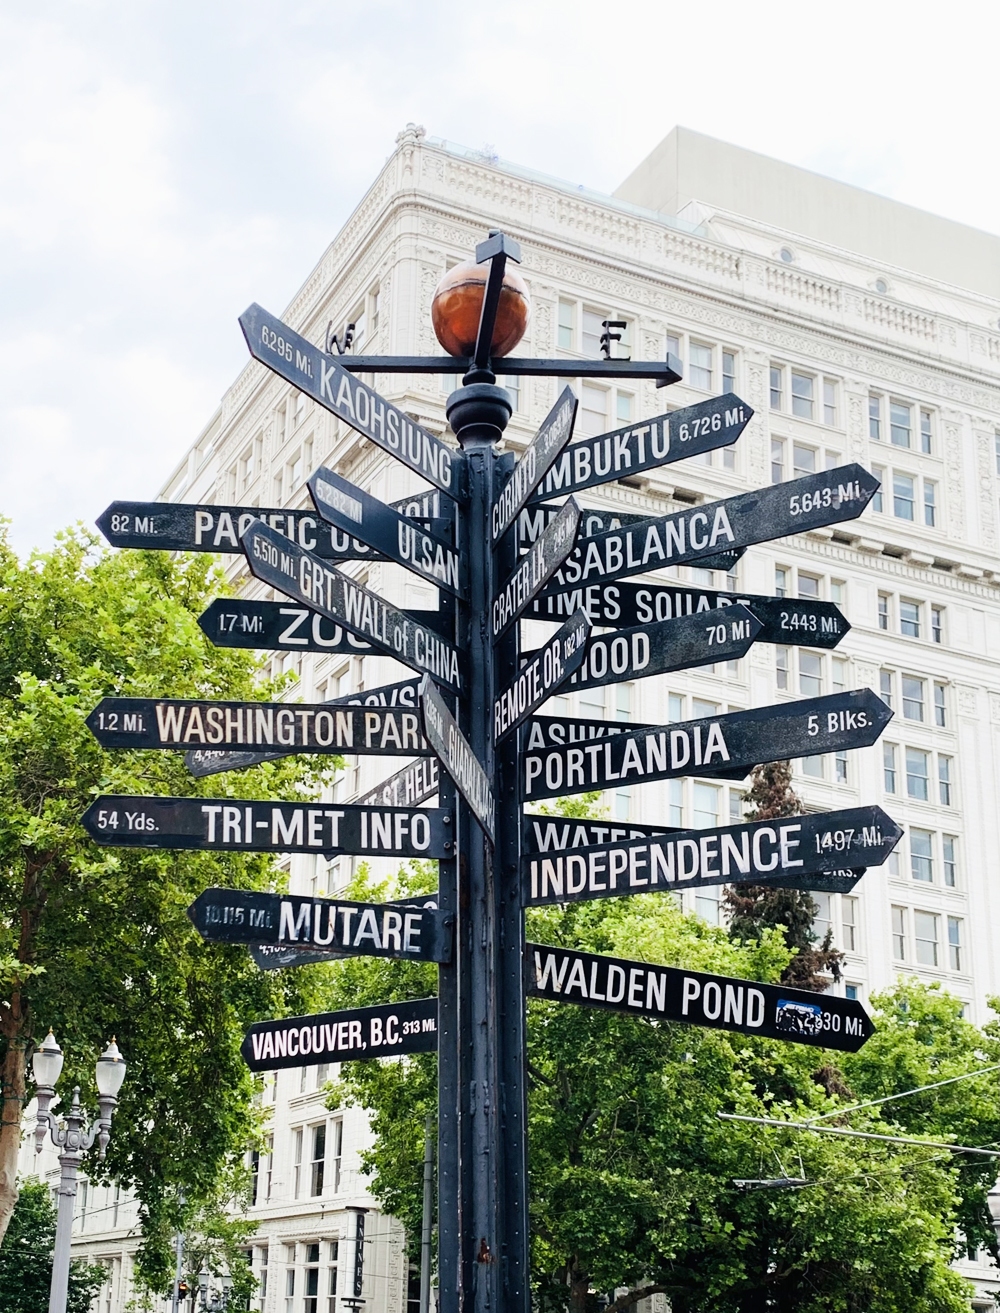
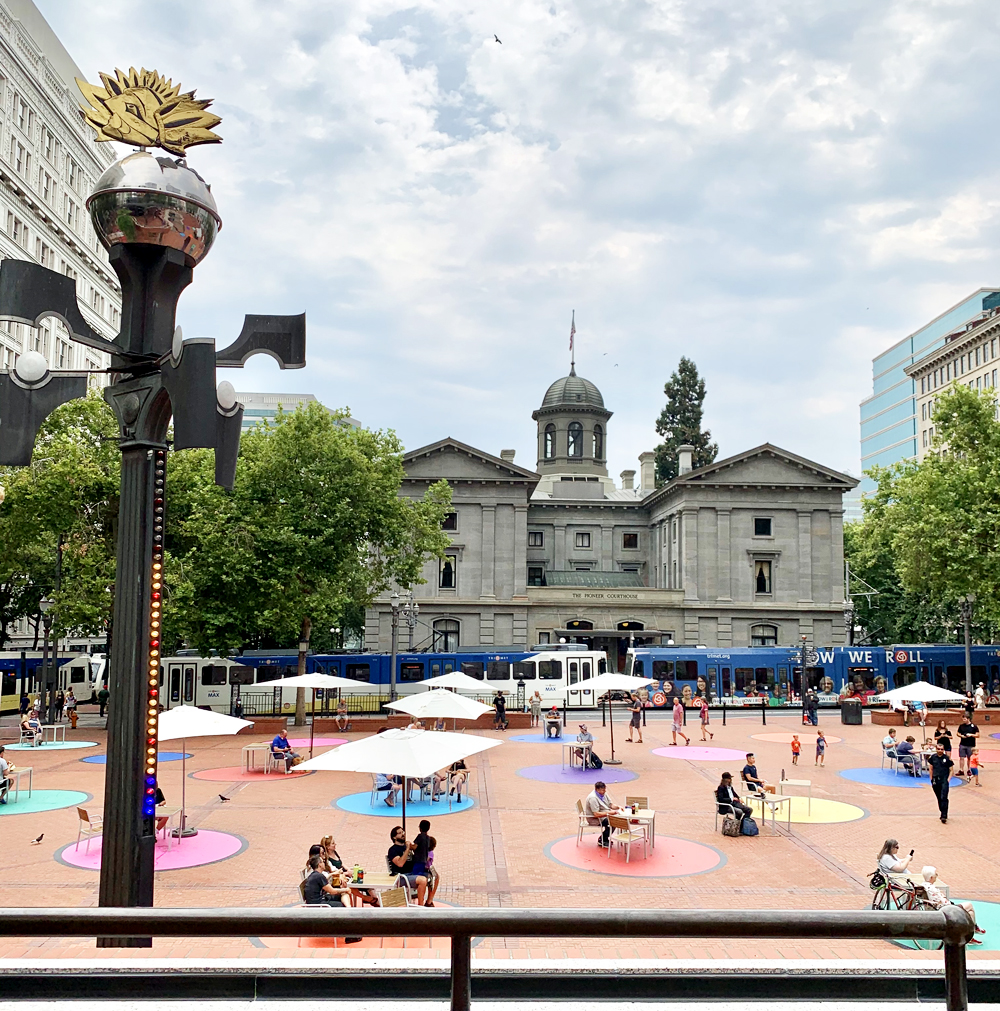
I explored Portland on foot for two days. They take pride in their local motto “Keep Portland Weird” and I had mixed feelings about Portland downtown, but I found some spots that were cool like Pioneer Square and the Pearl District.

In Portland I discovered (and I had been warned) that the city struggles with a serious homeless population. The downtown areas are covered in tents and there were a lot of transients walking around. It’s tragic and those of us who know San Francisco are acutely aware we have the same problem. I don’t know the solution but I do know it impacts the vibe of a city.

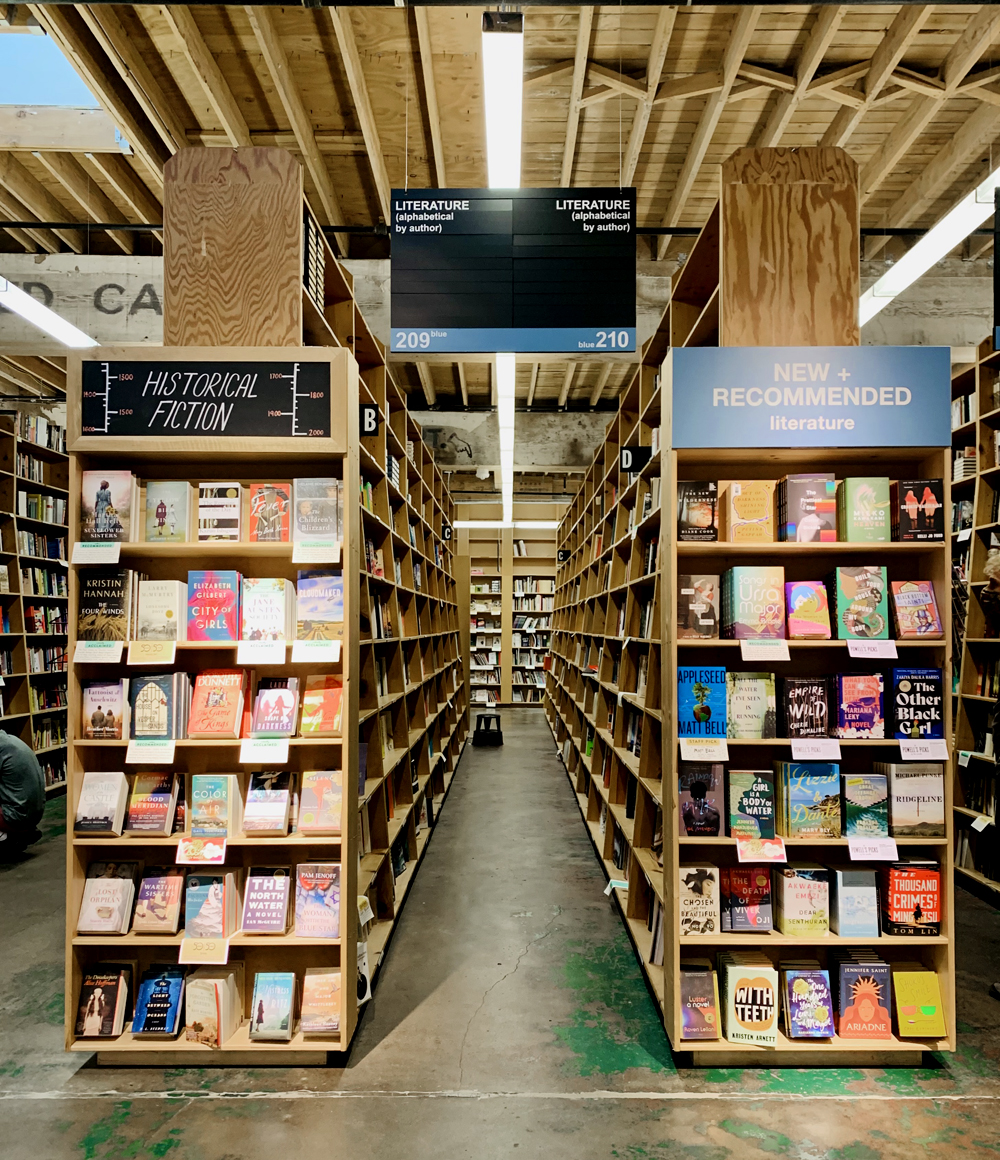
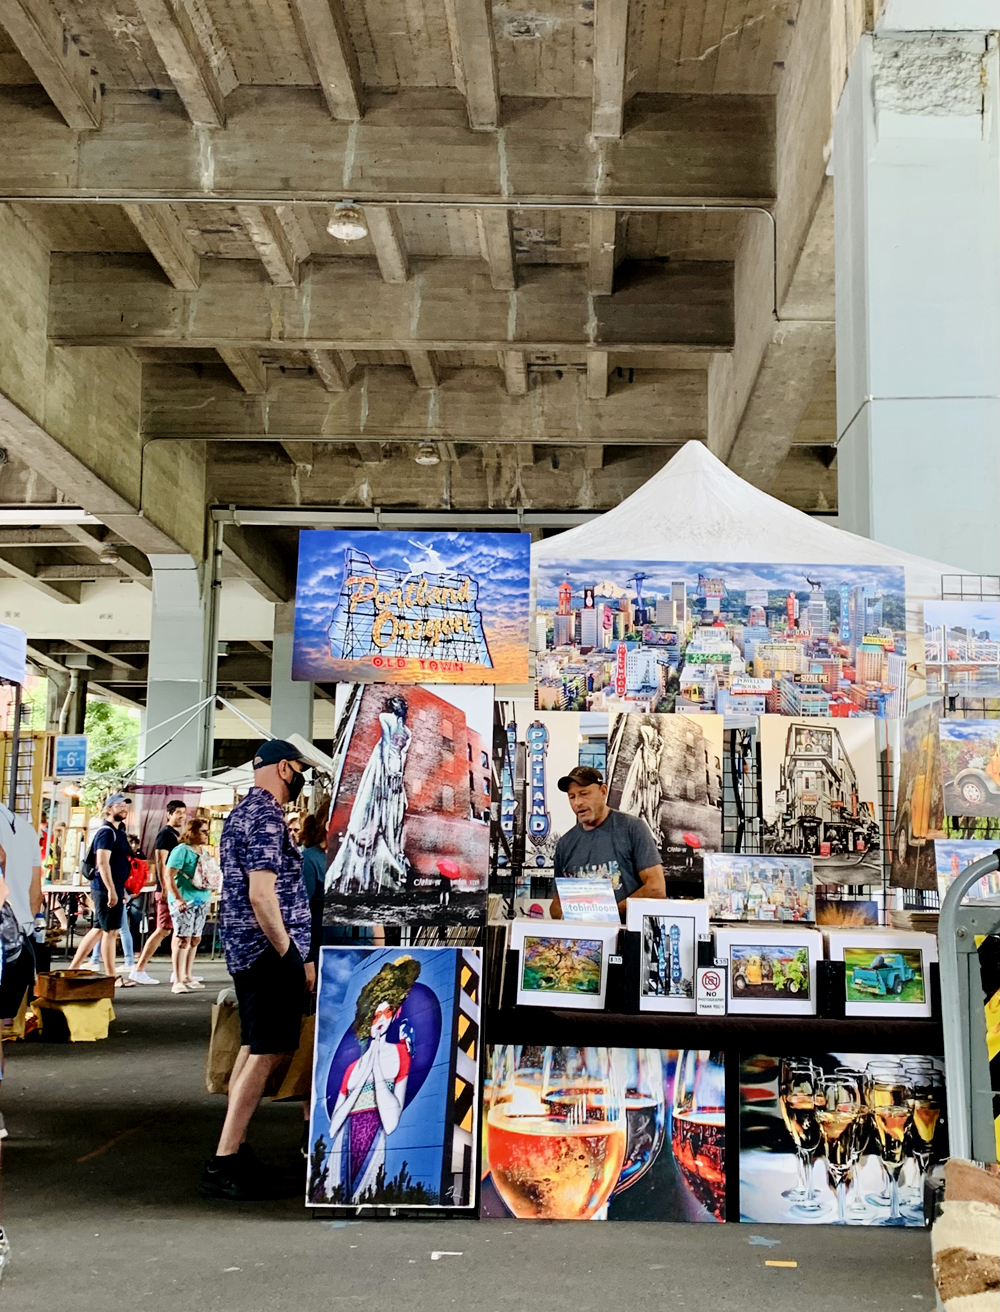
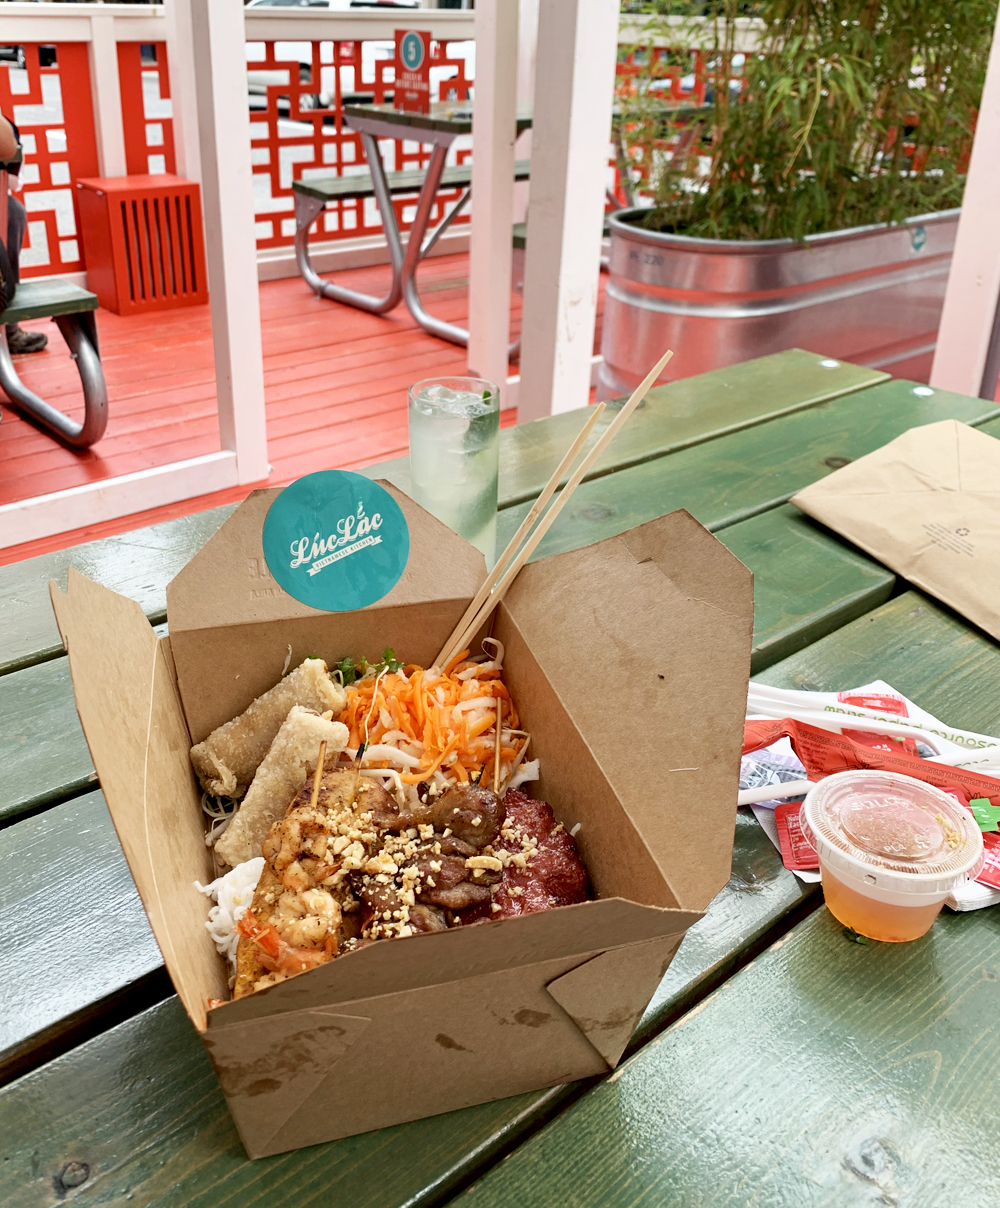
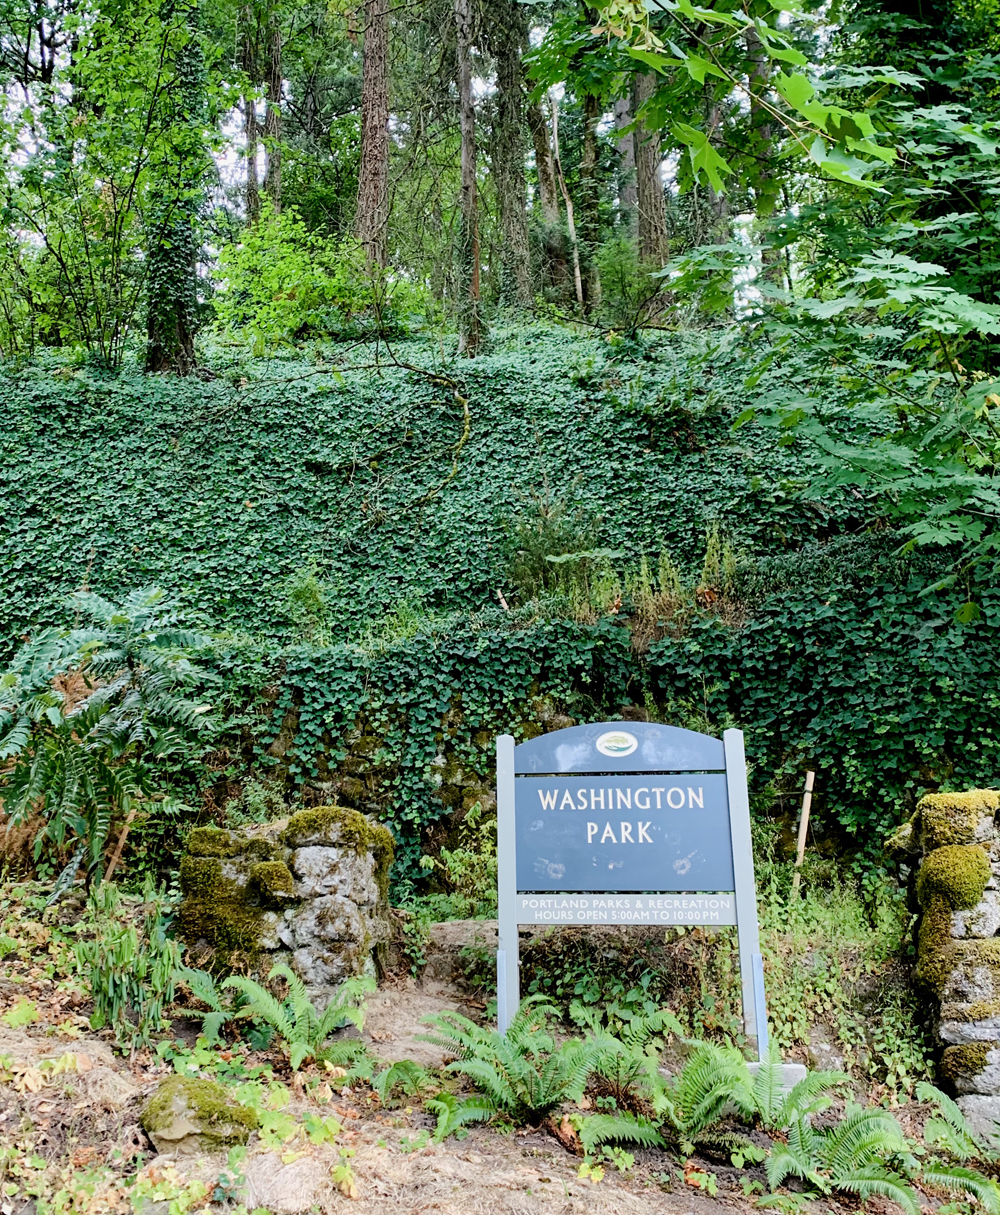
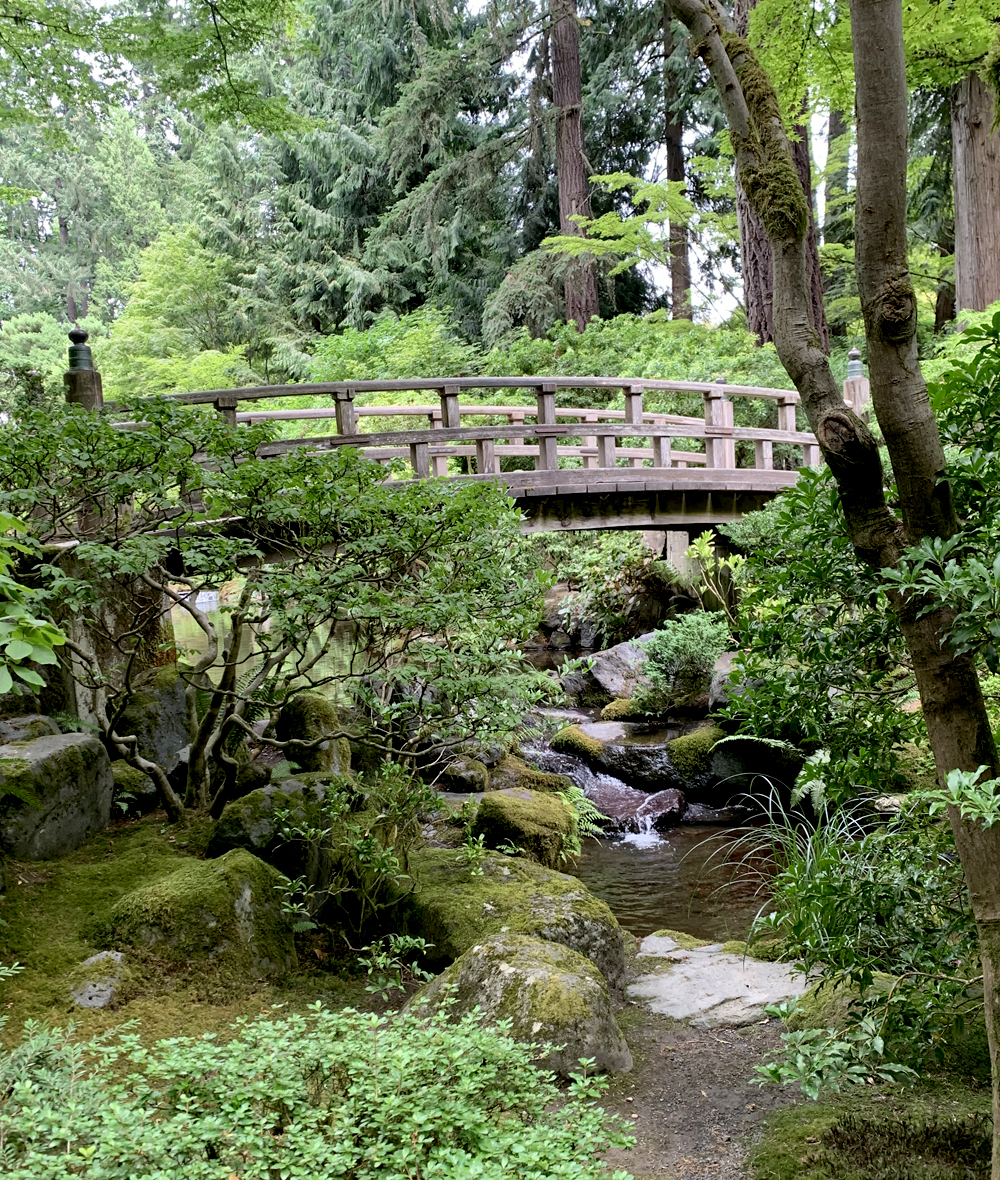
The highlights of Portland for me were popular Powells Books, the Saturday Portland market, and my outdoor lunch at Luc Lac kitchen. My most favorite stop was my hike through Washington Park to the zen Japanese garden, it was so beautiful and worth the long walk to that side of town and uphill hike through the park.


I left Portland and headed east to Hood River, a town I’d been wanting to see since reading about it. The drive east is beautiful, winding through the Pacific Northwest along the Columbia River, it’s hard to keep your eyes on the road with such natural beauty all around!

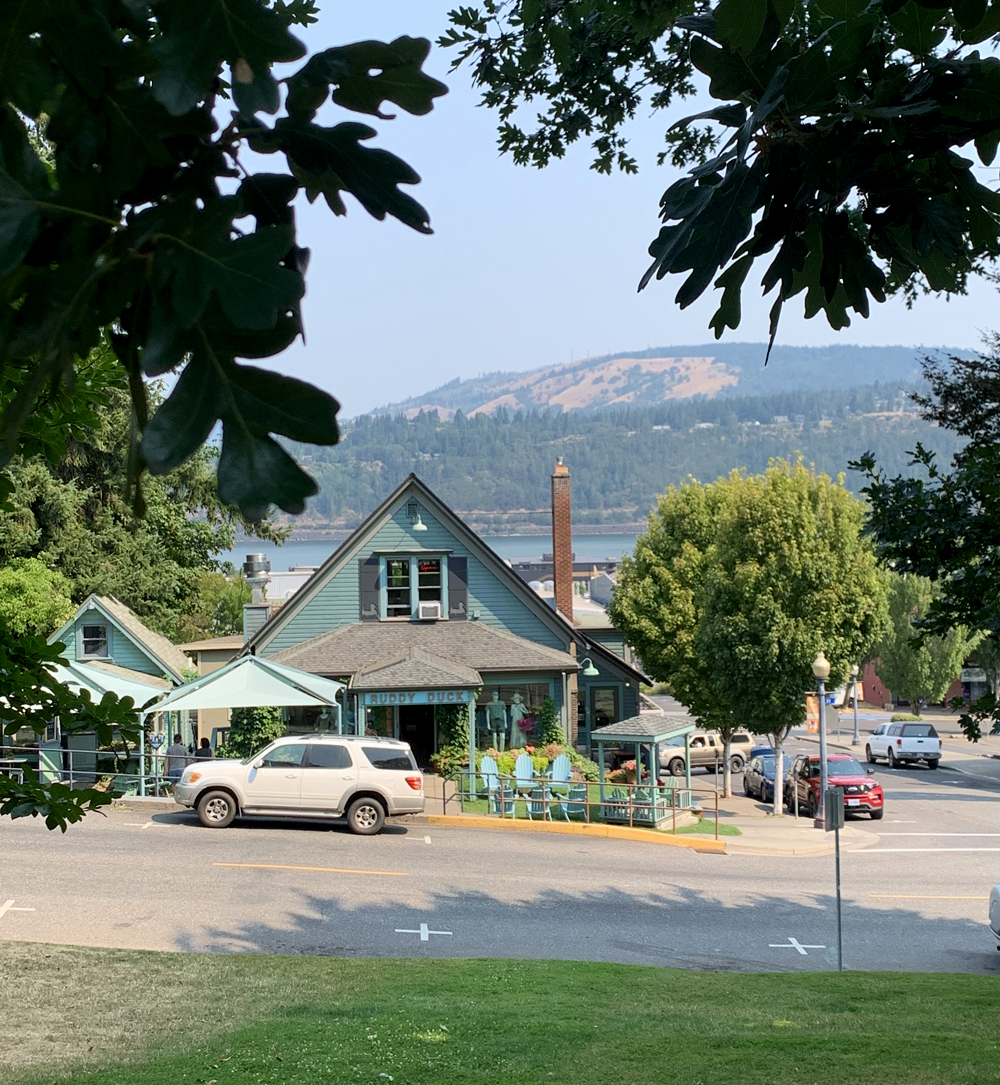
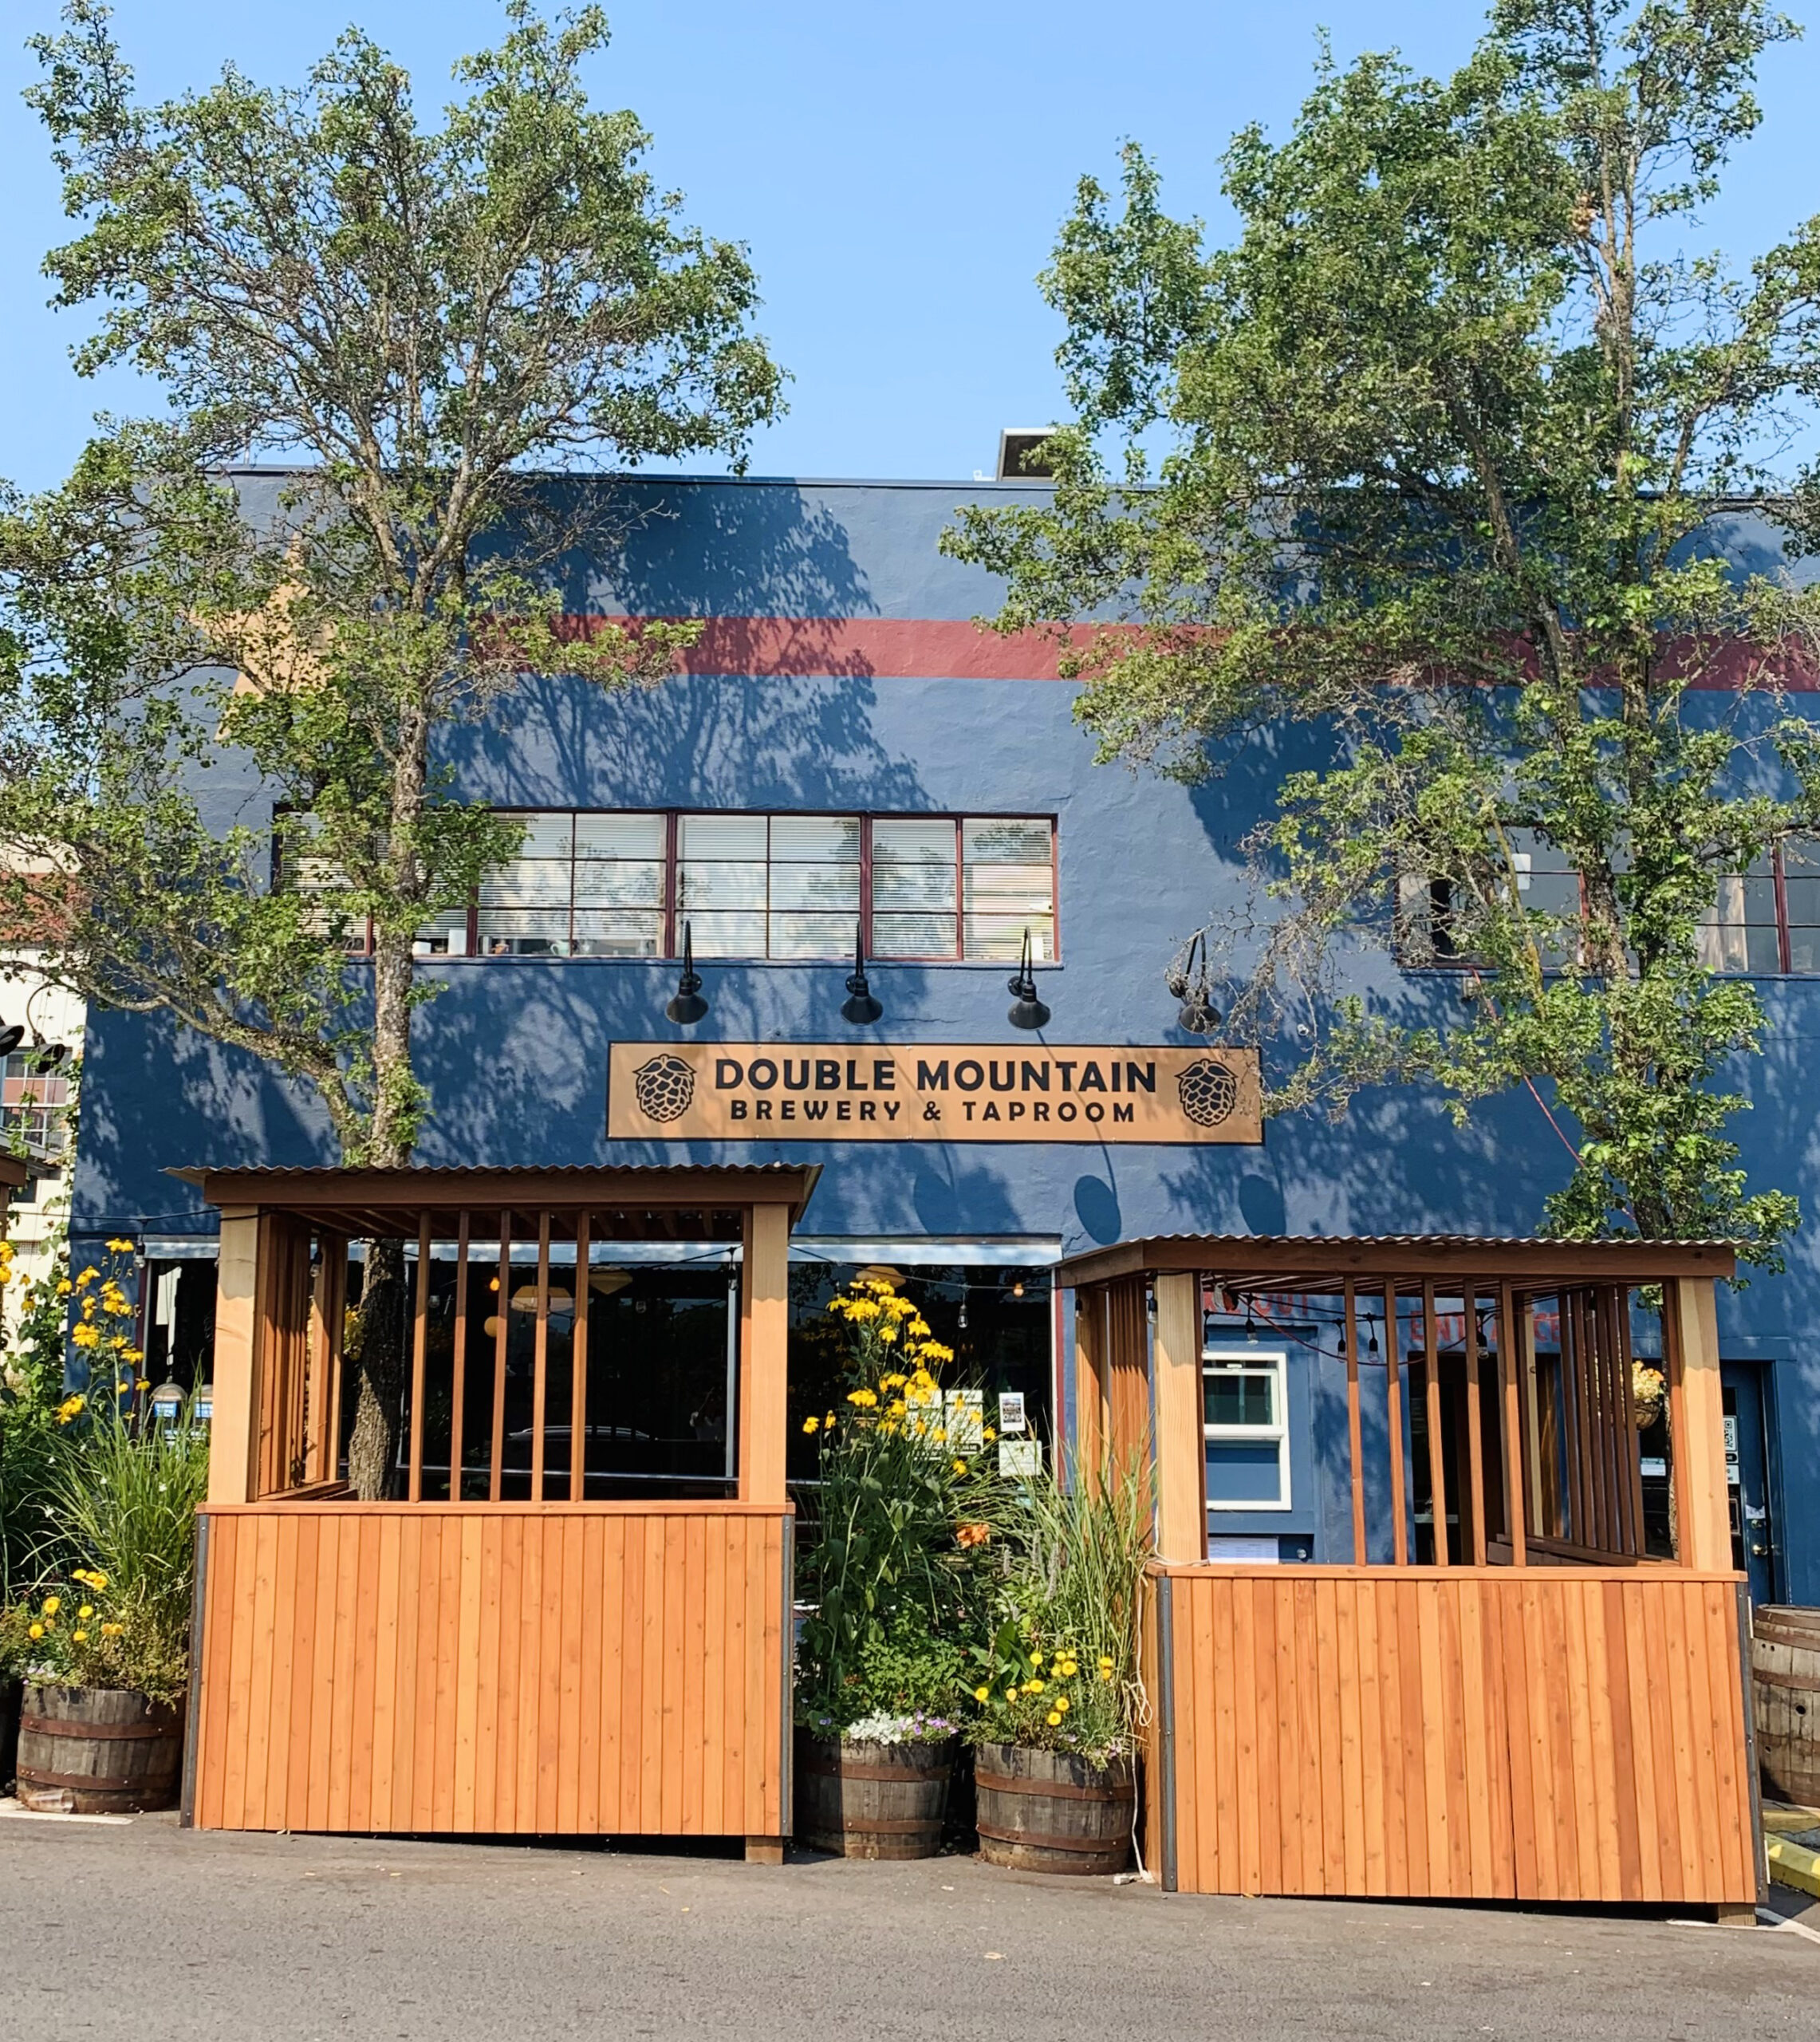
Hood River looked like a place where they’d film a Netflix series. You know they type: a few charming downtown streets filled with shops, cafes, and breweries, surrounded by craftsman style homes, where life moves slowly and it feels like everyone meets for coffee every morning and knows everyone in town.

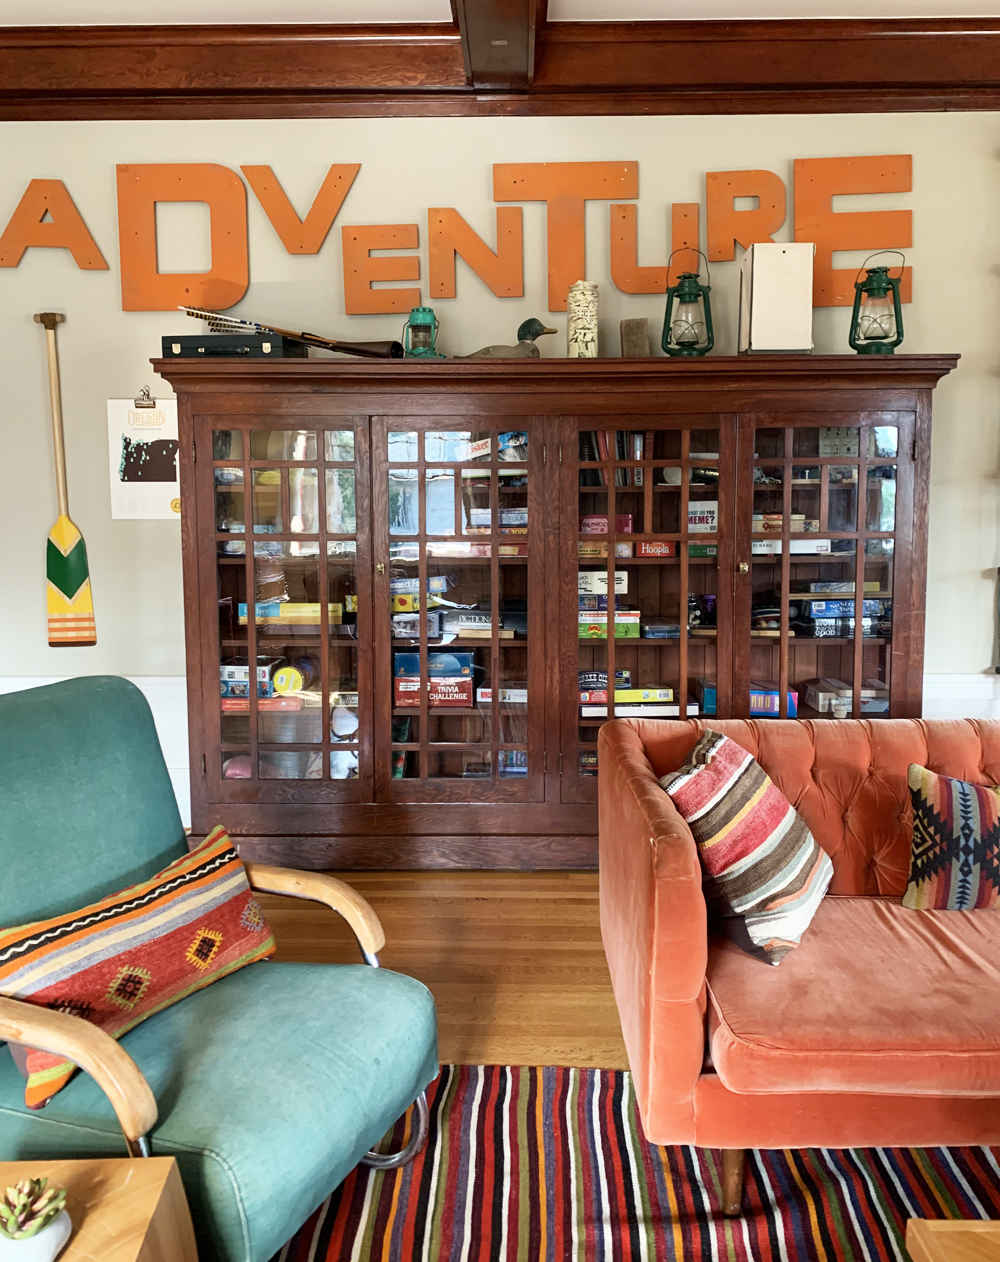
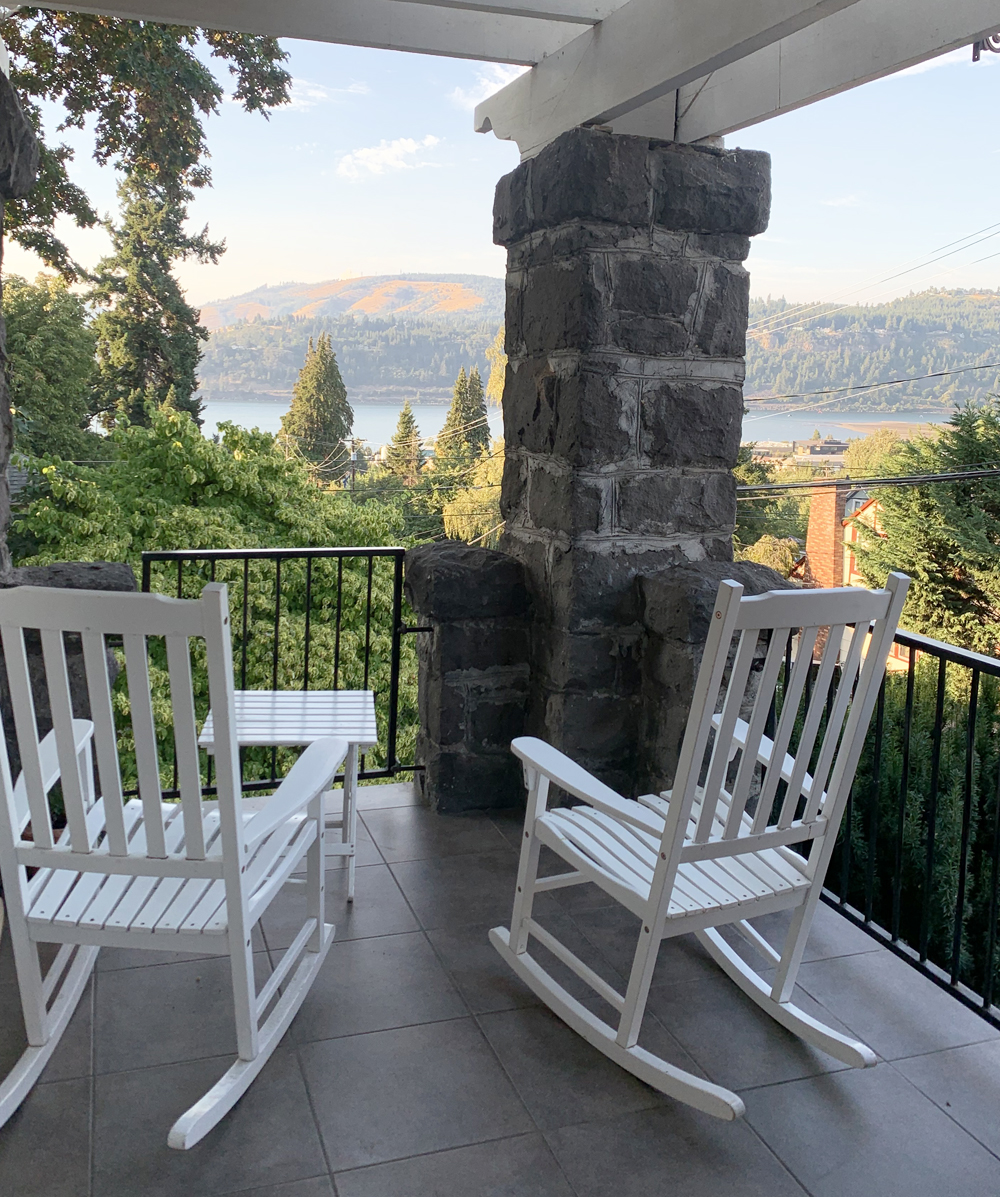
I rented a private room at the best Airbnb that was decorated with such cute and quirky furnishings and decor.

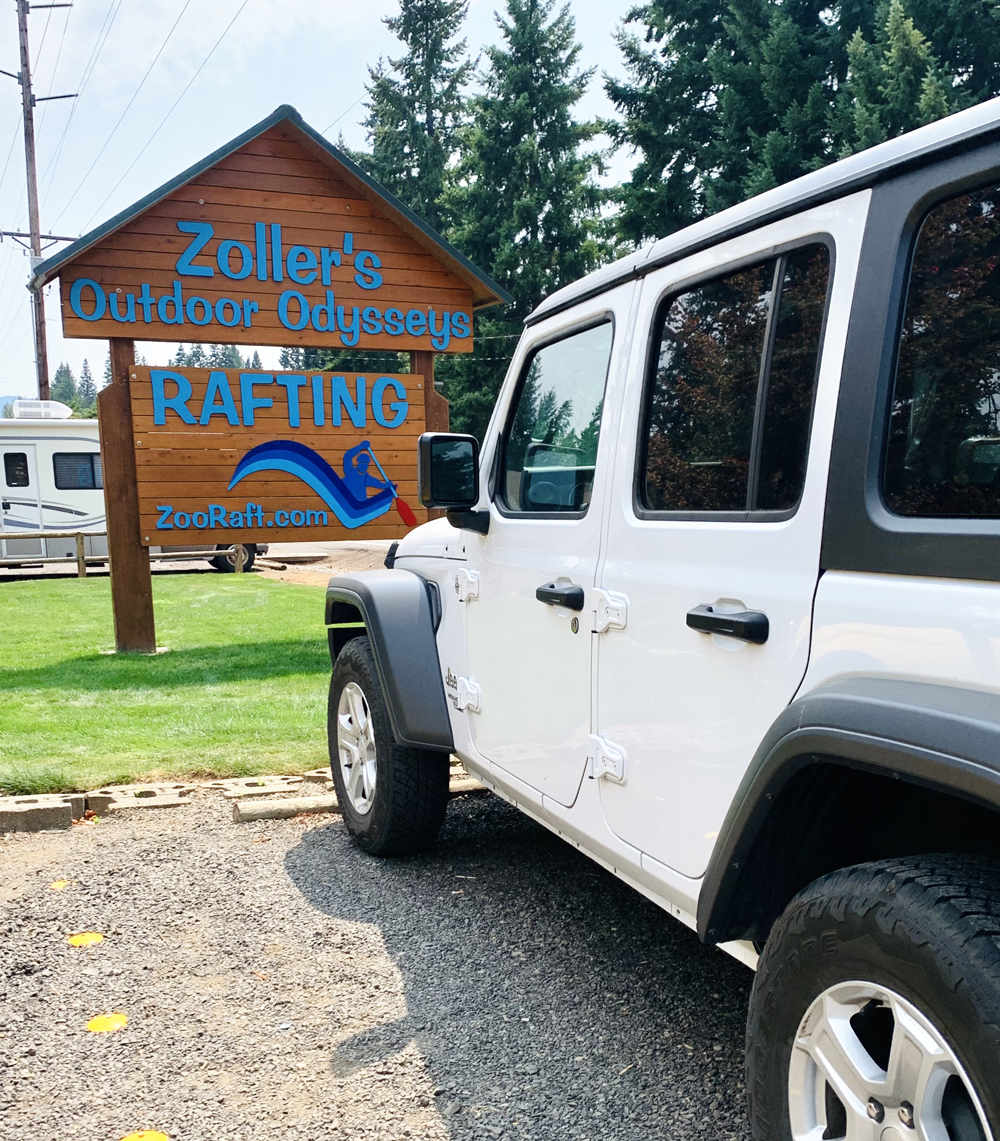
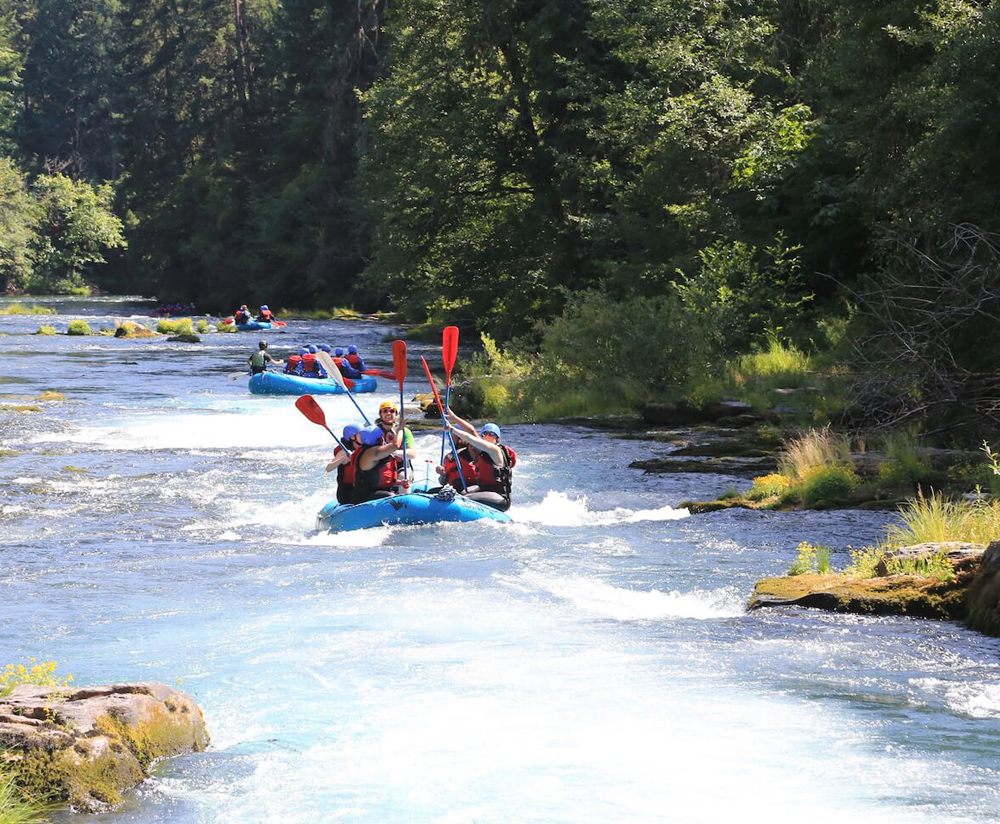
I had two amazing experiences in Hood River, the first was whitewater rafting with ZooRaft. So much fun! As a solo passenger I was partnered with a really cute family and spent a few hours riding rapids and drifting down river with them. It was one of the most pleasant travel experiences I’ve ever had, being on the water riding through a canyon surrounded by beautiful forests.

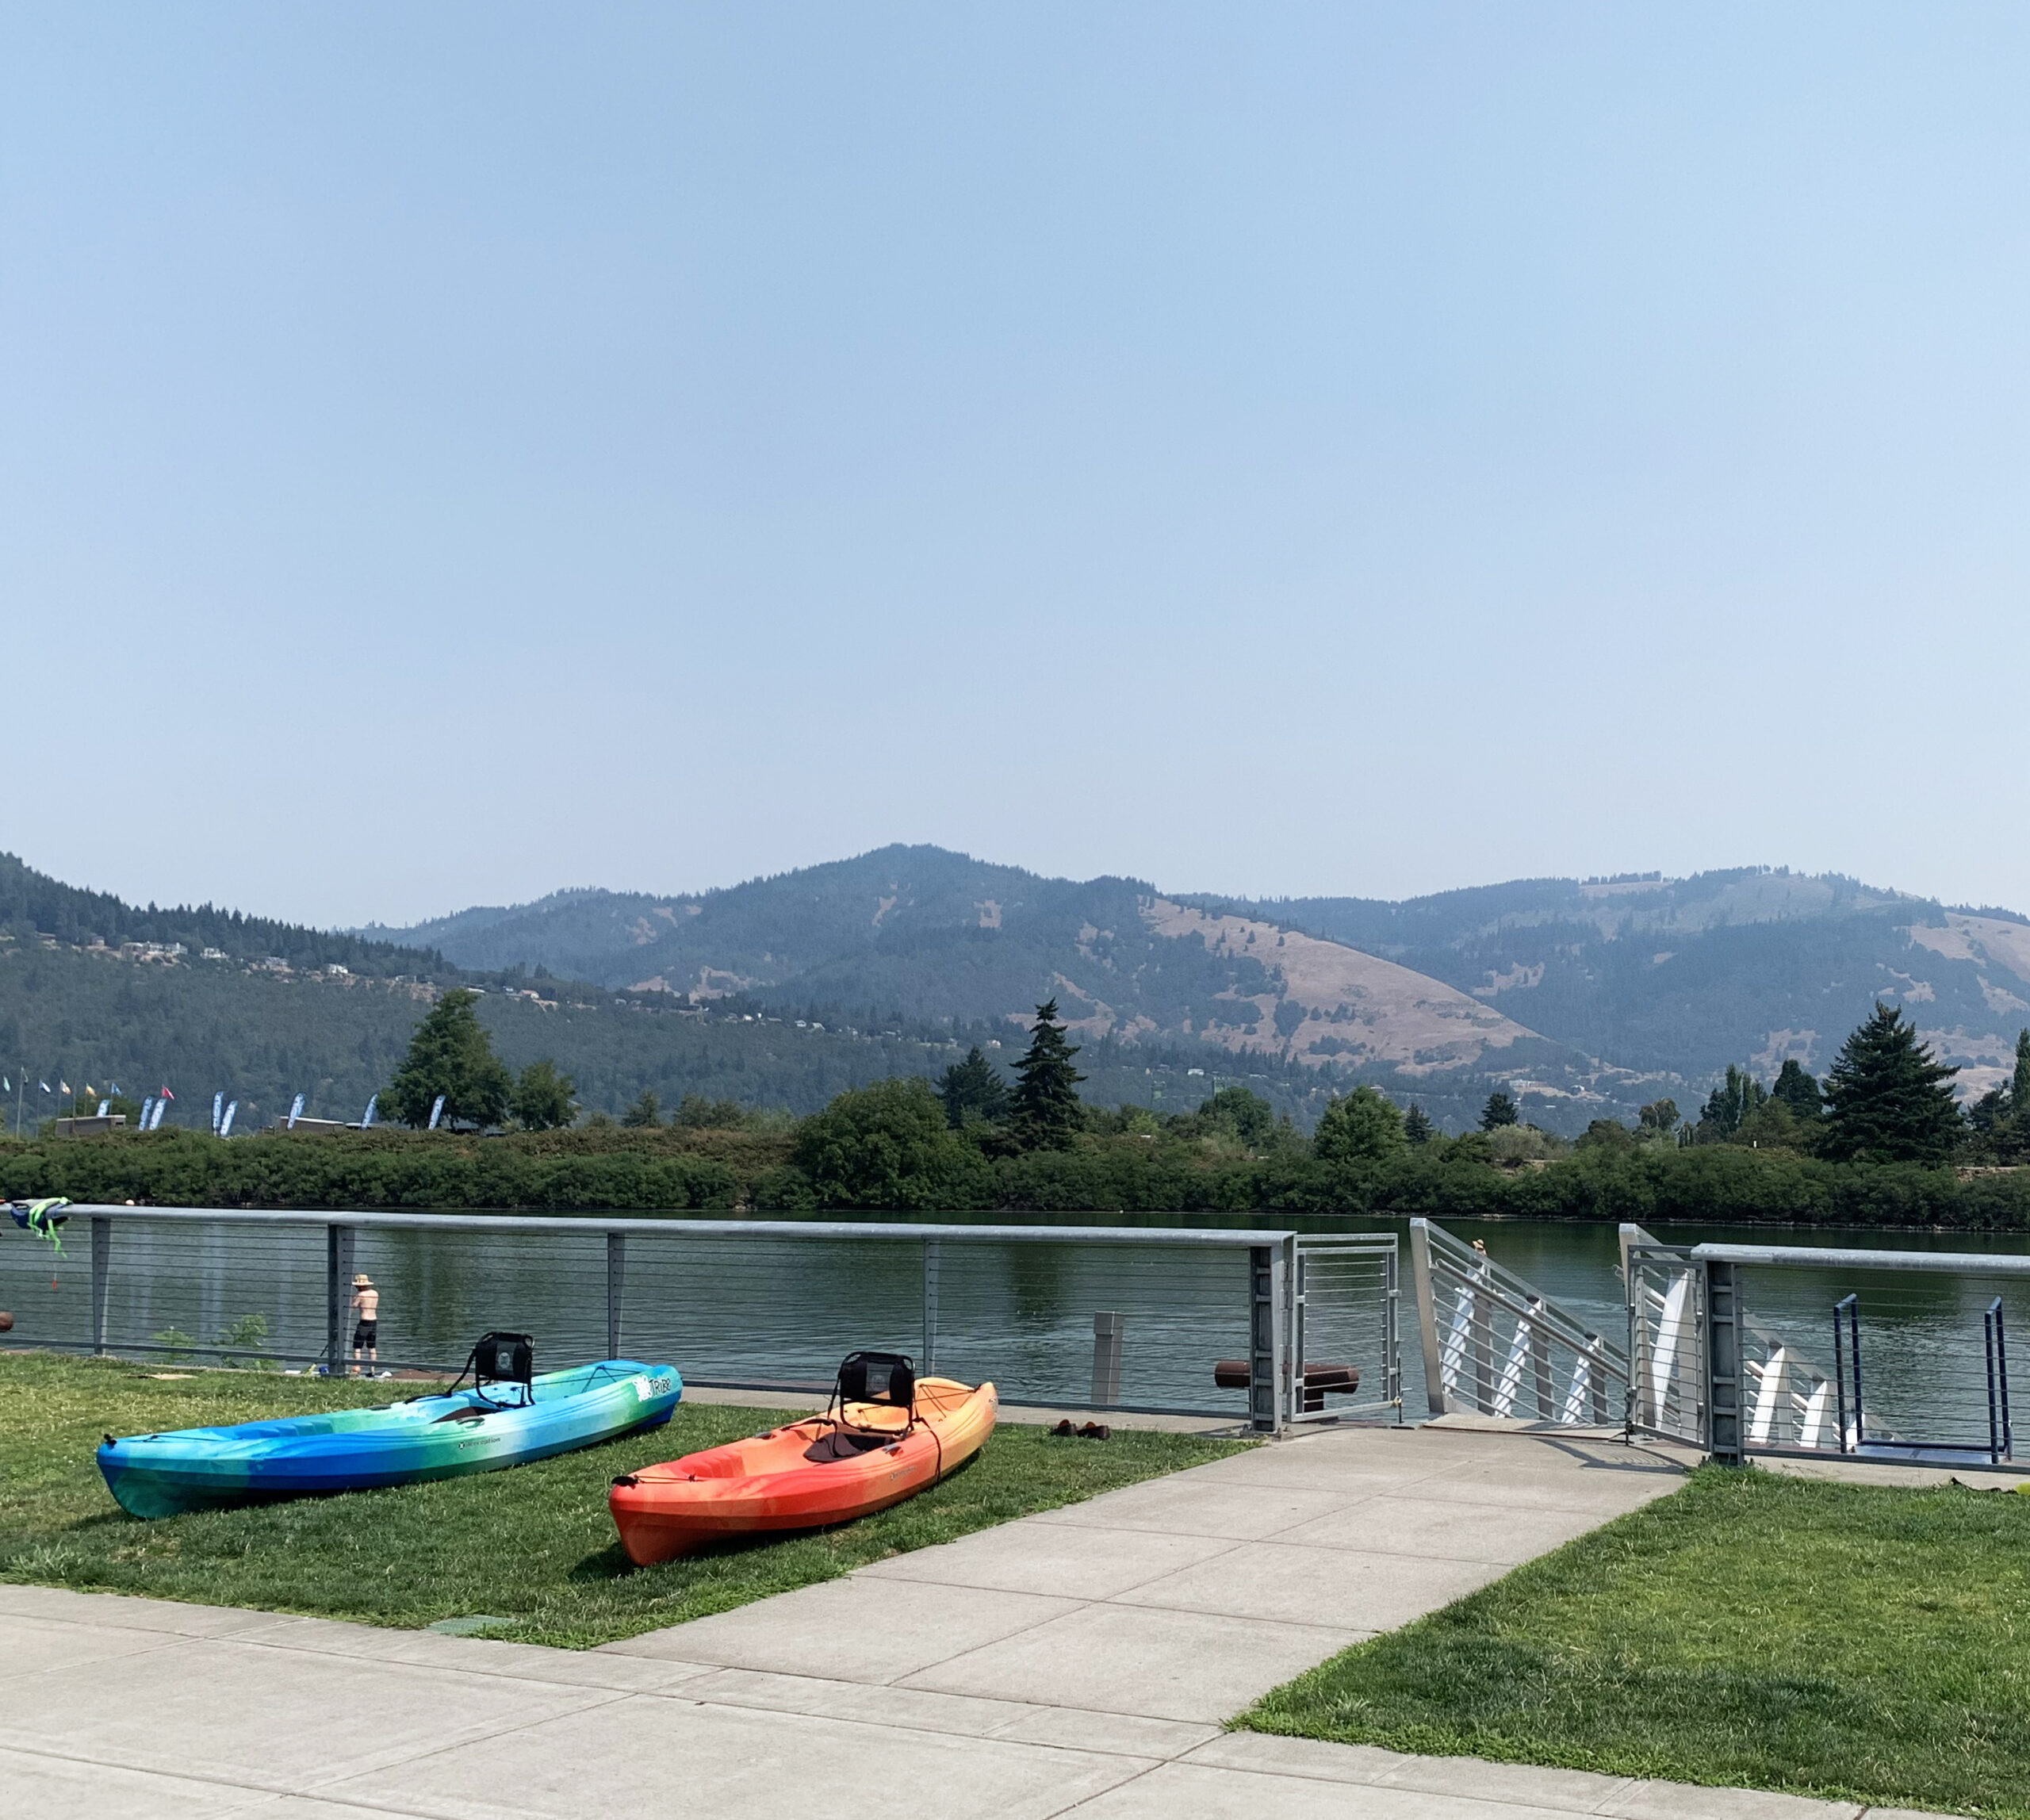
Hood River is a place where there are a lot of outdoor adventures: windsurfing, kayaking, and hiking, no wonder it’s such a happy place to be!

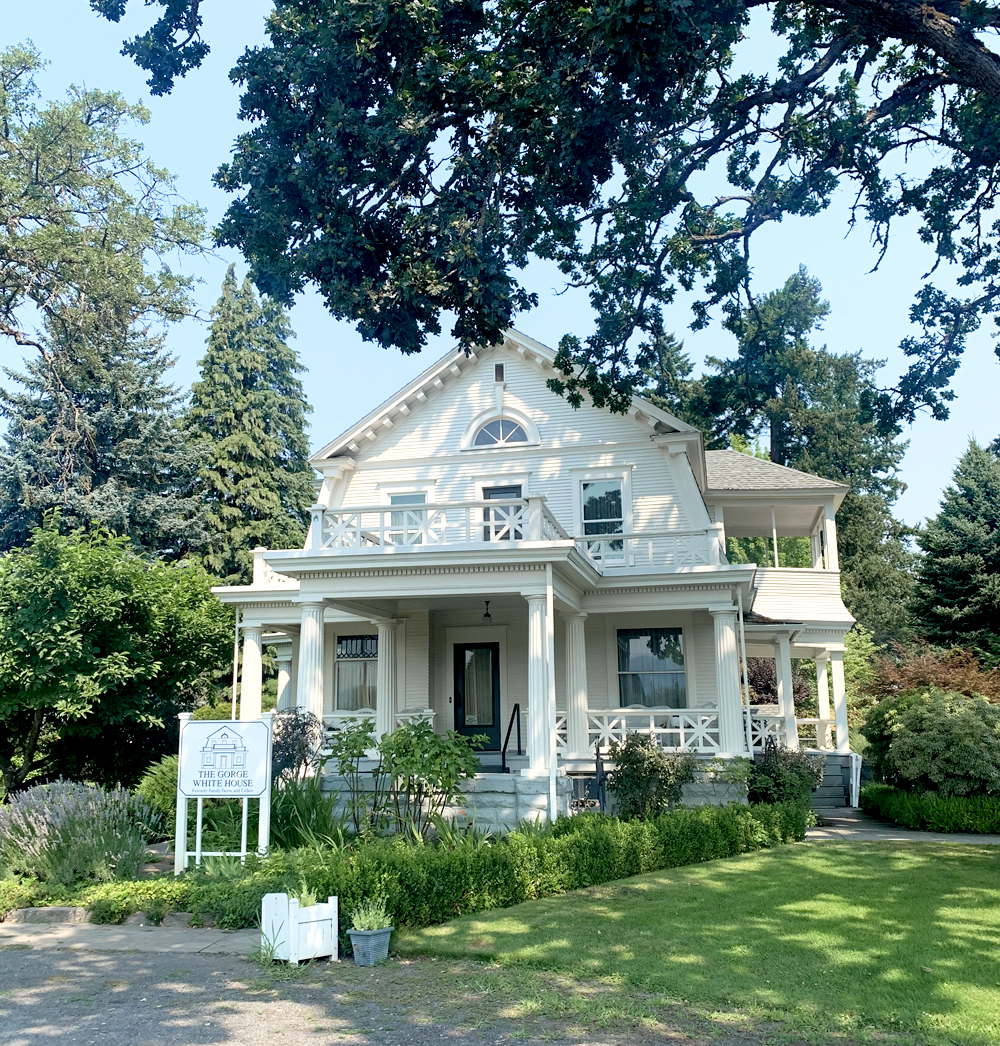
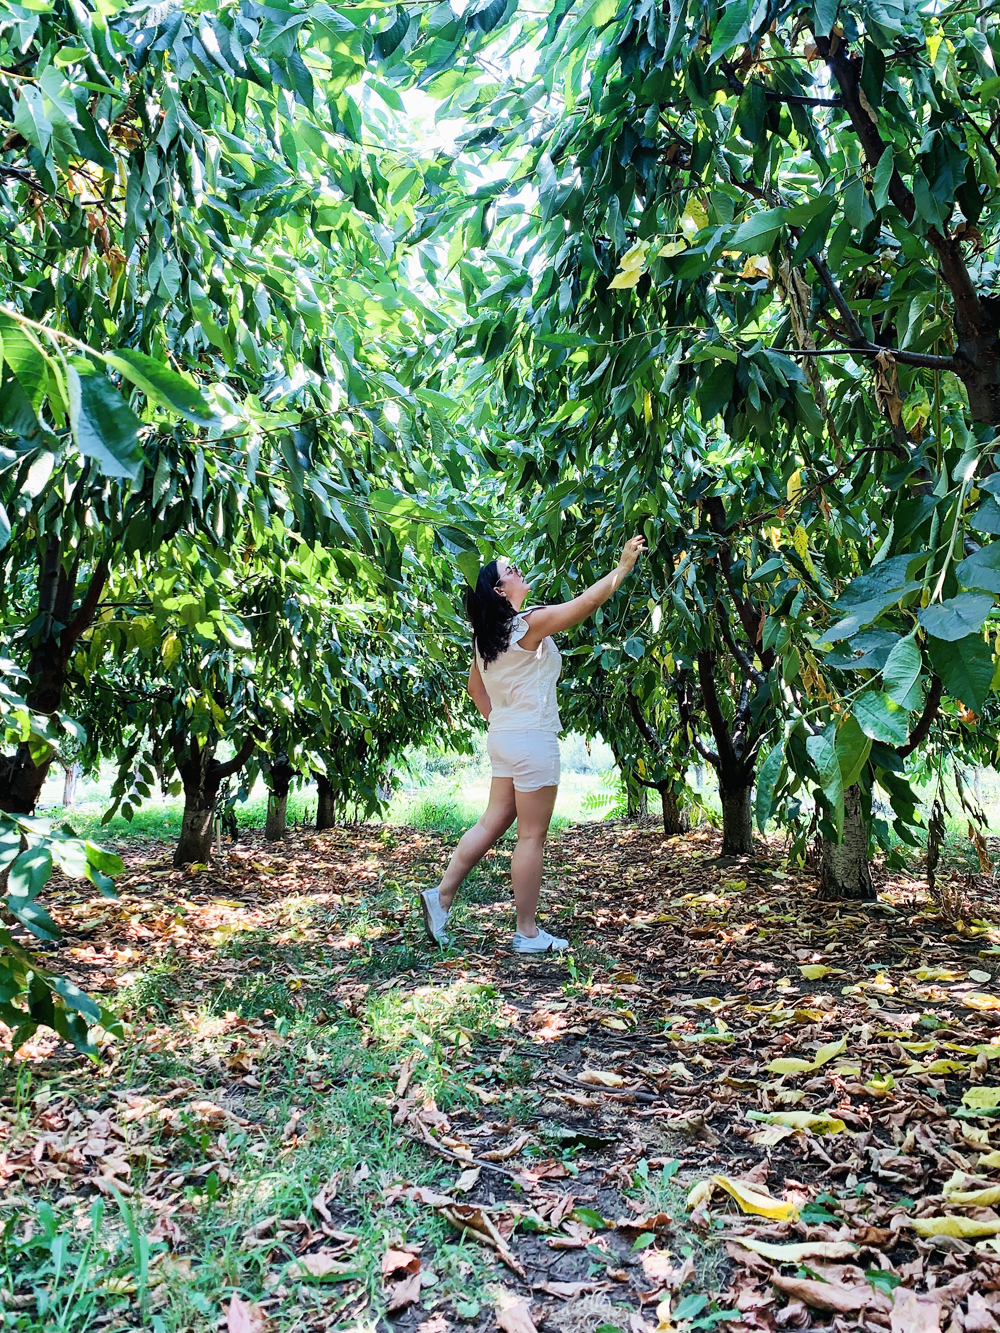
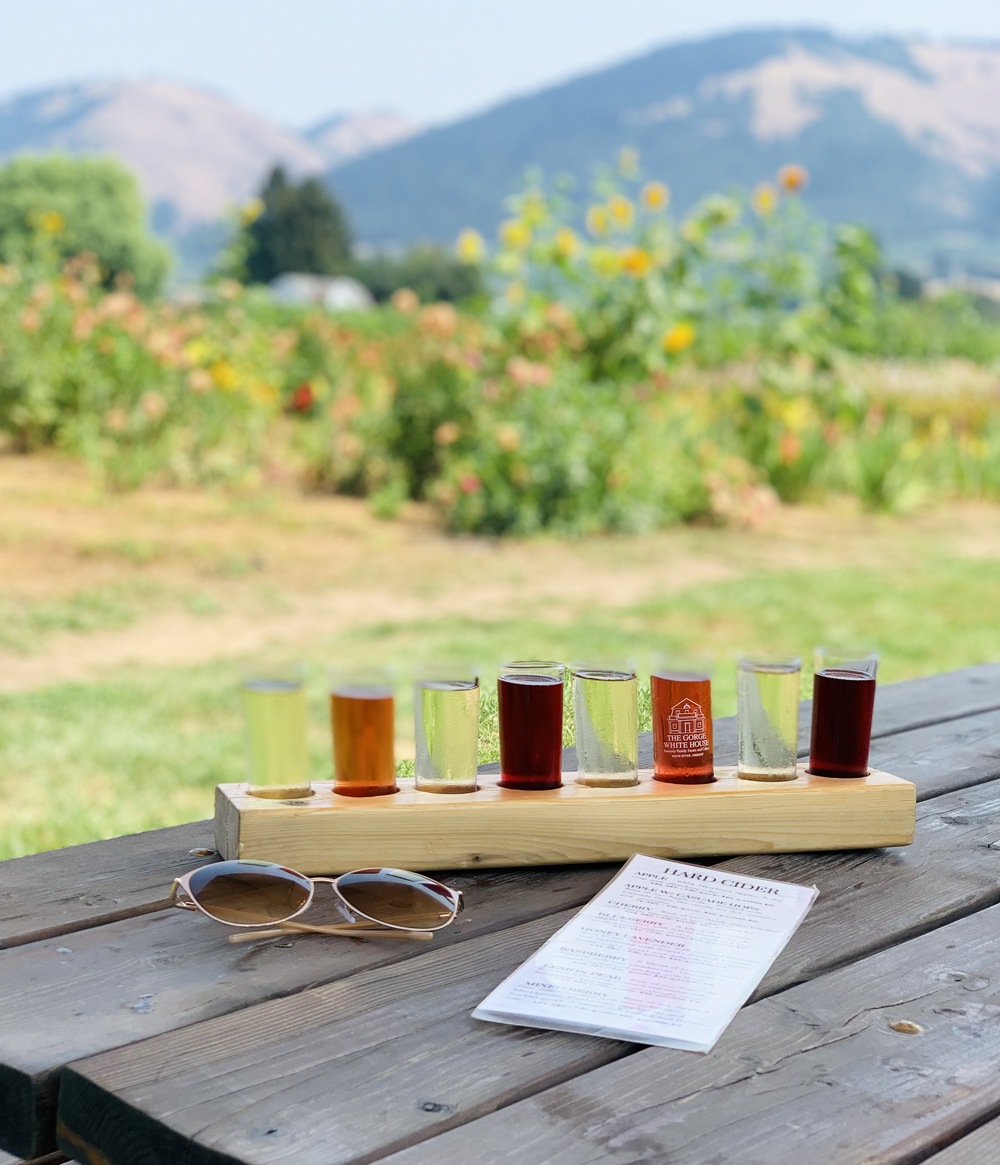
Another highlight was the Gorge White House, a stop recommended to my by my cousin. This farm had orchards and flowers and delicious hard cider, I highly recommend this place if you’re ever in Hood River!

I left Hood River and followed the Columbia River to the coast. What a beautiful drive!

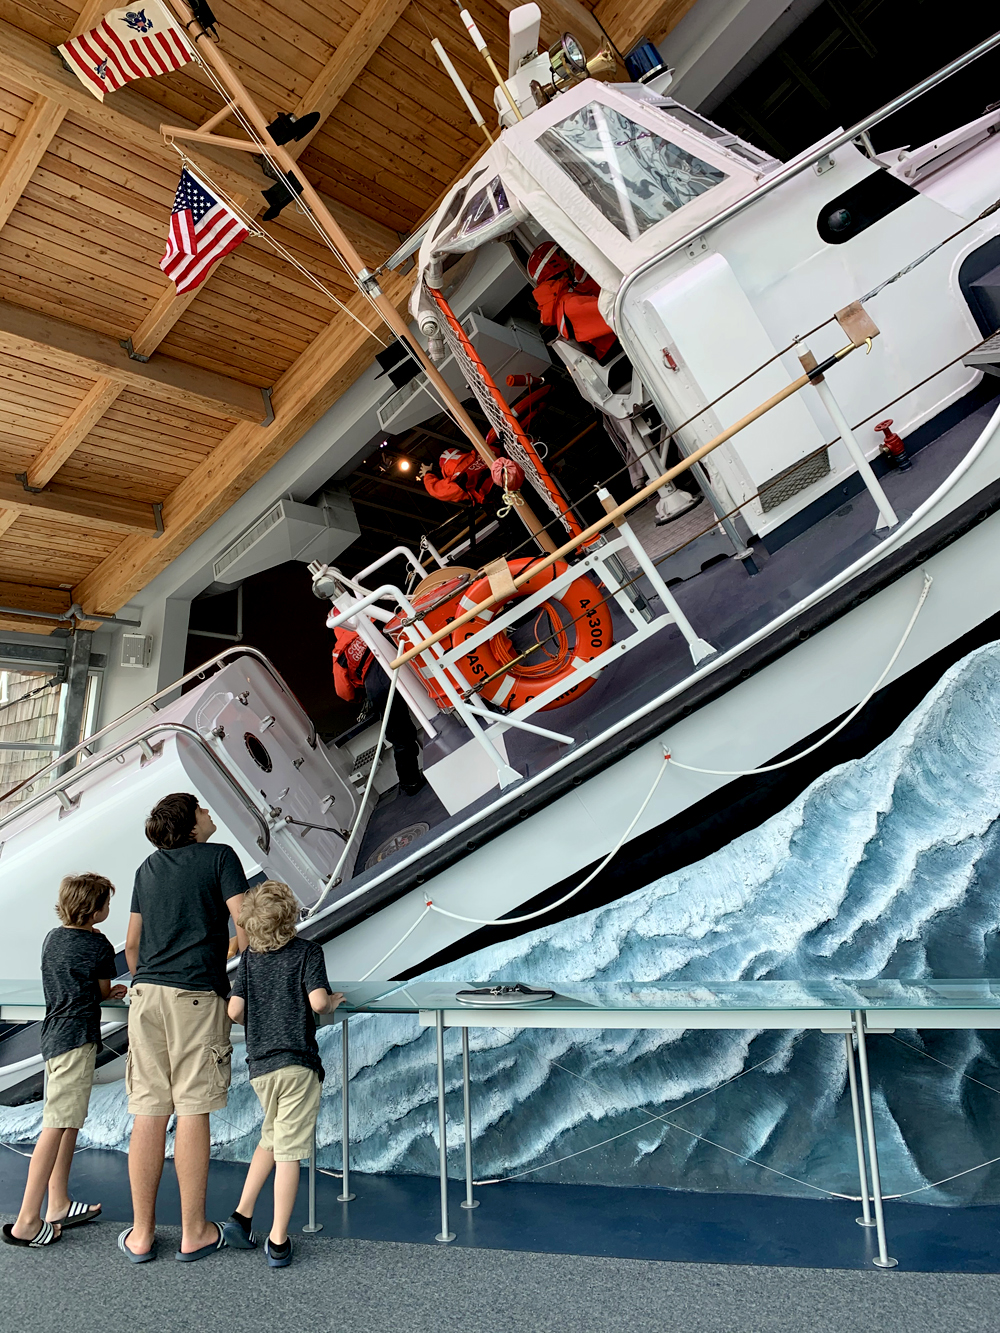
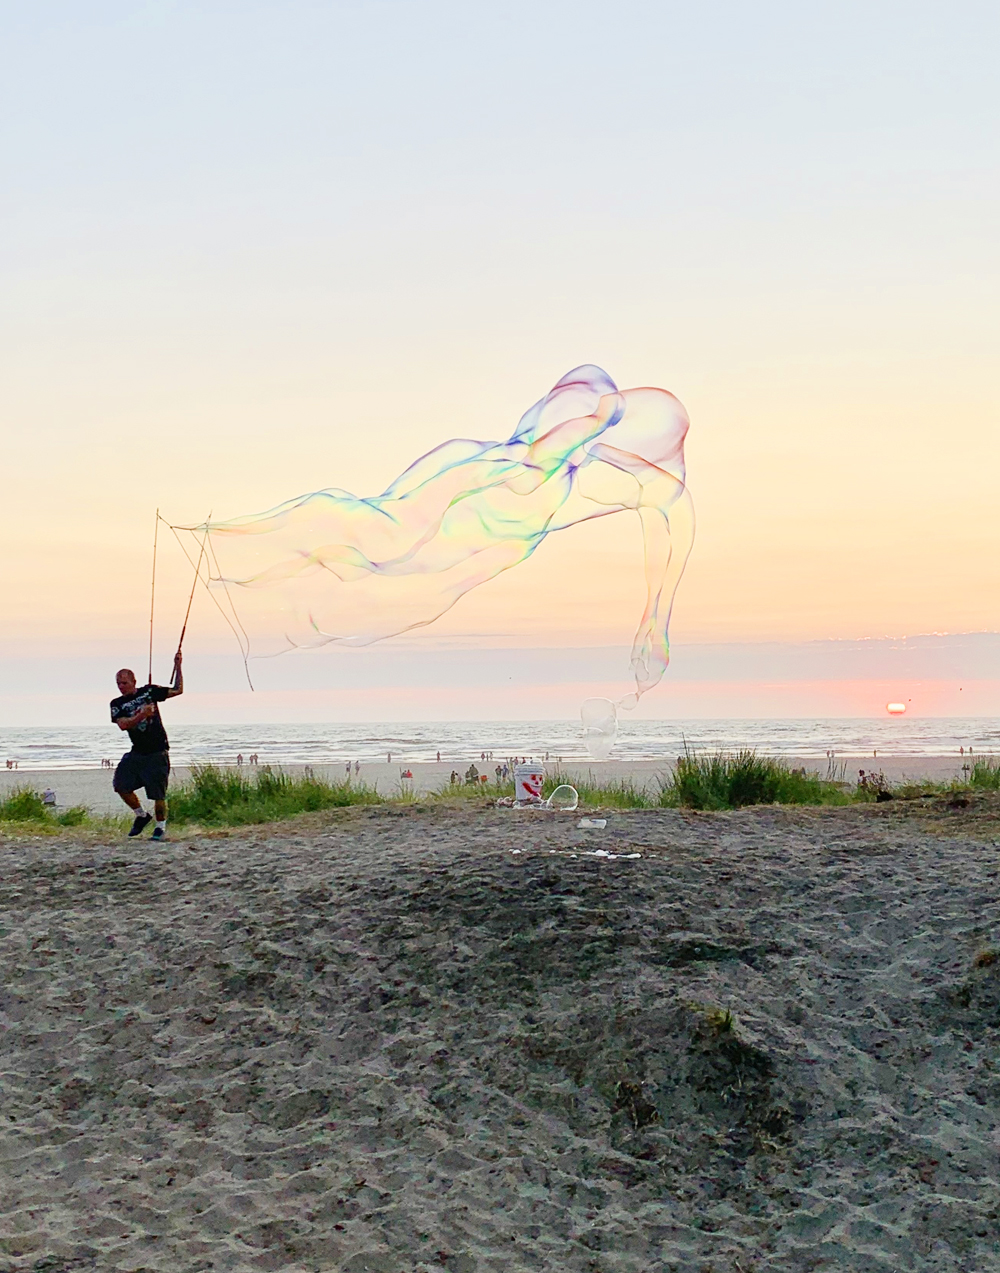
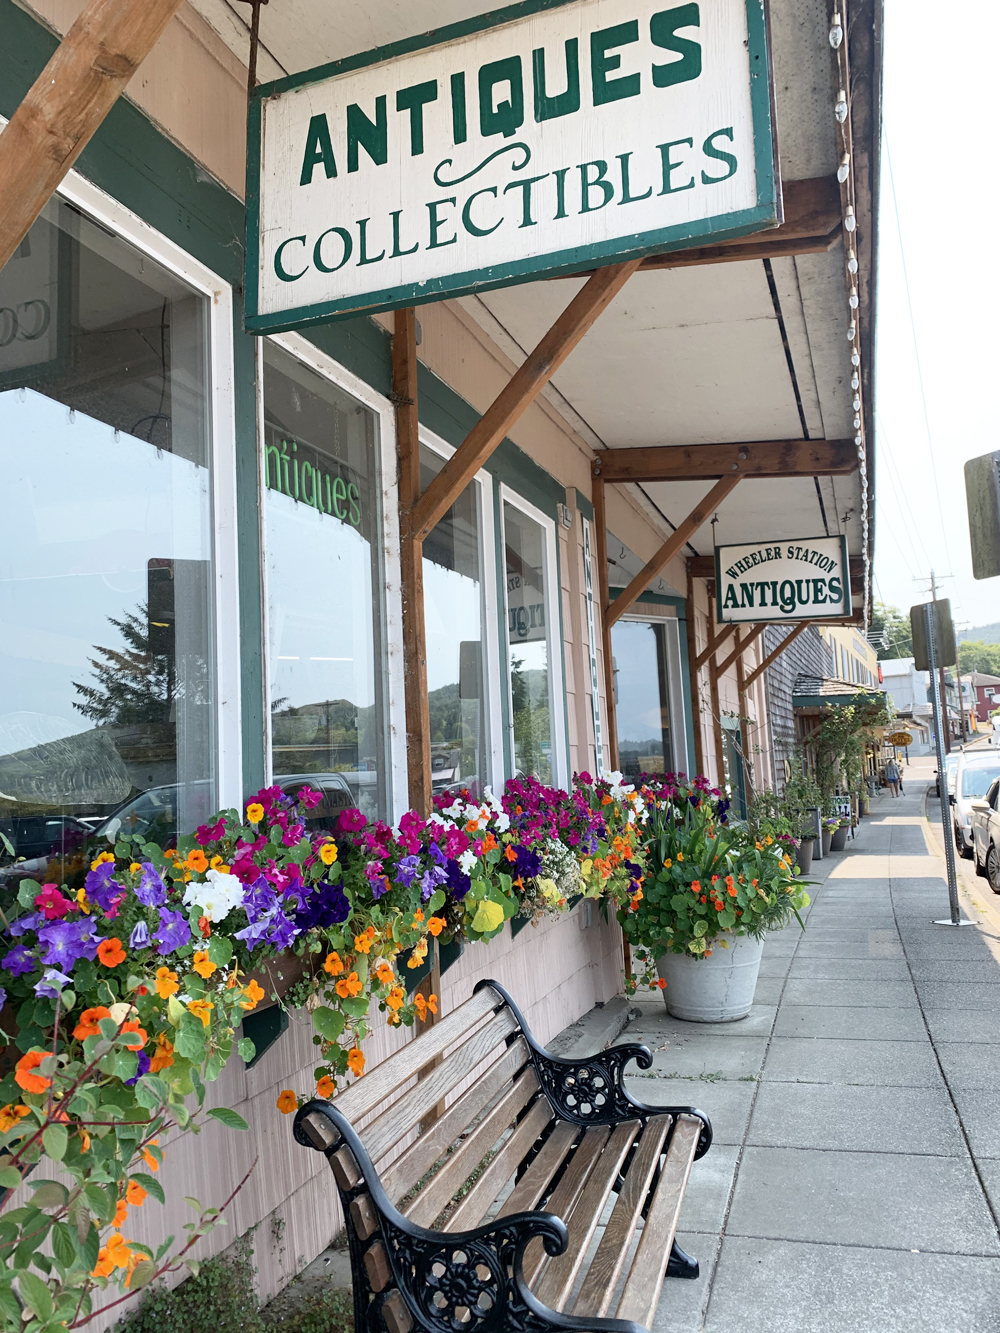
I took two days to drive the Oregon coast home, it was a long but another extremely scenic drive. I started in Astoria where the Columbia River meets the Pacific Ocean and turned south down Highway 101. Astoria has a really cool maritime museum and a really cute downtown where I stopped for an early dinner at a great brewpub.

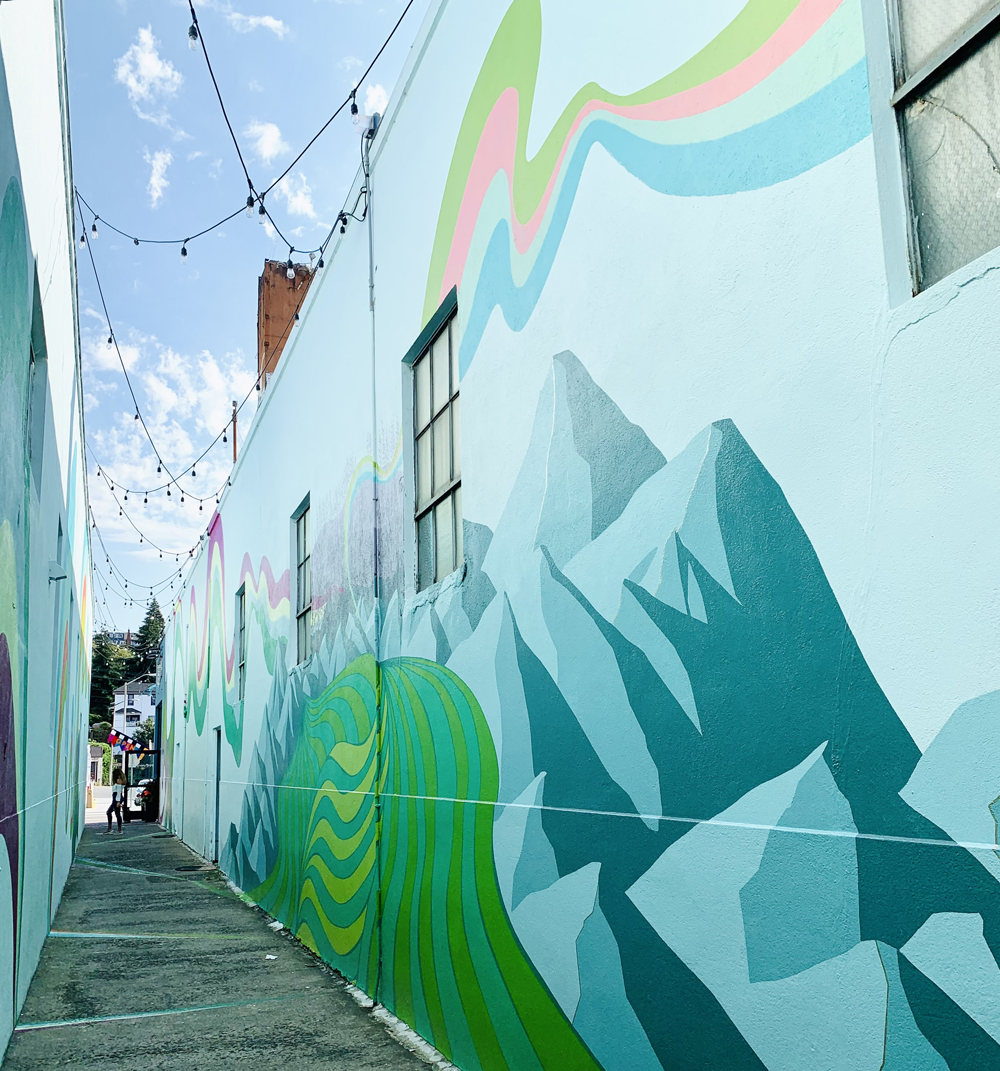
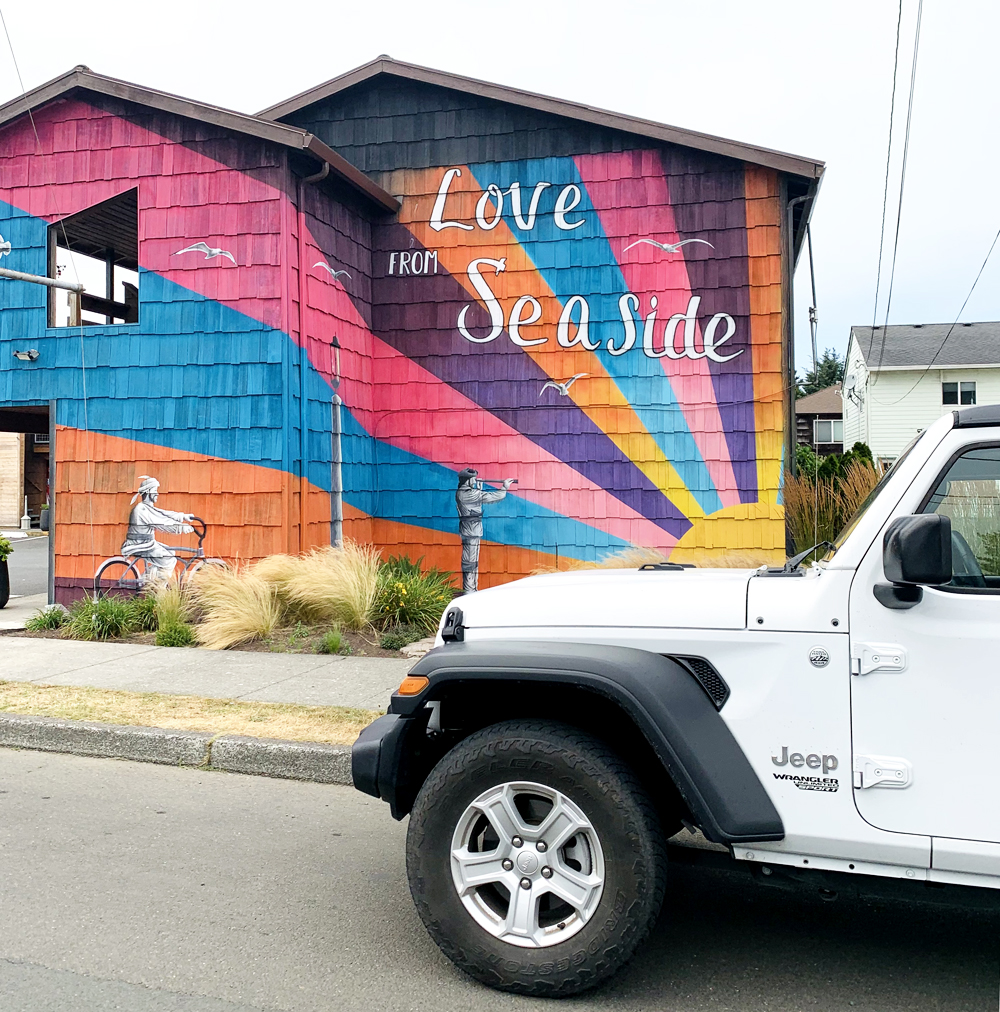
I stayed for a few hours then headed down a gently winding highway to stop in Seaside for dinner and to sleep for the night.

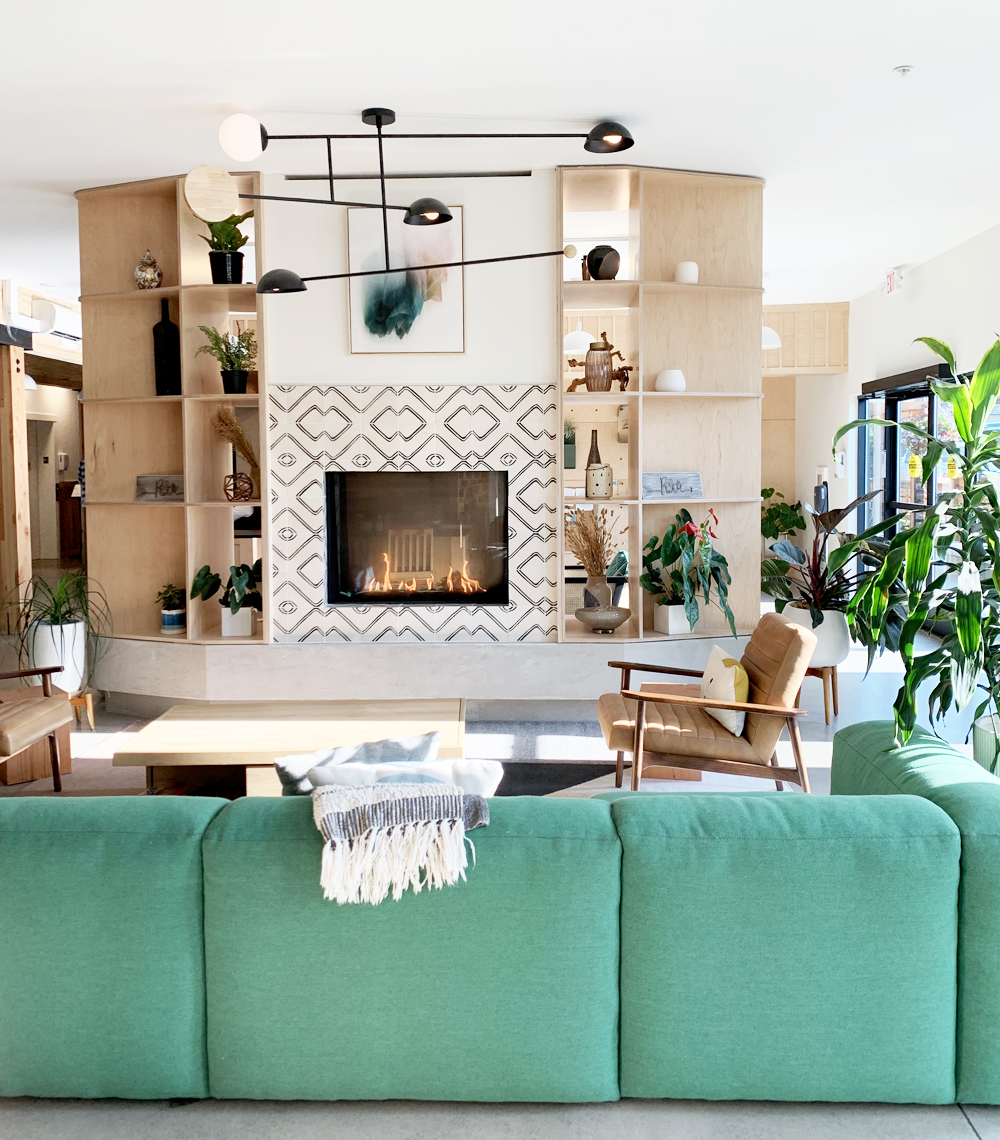
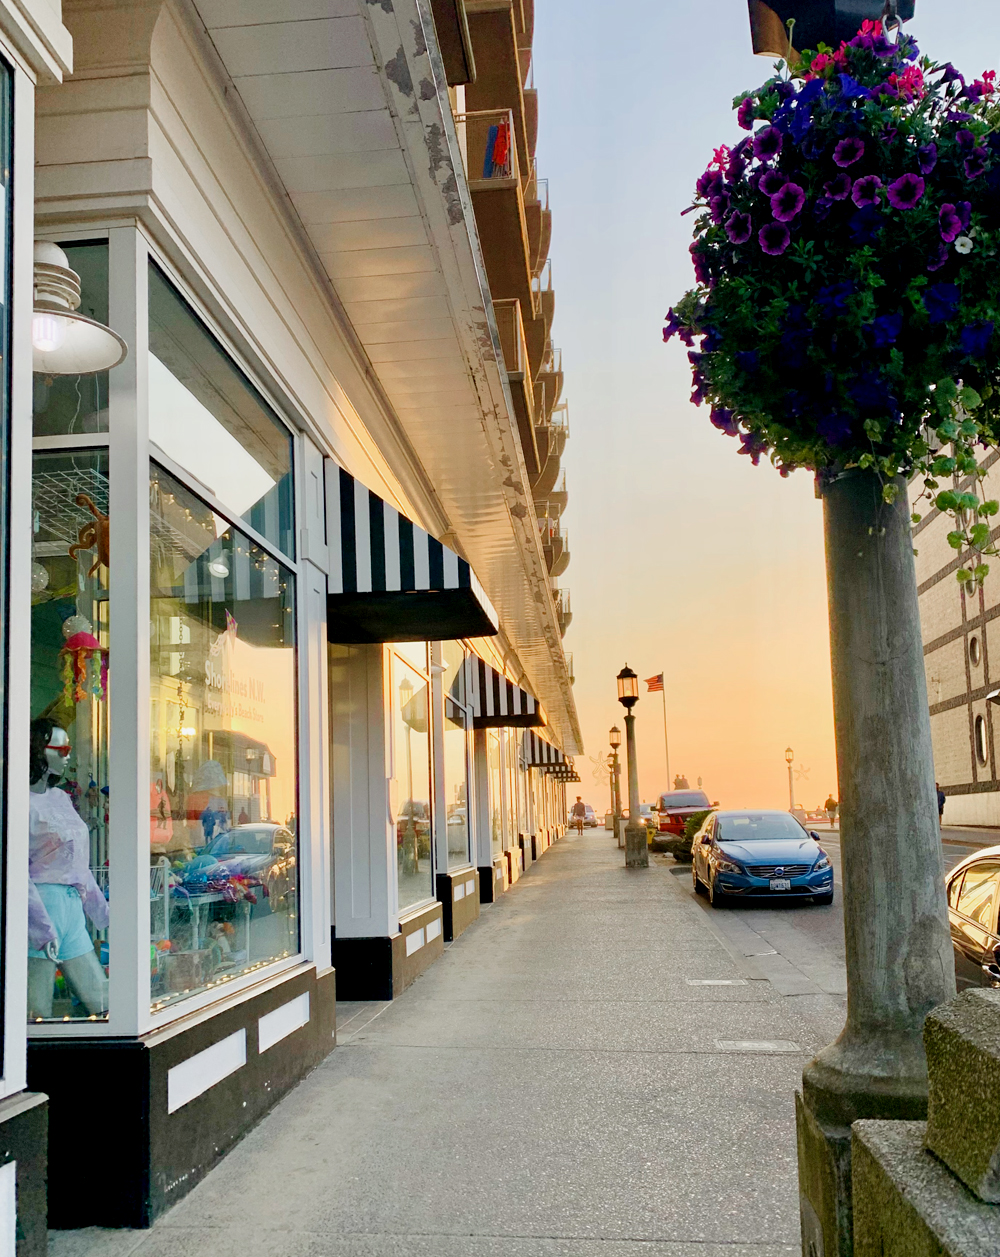
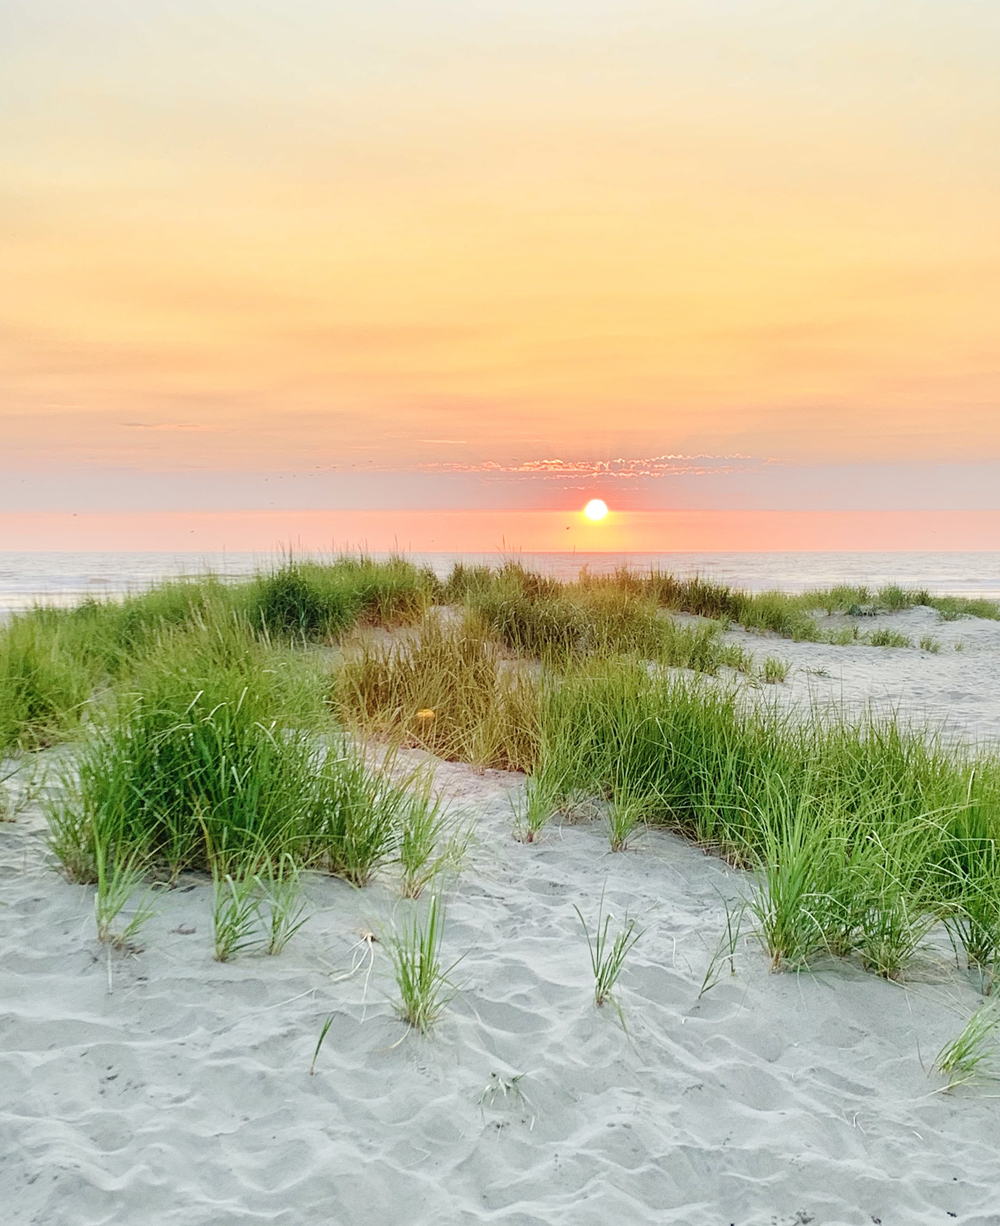
I could tell why Seaside was a vacation destination. It had a very cute downtown and beautiful beaches! I stayed at the chic Saltline Hotel for the night and was lucky to catch a beautiful sunset.

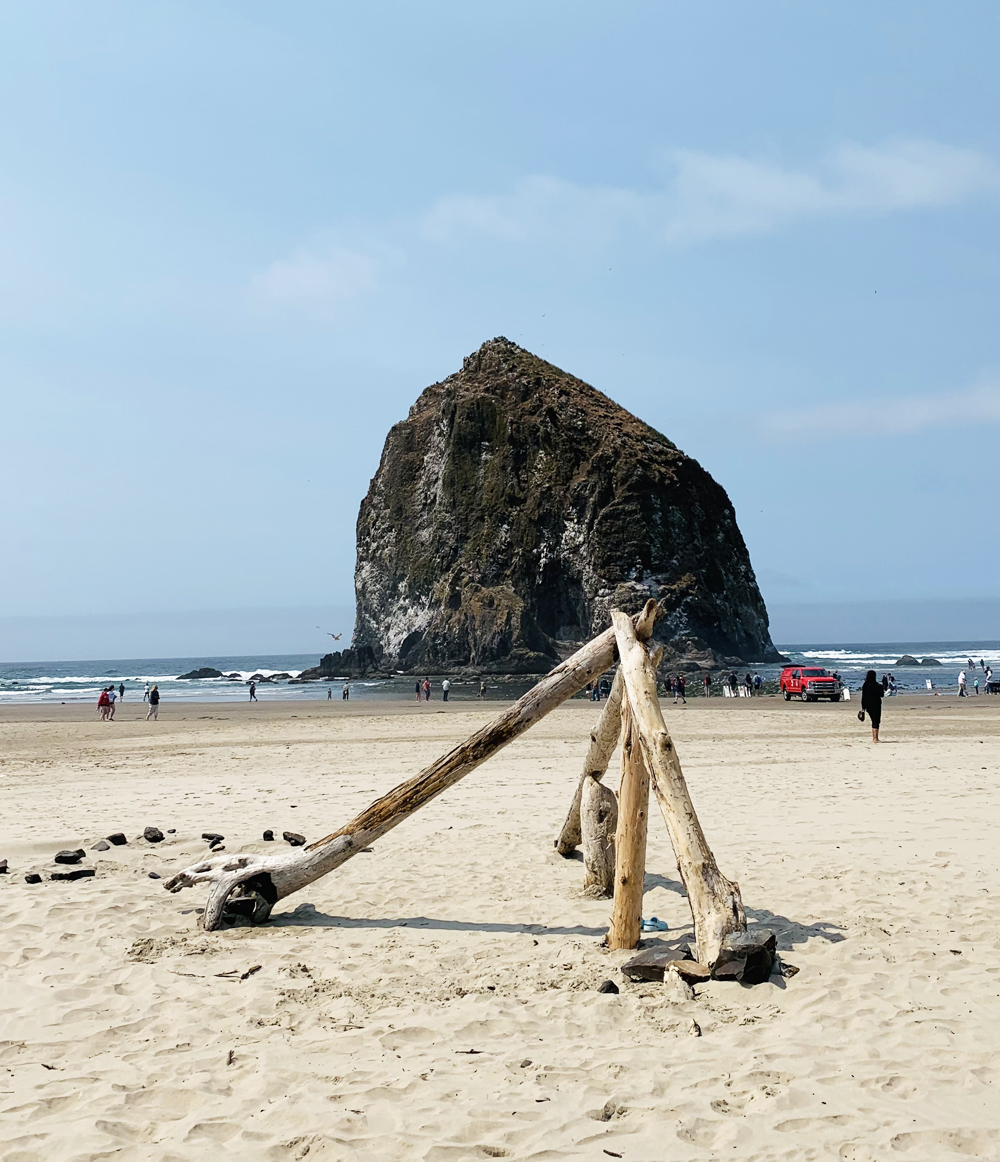
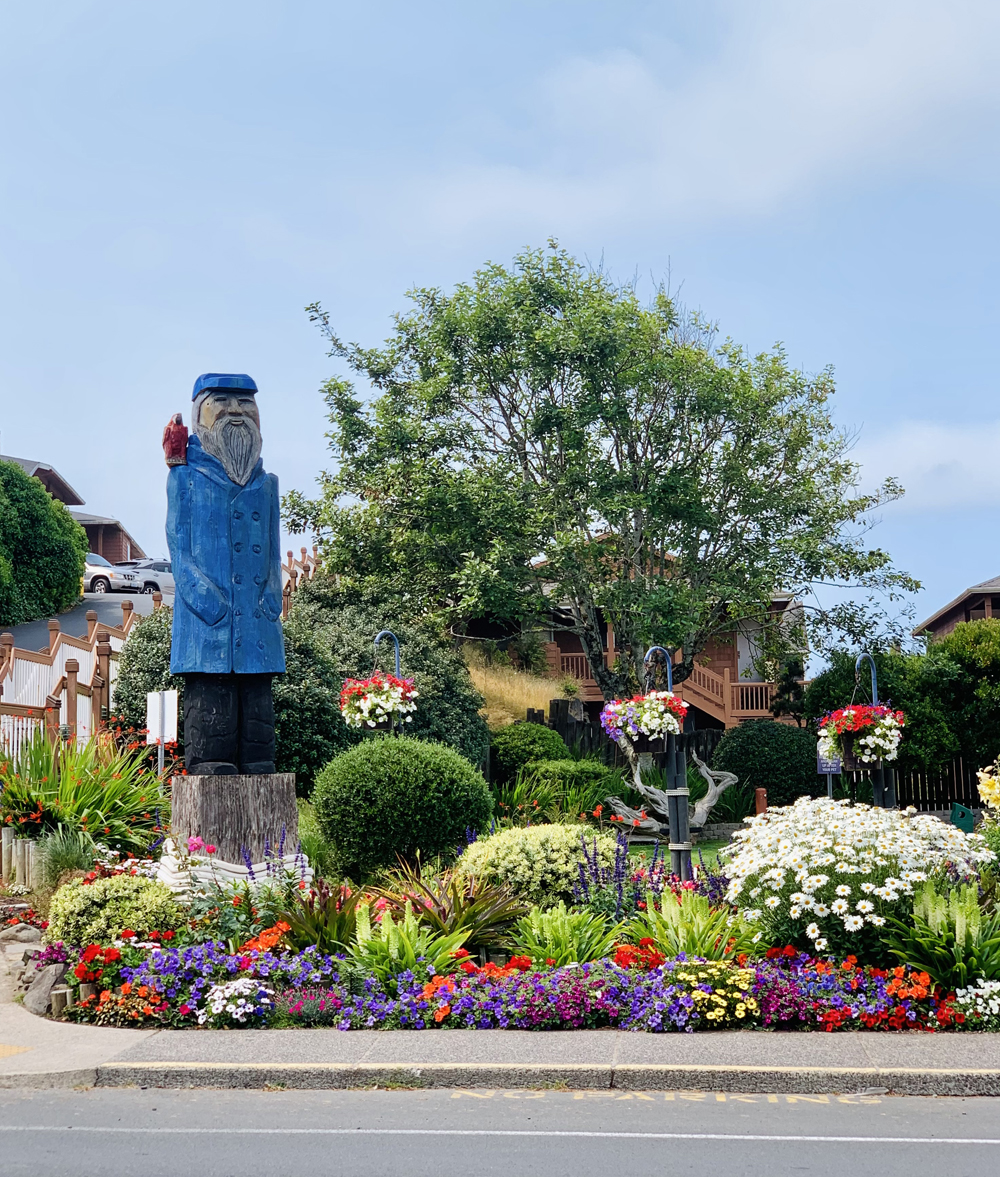
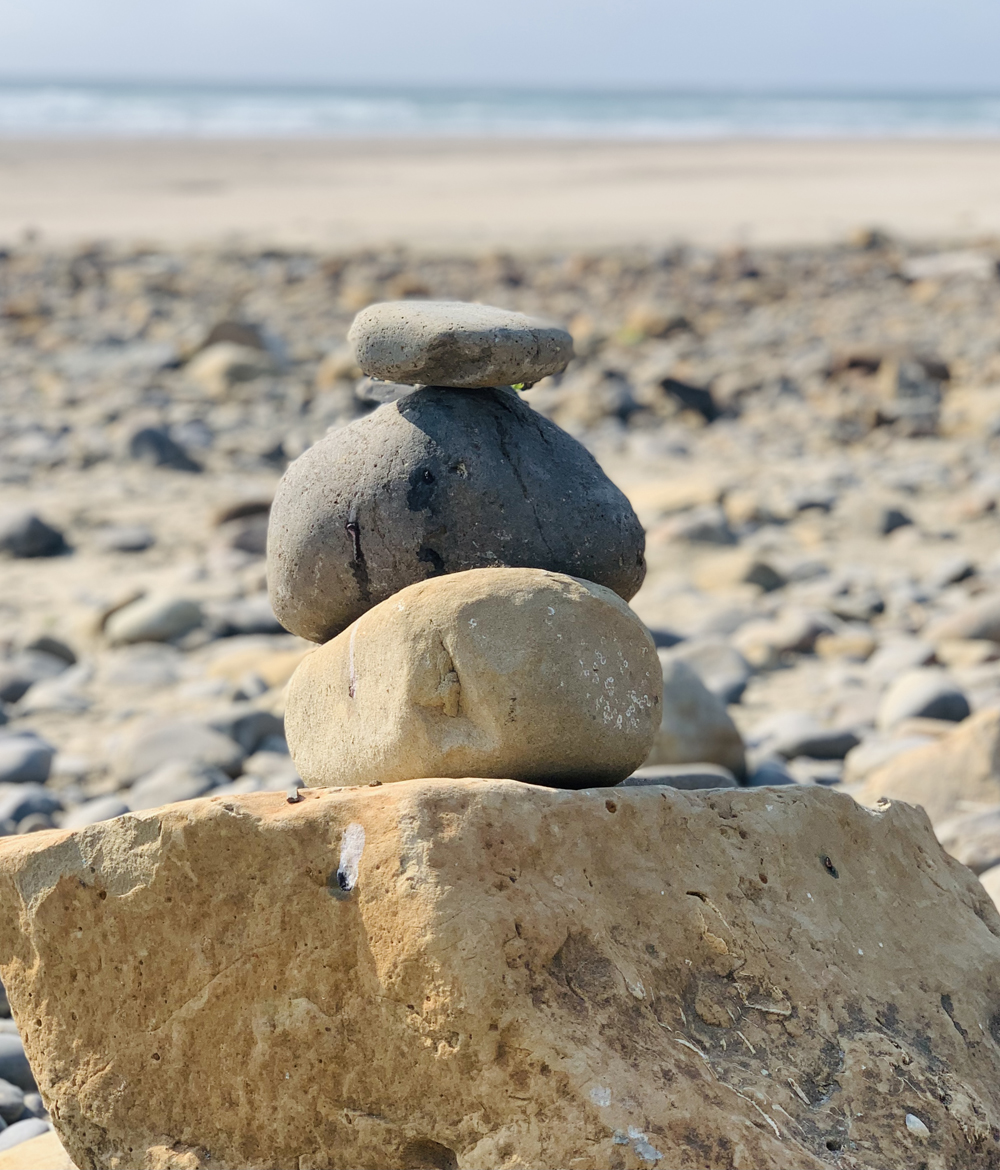
I stopped in Cannon Beach for a quick walk along the beach and to check out the famous rock. It was crowded with tourists and I could see why, Cannon Beach felt like it was straight out of a movie with its shops, manicured gardens, and seaside homes with stunning ocean views.

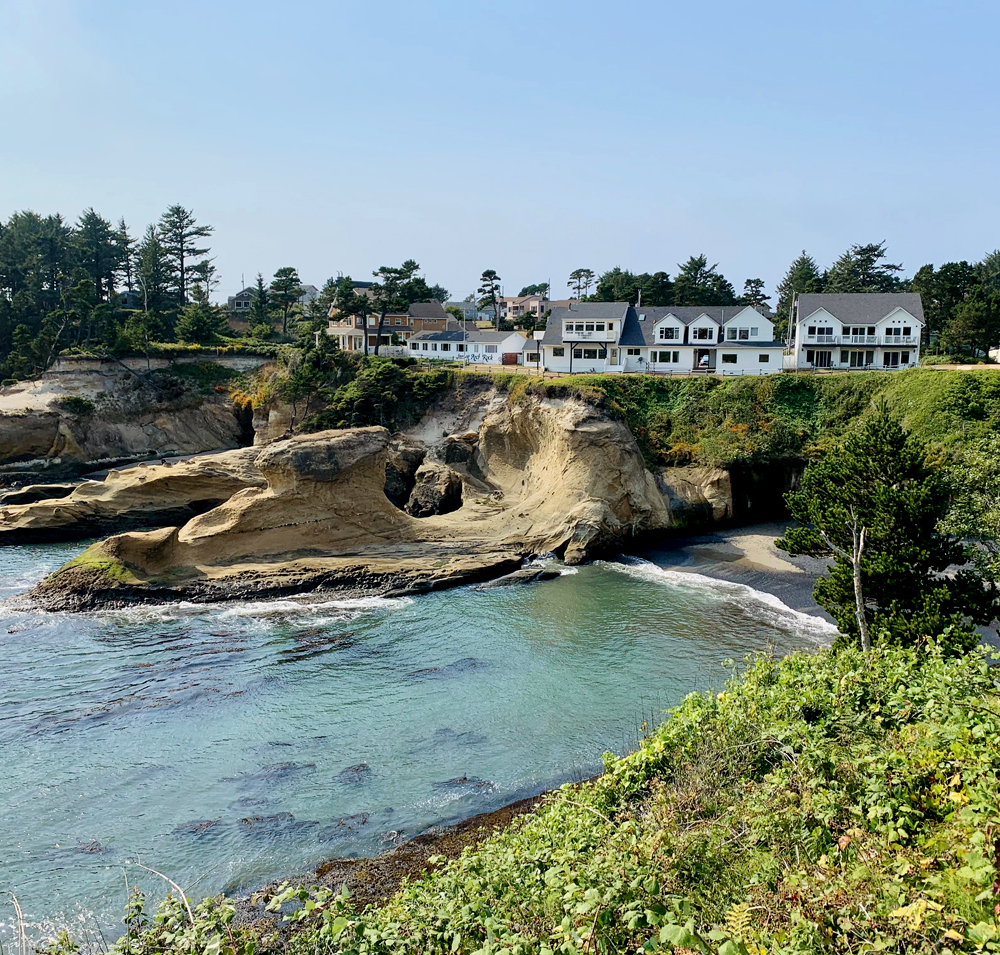
I stopped briefly in Depoe Bay to check out the views and grab some coffee. Wow what amazing vistas!

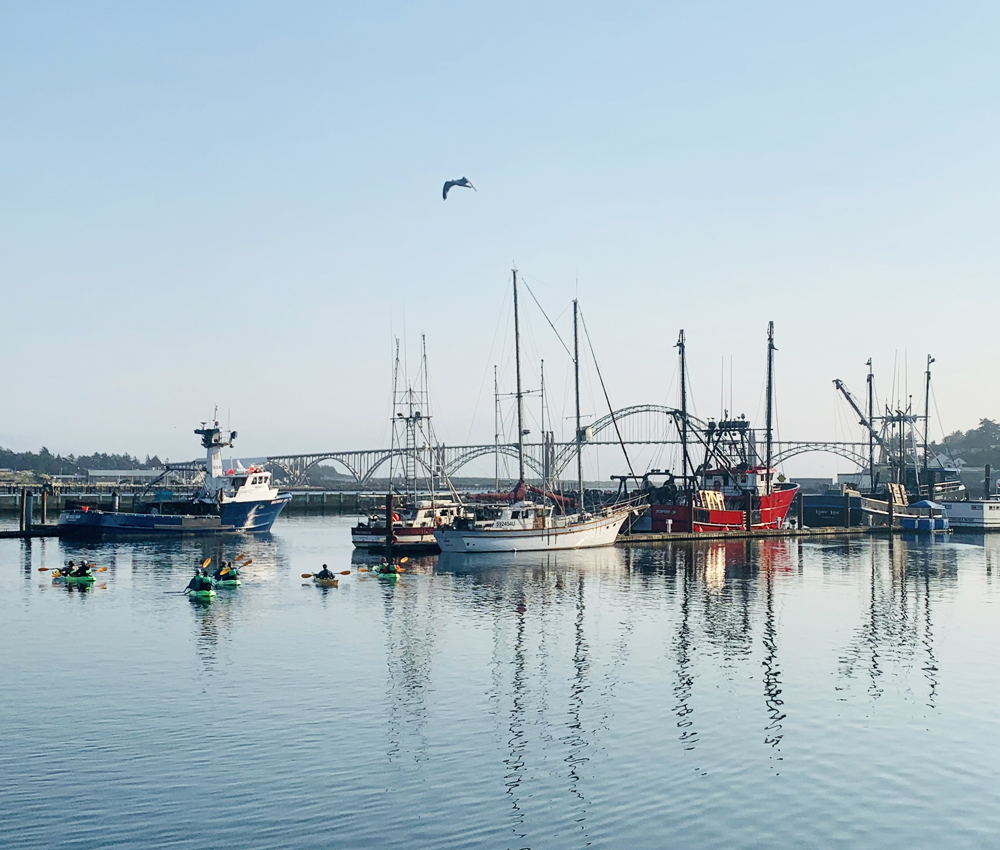
My final stop was Newport where I had dinner by the waterfront where all the locals enjoy amazing seafood.

My favorite coastal towns along Highway 101 were Seaside, Cannon Beach, Depoe Bay, and Newport! Thank you Oregon, my neighbor to the north, for showing off your scenery!

My  trip to Oregon had highs and lows. Travel isn’t always rainbows, but knowing that I still do it for the new experiences and vistas. Travel always teaches me something and I come back with stories to tell, like the motel where I was scammed! I made the mistake of not checking reviews and ended up at a total dump that used fake pictures to advertise and had no room available when I arrived. Thankfully I got my money back but that wasn’t a pleasant experience.


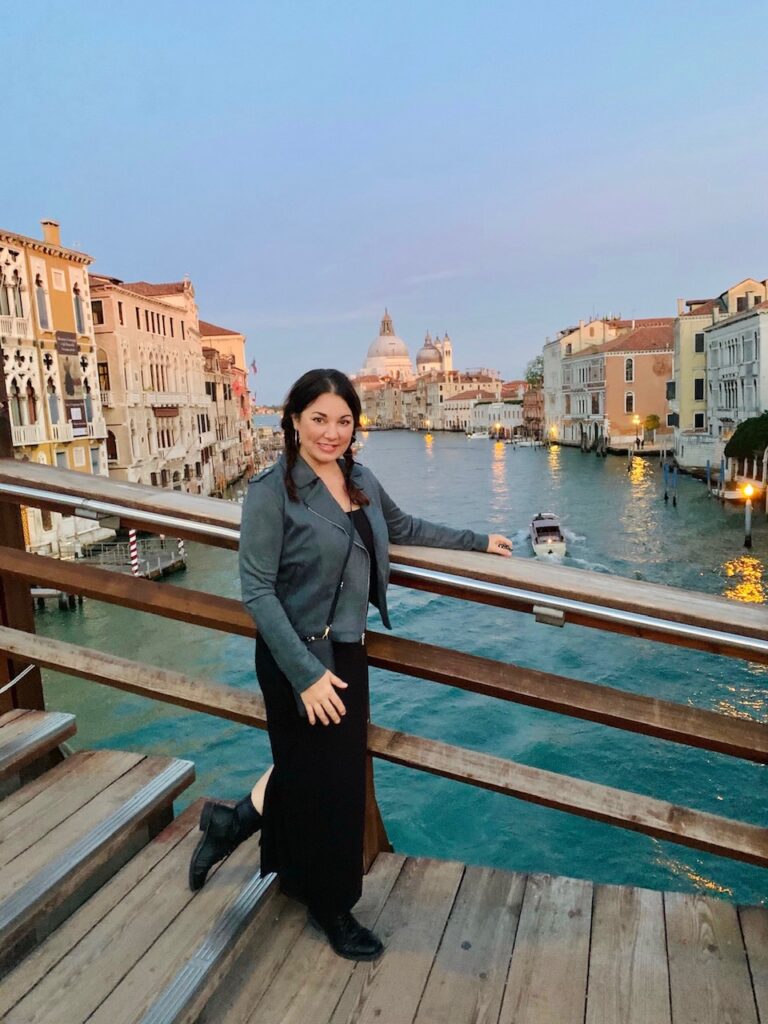
This road trip was a solo adventure. I’m lucky that Matt is the kind of person to say to me “go, explore, have fun!” while he handles the family obligations. When I travel solo I have a lot of freedom and solitude and I gain clarity being alone with my thoughts. I also have an opportunity to meet locals and strike up conversations with strangers I might not talk to if I was traveling with others.

Exploring new places makes me feel alive, and I always return from a solo trip as a relaxed, inspired, more evolved version of myself.

Did you miss our previous article…
https://distancebetweenplaces.com/?p=100